Sales orders are used to record customer orders in Jiwa. Once created, a sales order can drive downstream processes such as inventory allocation, picking, dispatch, and invoicing.
In this article we step through how to create a sales order, explain the key information entered during order entry, and show how to print or email the sales order once it has been created.
Check the warehouse before creating the order.
Before creating your new sales order make sure you are working with the correct warehouse as you will not be able to change the warehouse on the order itself.

Creating a Sales Order
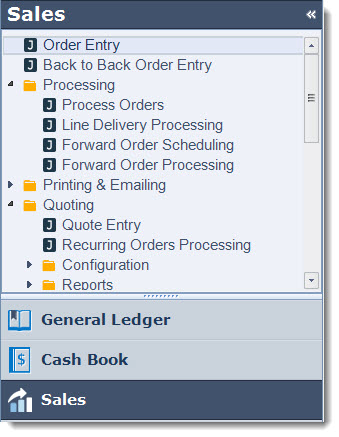
From the menu Select Sales | Order Entry
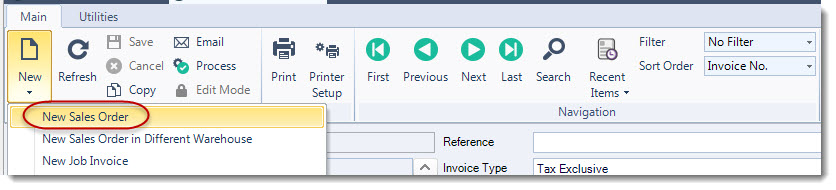
From the menu ribbon select New | New Sales Order
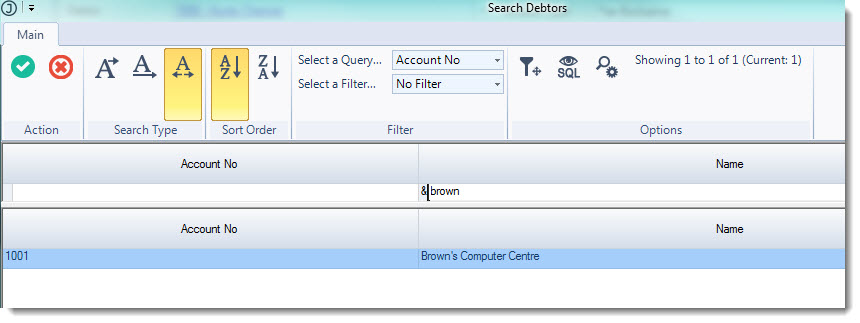
The Debtors search form will be activated, select your Debtor/Customer that the order is for.
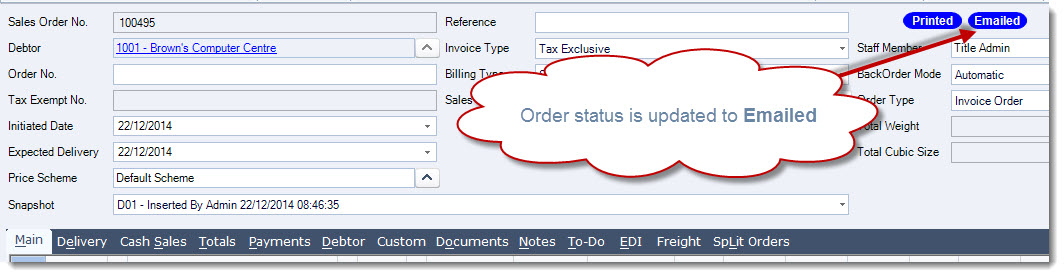
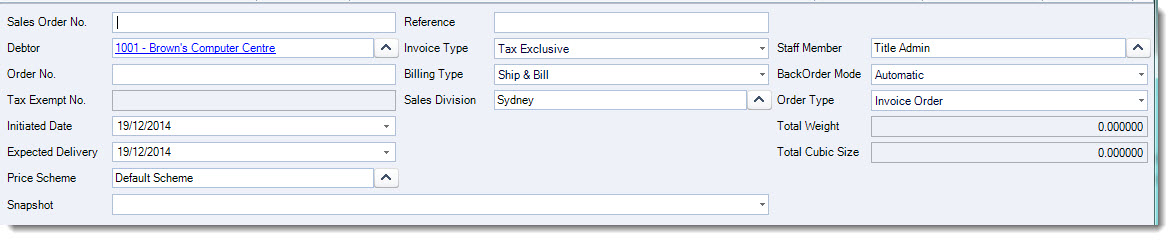
Sales Order Header
The Sales Order header provides you with key information about the order.
|
Field |
Description |
|
Sales Order No. |
The order number is automatically applied to the order when it is first saved |
|
Order No |
Customer order number |
|
Tax Exempt No. |
This field is only available if tax exemption in invoicing has been turned on. Please contact your Jiwa consultant for further information on this feature |
|
Initiated Date |
Defaults to the login date and represents the date the order was created |
|
Expected Delivery |
Defaults to the login date but can be overridden if required |
|
Price Scheme |
The customers default price scheme however can be changed if required. Any change is only applicable to the selected quote / sales order |
|
Reference |
Additional reference field |
|
Invoice Type |
Allows you to set the type of report to be printed eg. Tax Invoice GST Excl. or GST Incl. For further information or to discuss your requirements please contact your Jiwa consultant |
|
Billing Type |
Controls how goods are to be shipped and billed. The default billing type is set in System Configuration. Ship & Bill - Goods are delivered and invoiced when available Bill / Complete - Goods are delivered with each snapshot, but the invoice is not raised until the order is completed Ship / Complete - Goods are only delivered and invoiced when the order can be fulfilled in full |
|
Sales Division |
This field is only displayed if branch invoicing has been enabled |
|
Staff Member |
Individual linked to the sale. System Configuration setting controls if this is the logged in user or the default user attached to the Debtor record. |
|
BackOrder Mode |
Controls how back-orders are filled for the order. The default back-order mode is set in System Configuration. Automatic - Order is filled by the function Process Back Orders Manual - Order is filled by manually creating a new snapshot |
|
Order Type |
Default order type is set in System Configuration. Available order types are Reserve, Invoice, Foward and Active. Contact your Jiwa consultant to discuss your specific requirements. |
|
Total Weight / Cubic Size |
Total weight and cubic size of the lines on the order and is based on the weight and cubic size against the inventory item. |
Order Tabs

|
Field |
Description |
|
Main |
Inventory and non inventory items, comments and freight are added to the order on the Main tab |
|
Delivery |
Customer delivery address, notes, courier and freight forwarder details default from the Debtor master record to this tab. The delivery and freight forwarder addresses can be changed if required by either manually overriding the address or clicking on the lookup icon to select an alternative address. |
|
Cash Sales |
This tab allows you to record customer details for quotes/sales that are recorded against a generic debtor account for example Cash Sales or Trade Counter Sales |
|
Totals |
This tab maintains a record of the changes to the sales order. It is updated when the order is saved and when a snapshot of order is saved or edited. The order total displayed is GST Inclusive. |
|
Payments |
Payments can be made against each unprocessed snap shot on the sales order in this tab |
|
Debtor |
Displays customer details including postal address, credit limit and current balance |
|
Custom |
All custom fields relating to sales orders are held in this tab. If you need to capture additional information on sales orders please discuss your requirements with your Jiwa consultant. |
|
Documents |
Documents and emails specific to the order can be added to this grid by either attaching the document or using the Windows drag and drop function to add documents to this tab. These documents are stored in the Jiwa database. Documents can be extracted, opened or emailed from this tab. |
|
Notes |
Notes specific to the order are added on this tab |
|
To Do |
Action items specific to the order are added on this tab |
|
EDI |
This tab contains EDI relevant information that can be manually updated or updated using a plugin or 3rd party application |
|
Freight |
Freight and courier details including consignment notes are captured and are maintained in this Tab |
|
Split Orders |
This tab displays all items that have been moved to a new sales order when the Move Backorders to a New Order option is used. |
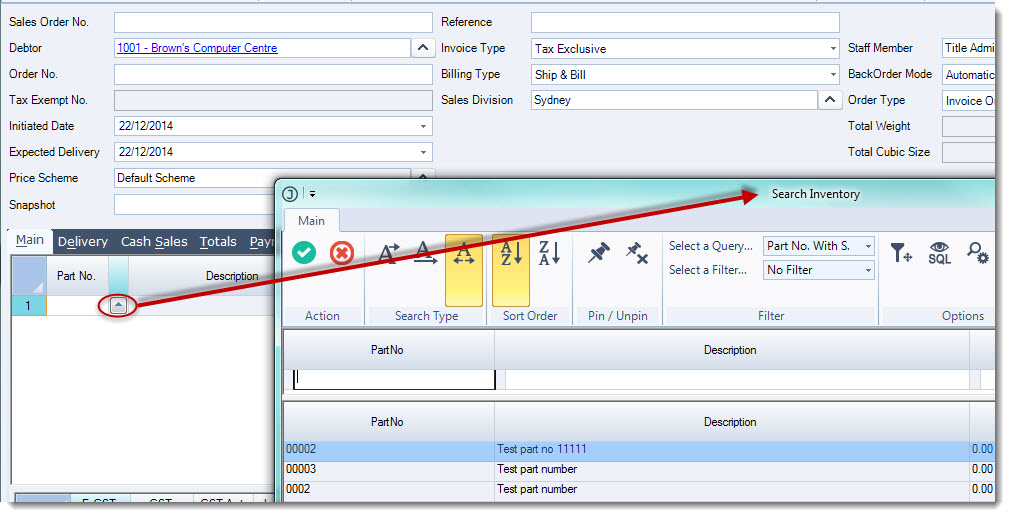
Main Tab
Enter in the parts to be ordered in the Main tab by either keying in the part number in the Part No field or selecting the lookup icon next to the field to bring up your Inventory Search form.
Using the Inventory search form select the items to be added to the sales order.
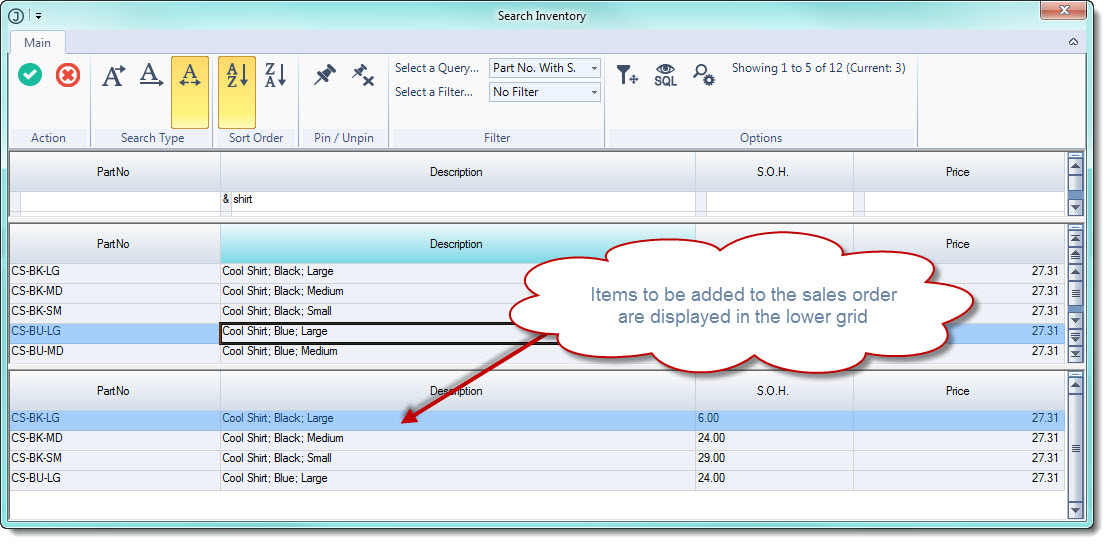
Click on the Select & Close icon from the menu ribbon to return to the Sales Order Entry form.
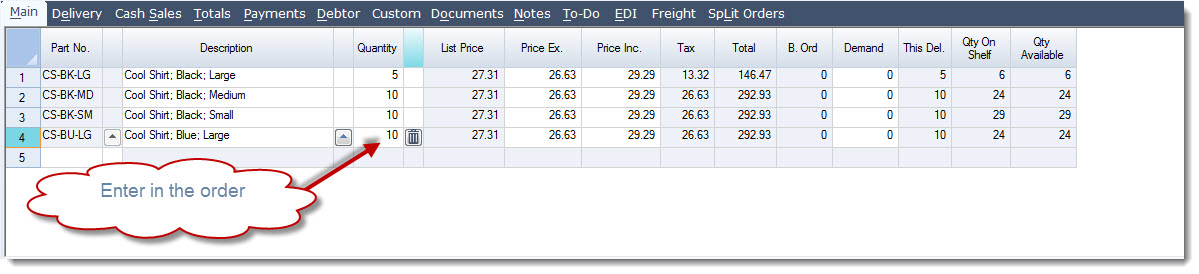
Enter in the order quantities in the Quantity field, the price applied to the order is based on the price scheme and any pricing discounts that the Debtor may be linked to.
Prices can be edited and any further discounts applied if required, however this will be dependant upon your system and security settings.
Freight & Sales Order Totals
Add freight or courier charges to the sales order if applicable in the freight grid.

Confirm the sales order total

Completing your Sales Order
Once you have completed your sales order press Save from the menu ribbon, at this point the sales order number will be applied.
To print your sales order from the menu ribbon select Print this will activate the Sales Order Print Report popup
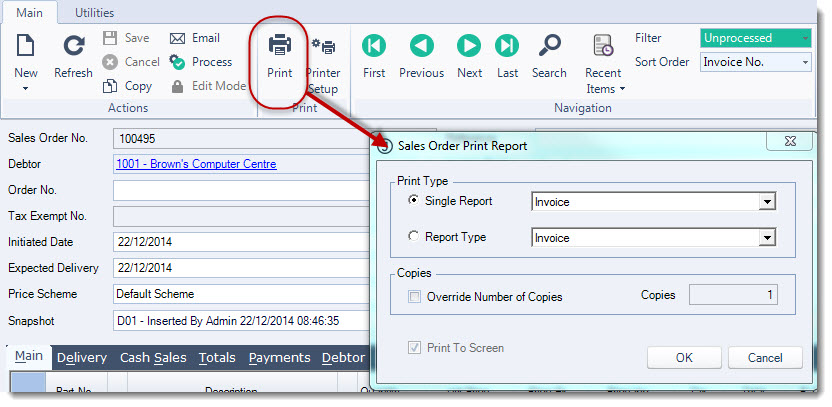
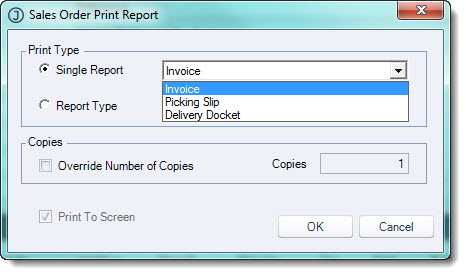
Select the report/(s) that you want to print by either selecting a single report from the Single Report options or a group of reports by selecting the type of reports from the Report Type options.
Once the sales order has been printed the order status will be updated with Printed.

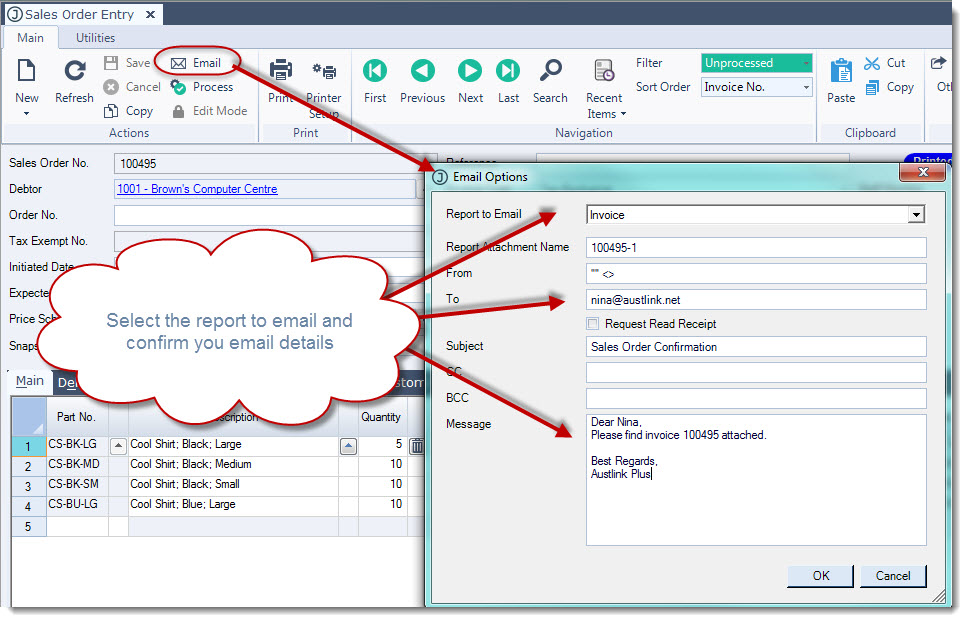
To email your sales order select Email from the menu ribbon, this will activate the Email Options pop-up where you can
-
Select the report to be emailed
-
Confirm the email address, and
-
Amend the message if required
Once you have emailed your sales order you will notice that the order status will be updated with Emailed.