This is the first in a series of articles that look at the Job Costing module in Jiwa 7.
In this article we look at the key tabs that should be completed when creating a new job.
Overview
The Job Costing module is ideal for businesses that are project oriented and need to manage the life cycle of a job or project from the quoting and budgeting phase right through to profitability reporting.
Choosing between the Job Costing and Service Manager modules will be dependent upon what information needs to be captured against a job and how that job will be managed and invoiced out to the customer.
Let's first have a look at the key differences between Job Costing and Service Manager
|
Function |
Job Costing |
Service Manager |
|
Add non inventory costs to job |
✓ |
Only physical and non-physical inventory items can be added |
|
Billed at inventory value |
|
✓ |
|
Email from Job |
|
✓ |
|
Flexible billing options |
|
✓ |
|
Job Actual v Budget reporting |
✓ |
|
|
Manage prepaid hours (Labour packs) |
|
✓ |
|
Managed through cost centre / stages |
✓ |
|
|
Managed through tasks |
|
✓ |
|
Produce finished goods |
✓ |
|
|
Progress billing |
✓ |
|
|
Purchase order generation |
✓ |
|
|
Work in Progress Reporting |
✓ |
Stock is moved to Service warehouse rather than WIP |
So when is Job Costing a better fit to Service Manager?
Job Costing is best suited for businesses that;
-
Capture all cost types against jobs not just materials and/or labour,
-
Manage jobs through cost centres and stages,
-
Require reporting against quotes and budgets,
-
Need to produce finished goods,
-
Need work in progress reporting
Creating a Job
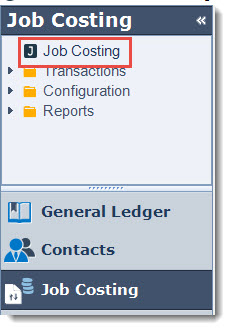
From your menu select Job Costing | Jobs
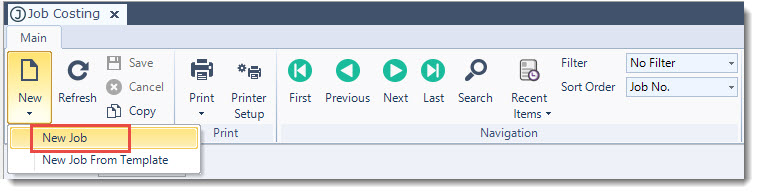
From the menu ribbon select New | New Job
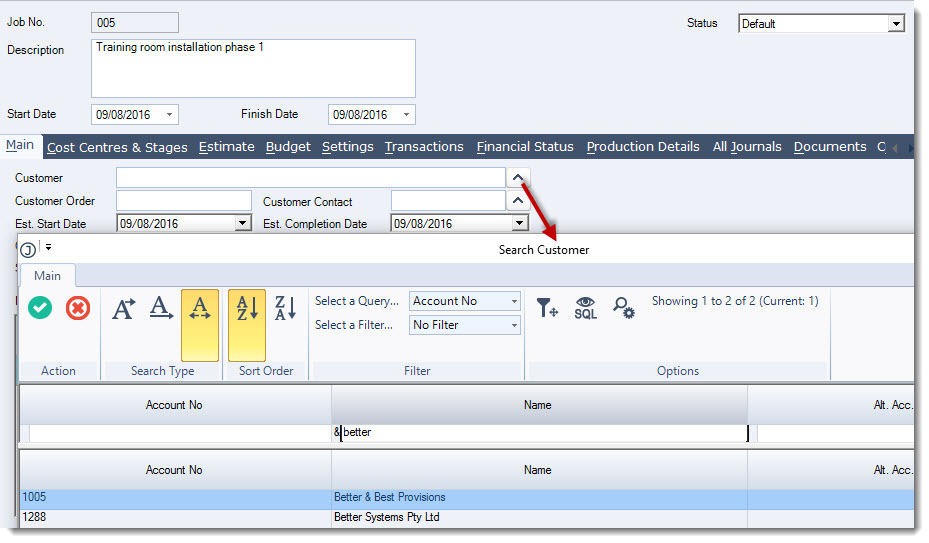
In the Description field give your new job a meaningful description.

|
Field |
Description |
|
Job No |
The job number field will be populated automatically with the next available job number when the job is first saved |
|
Description |
Job/project description. This description will appear on your job costing reports |
|
Start Date |
This is the date that work has commenced on the job. Defaults to the current login date. |
|
Finish Date |
This is the date that the job was completed. Defaults to the current login date. |
|
Status |
The status controls when costs can be allocated to a job and invoices raised. Default - The job is active allowing users to add costs to the job and create invoices Inactive - This indicates that the job is either on hold or may not be started as yet. Whilst a job has this status costs cannot be added to the job nor can invoices be raised Closed - The job has now been completed. When a job is closed costs cannot be added to the job nor can invoices be raised. Jobs can be re-opened as required simply by updating the job status from Closed to Default |
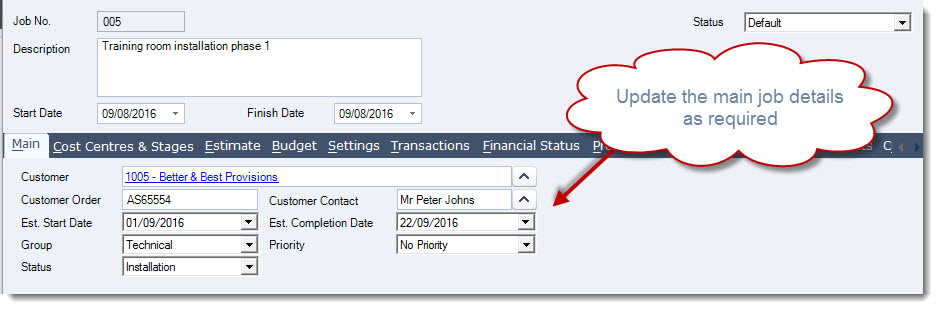
Main Tab
Add your customer to the job by clicking on the lookup icon next to the Customer field to bring up your Customer Search form
If applicable enter in your customer order number in the Customer Order field and add a Customer Contact
Update the remaining fields as required
|
Field |
Description |
|
Customer |
This is the customer that all invoices will be sent out to |
|
Customer Order |
Enter in the customer order number if applicable |
|
Customer Contact |
This is the main customer contact for the job. Contacts are selected from the available contacts that have been setup against the customer account. |
|
Est. Start Date |
This is the estimated job start date. Defaults to the current login date. |
|
Est. Completion Date |
This is the estimated job completion date. Defaults to the current login date. |
|
Group |
Groups are user defined and are setup through the Job Costing - Groups Configuration form. Groups allow you to group like jobs together for reporting purposes. Staff and Resources are also linked to groups. |
|
Priority |
Priorities are user defined and are setup through the Job Costing - Priorities Configuration form. Jobs can also be reported on based on their priority. |
|
Status |
This status is different to the status on the job header and is user defined through the Job Costing - Status Confirmation form. Jobs can also be reported on using this status. |
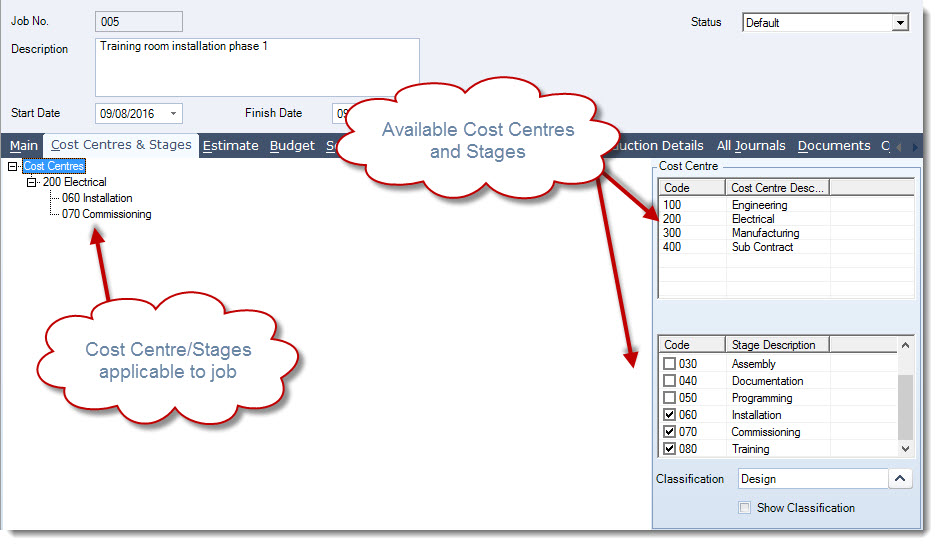
Cost Centres & Stages
All Job Costing activities are linked to a Cost Centre and Stage this means that you cannot add costs, time or invoice a job unless at least 1 cost centre and stage has been added to the job.
Cost centres and stages cannot be added on the fly in other words whilst you are in the process of adding costs to a job. For this reason it is important when creating new jobs that the required cost centres and stages are added. Additional cost centres and stages can be added to a job as required later.
The Cost Centre & Stages tab is divided into 3 sections The left panel displays the cost centres and stages that are applicable to the job and the right section displays the available (active) cost centres and stages.
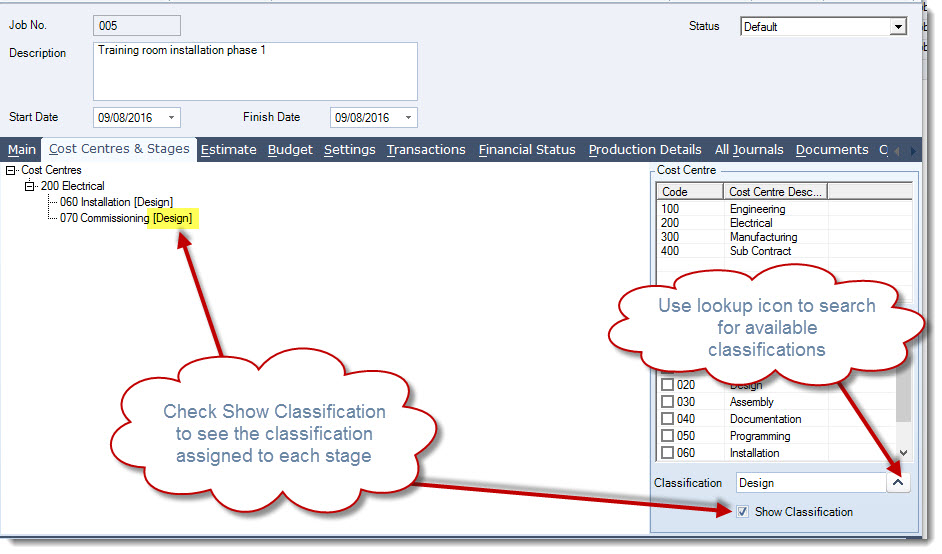
Job Classifications
Before we start adding cost centres and stages to our job we want to make sure that the correct Classification is linked to each of our stages.
Classifications in Job Costing hold all the General Ledger control accounts that are used by the module to post to the General Ledger. Whether you have one classification or many will be dependant upon your business requirements and these would have been created during the implementation of your Job Costing module.
Please contact your Jiwa Consultant if you have further questions regarding Job Costing Classifications.
Classifications should be selected before stages are added to the job, this can be done by clicking on the lookup icon next to the Classification field to bring up your Search Job Classifications form.
The Show Classification check box when ticked displays the classification linked to each stage.
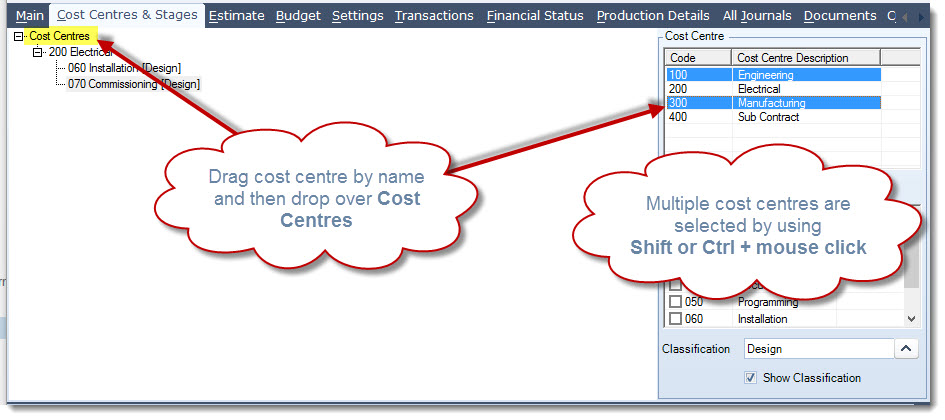
Adding Cost Centres & Stages to Job
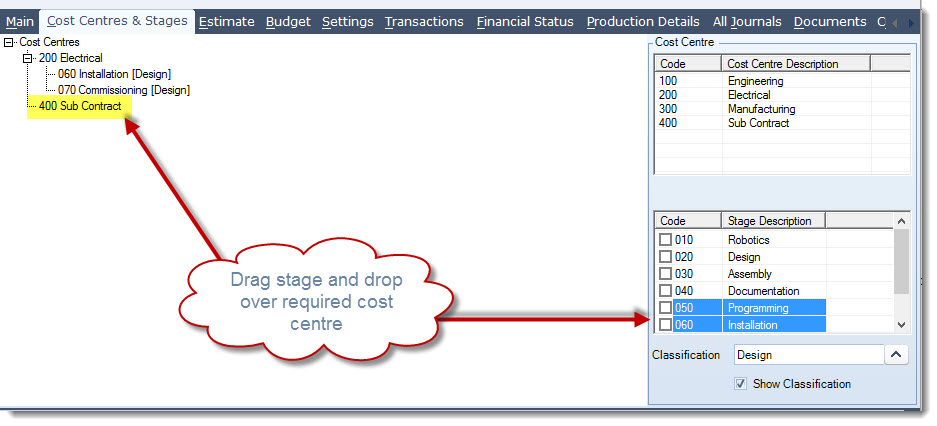
Begin by adding a cost centre to your job. This is done by selecting the cost centre by name and then dragging and dropping the required cost centre onto the left panel over the Cost Centres label.
Multiple cost centres can be selected by using the Shift or Ctrl + mouse click on the required cost centres
Use the same method to add your stages except that with stages you need to drop them over the required cost centre
Multiple stages can be selected by using the Shift or Ctrl + mouse click on the required stages
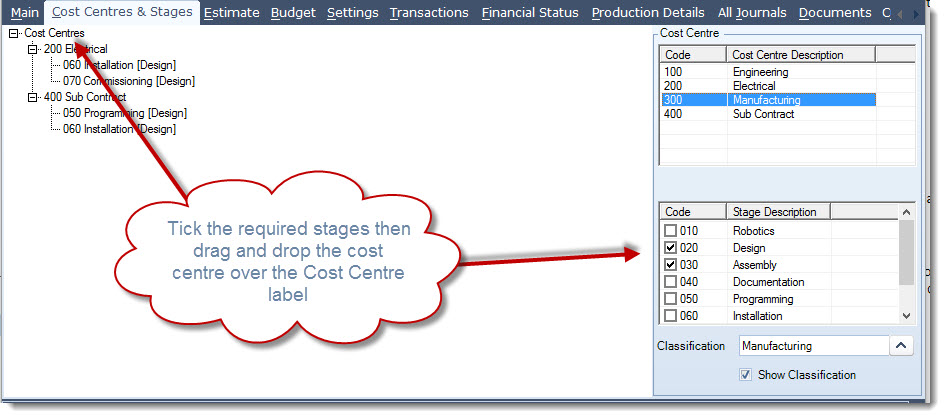
Alternatively, both the cost centre and stages can be added at the same time by ticking the required stages, then dragging and dropping the cost centre onto the left panel.
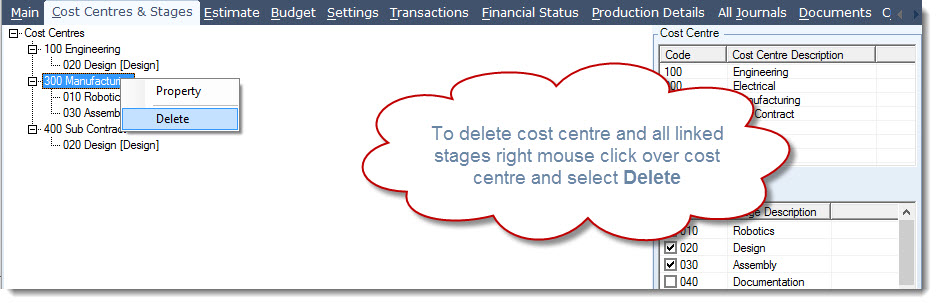
Cost centres and/or stages can be removed from a job as long as there are no transactions against the stage.
To delete an entire cost centre and all stages in the cost centre right mouse click over the cost centre and select Delete
To delete a single stage within a cost centre right mouse click over the stage and select Delete
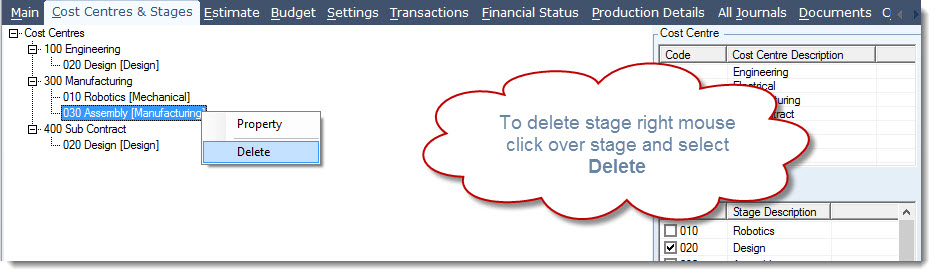
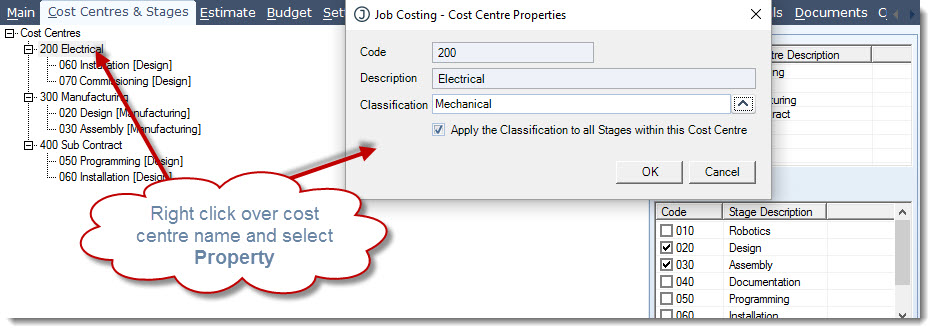
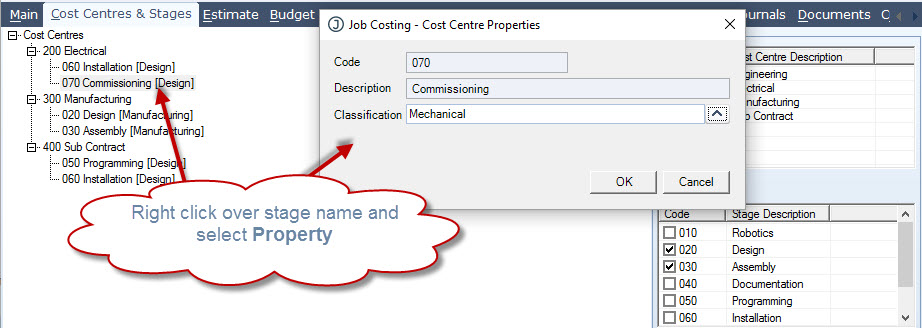
Where a stage is linked to the wrong classification this can be changed for the entire cost centre or simply for a specific stage by right clicking on the cost centre or stage and selecting Property.
Settings Tab
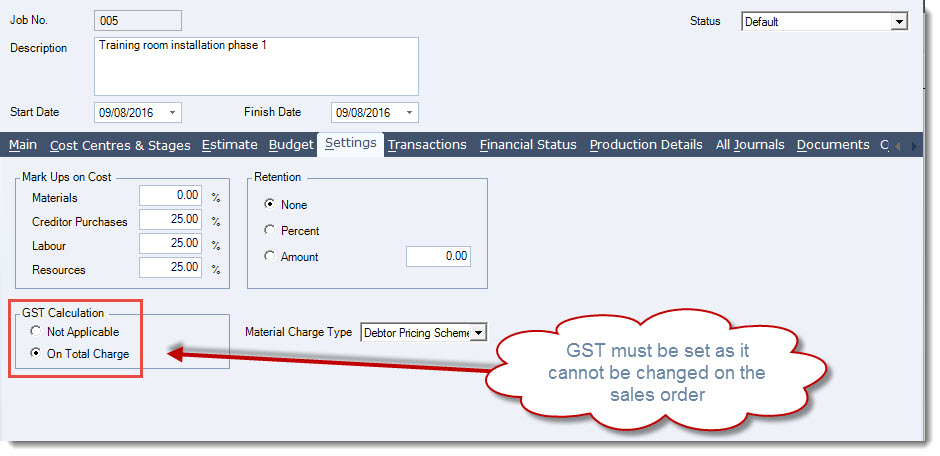
The Settings tab is where we set the markup on costs and confirm if GST is applicable on invoicing.
NOTE: When creating a job invoice it is important that the GST Calculation basis is set on this tab as it cannot be changed in the sales order.
Complete the details on this tab
|
Field |
Description |
|
Mark Ups on Cost |
Set the percentage markup on costs for each of the cost types; Materials - Markup on inventory items allocated from stock on hand or purchased specifically for the job. This markup is applied when the Material Charge Type flag is set to Mark Up on Cost Creditor Purchases - Markup on all non-stock supplier purchases and miscellaneous Cash Book payment entries Labour - Markup on time sheet hours added to the job Resource - Markup on Resource type costs added to the job |
|
GST Calculation |
This setting determines if GST is to be charged on the total invoice value. When set to Not Applicable GST is not charged When set to On Total Charge GST is charged on the total invoice value |
|
Retention |
This is a reference only on the job. Jiwa at present does not use this setting |
|
Material Charge Type |
Determines the sell price that is applied to inventory items from stock on hand or direct supplier purchases allocated to the job. The default setting is Mark Up on Cost Options available:
|
Save your changes
Other Tabs
|
Tab |
Description |
|
Estimate |
This tab lists all the estimates that have been created against the job. Multiple estimates can be created however only 1 estimate can be active at any one time. |
|
Budget |
This tab is used to manage the jobs budget. Budgets are entered by Cost Centre / Stage / Budget Item Type |
|
Transactions |
This tab displays all transactions that have been activated against the job. New transactions can also be created from this tab. Transactions can be filtered by cost centre and type |
|
Financial Status |
This tab displays the jobs financial details including WIP and job profit to date. Actuals can be compared to both the Budget and active Estimate |
|
Production Details |
This tab displays all finished goods that have been created through the job |
|
All Journals |
This tab displays all the journal sets that have been created which relate to the job |
|
Documents |
This tab allows you to attach documents relating to the job eg. job specifications |
|
Custom Fields |
This tab holds all custom fields that have been added to the Job Costing form |
|
To-Do |
This tab allows you to set tasks that relate to the job |
This video is best seen on the full screen. Just click on the icon at the bottom right of the video (see image below). To exit full screen just press escape