In this article we look at how to create invoices against jobs in Jiwa 7.
Jobs are invoiced at the cost centre level this means that during the invoicing stage costs and charges are assigned to the invoice.
The allocation process enables users to assigned costs and charges to an invoice either manually or automatically.
Creating Job Invoice
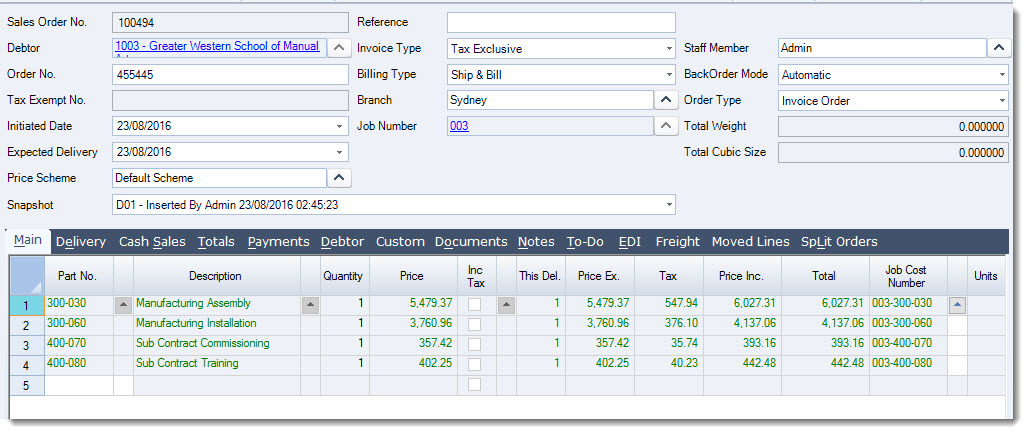
Job invoices are created through the Sales Order Entry form either by selecting Sales | Order Entry and then New | New Job Invoice from the menu ribbon.

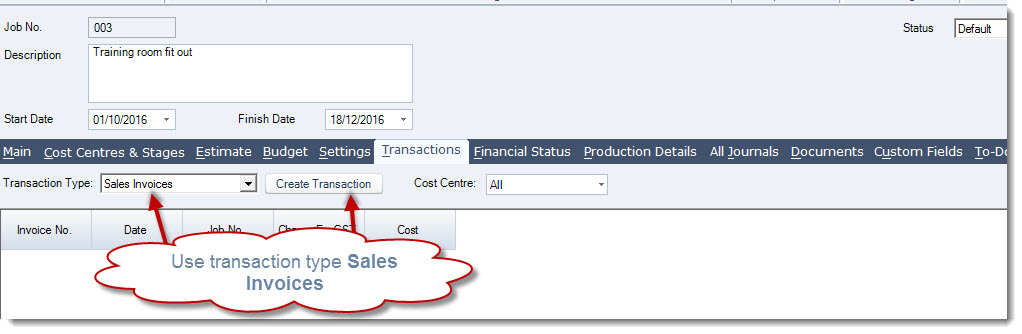
The sales order entry form can also be opened from the Transaction tab on a job by using the transaction type of Sales invoices and then clicking on Create Transaction
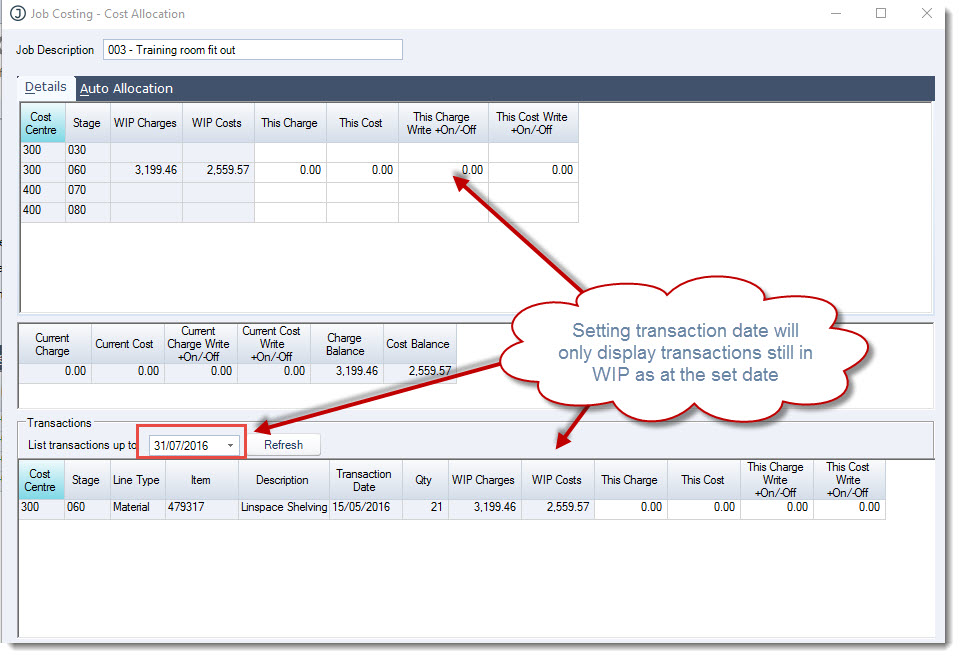
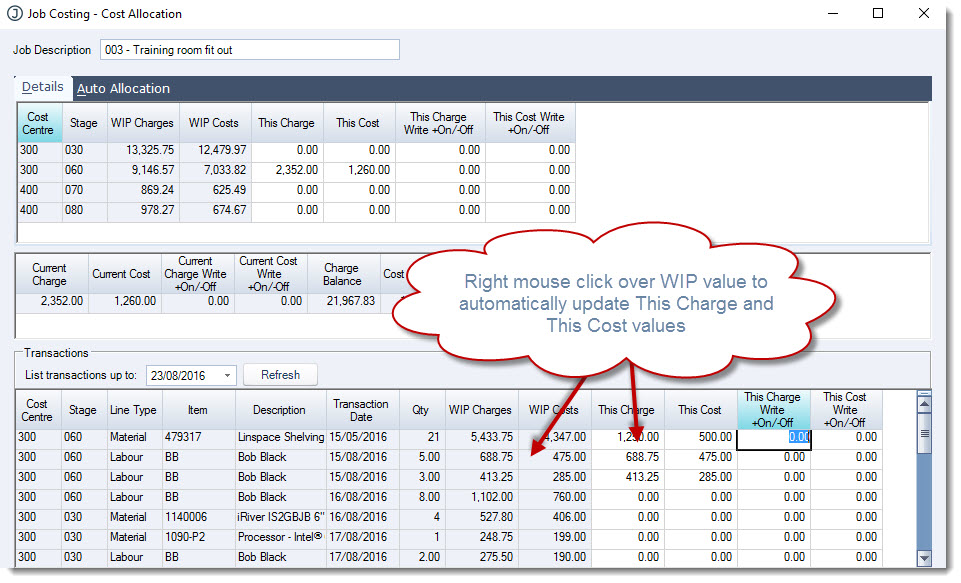
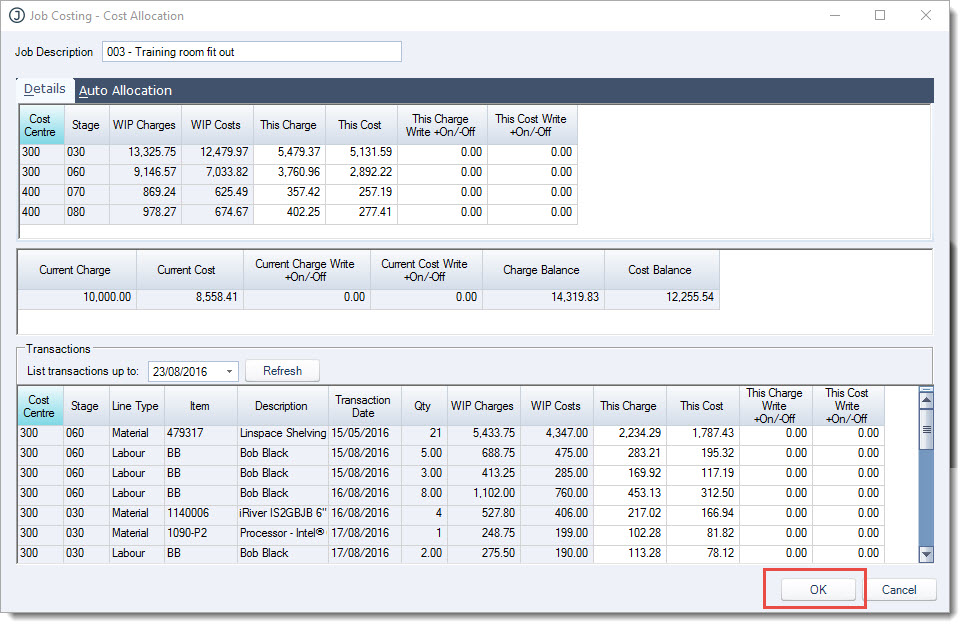
When the sales order is created the Job Costing - Cost Allocation popup is displayed
The form is divided into three(3) sections;
-
The top section displays costs and charges that have yet to be allocated to an invoice by cost centre, and the Auto Allocation options
-
The middle section provides a job summary
-
The bottom section displays all job transactions and values that are still in WIP

The List Transactions date can be used to filter transactions upto and including a set date. This is useful if you need to invoice to a specific date.
Manual Allocation
Manual allocation of costs and charges to an invoice can be completed at the cost centre / stage level or at the transaction level.
NOTE: All values entered in the Cost Allocation form are GST exclusive, GST if applicable to the job will be applied to the sales order. Check the Settings tab on the job to confirm if GST is to be applied to or not.
Allocation by Cost Centre
This method of invoicing sets the charge and cost values at the cost centre / stage level.
Enter in the amount to be invoiced (excl GST) for the cost centre / stage in the This Charge field
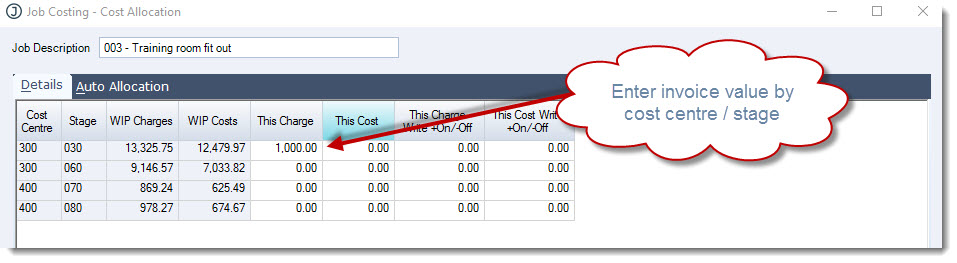
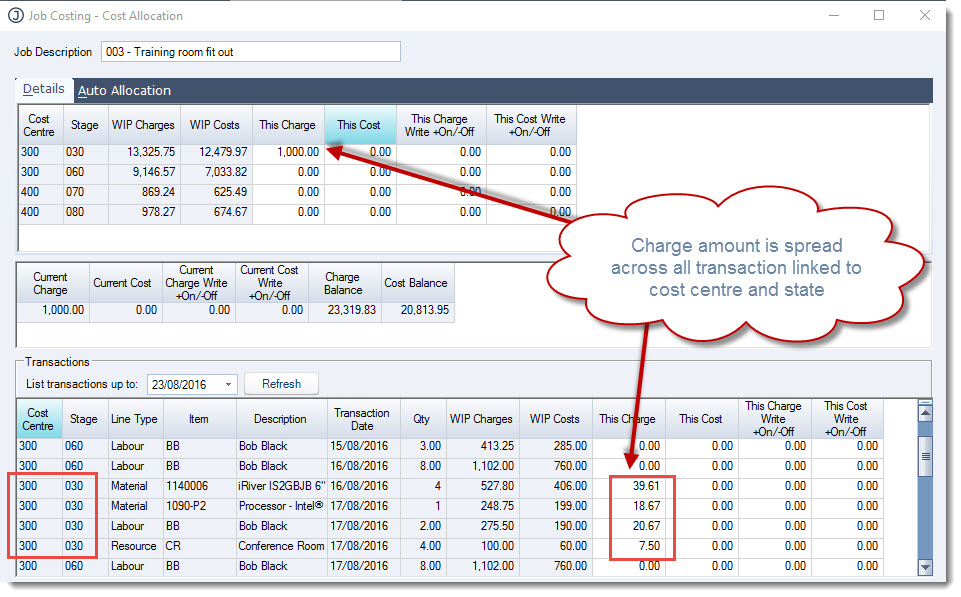
When this field is updated you will notice that in the Transactions grid the amount is then apportioned across all transactions still in WIP linked to the cost centre on a prorata basis.
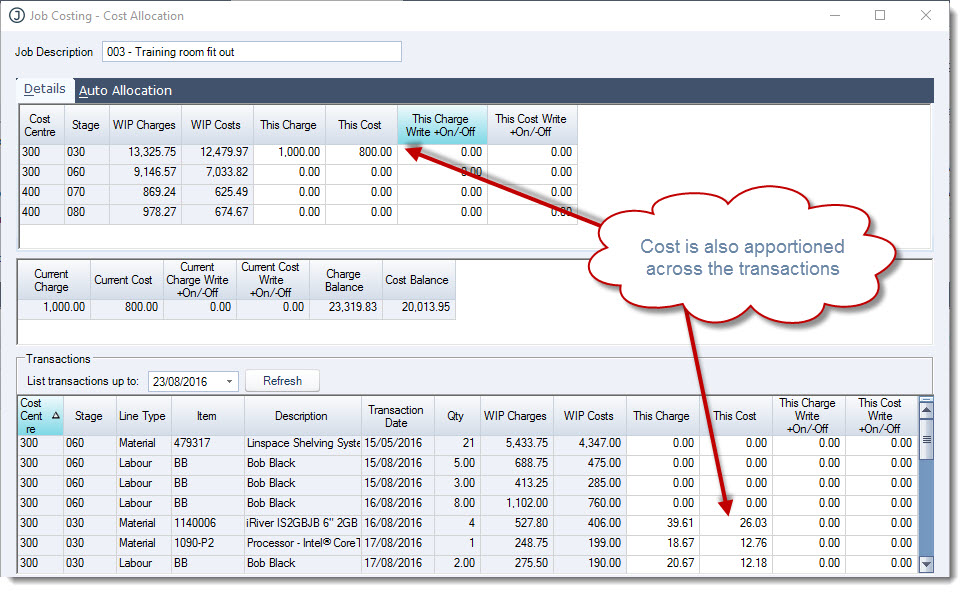
Now in the This Cost field add in the cost value you want to allocate to the invoice.
Alternatively if you want to allocate the full cost centre cost and charge amounts to the invoice you can right mouse click over the cost centre WIP Charges or WIP Costs value and select one of the Allocate All options
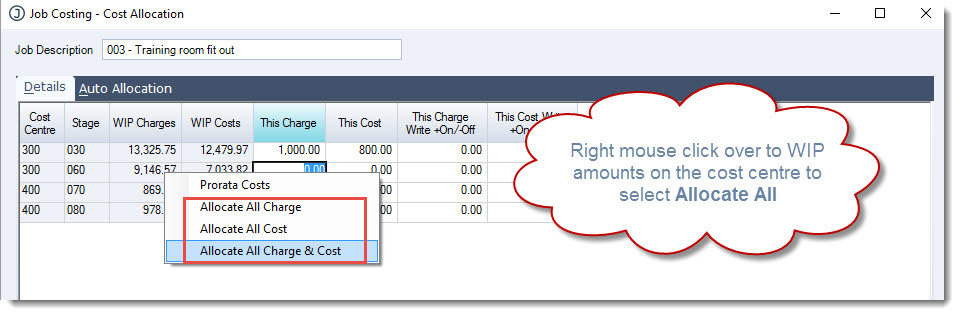
In the example below the Allocate All Charge and Cost option was selected which updated the This Charge and This Cost fields to what is sitting in WIP
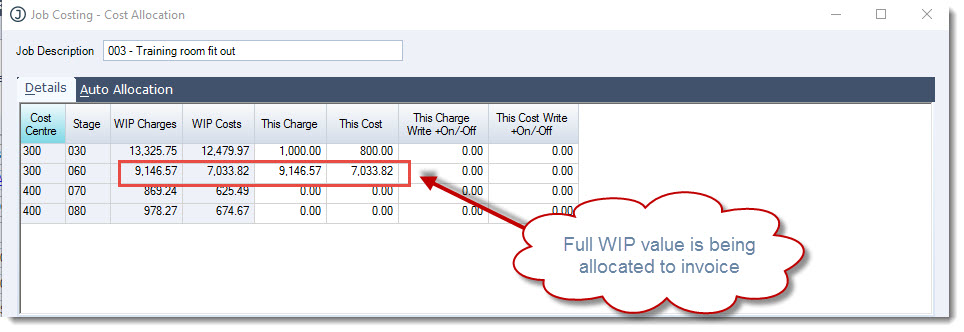
You will notice that the job summary and transactions are updated accordingly

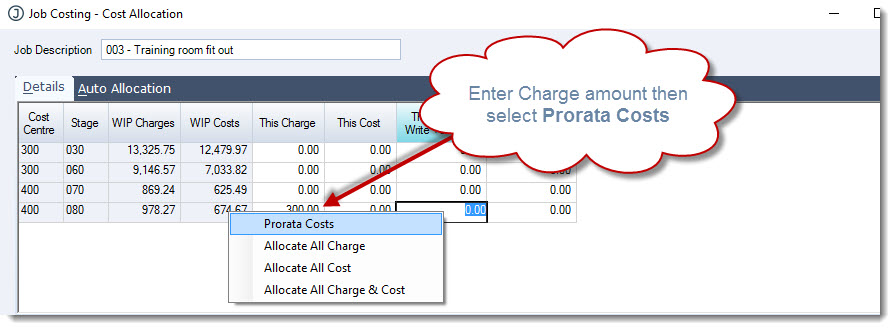
Prorata Costs
Costs can also be allocated on a prorata basis based on the This Charge amount
Enter the value to be invoiced (excl GST) in the This Charge amount field
Then right click over the WIP amount and select Prorata Costs
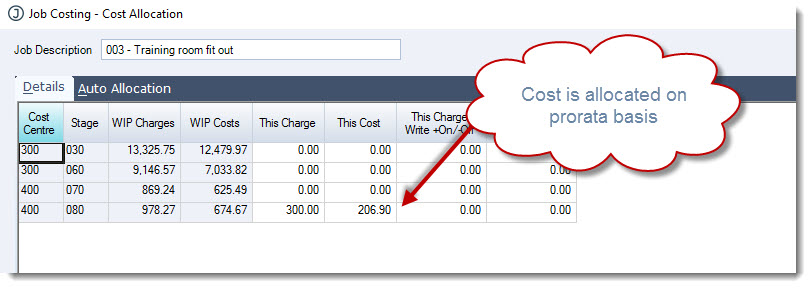
The cost field is automatically updated on a prorata basis
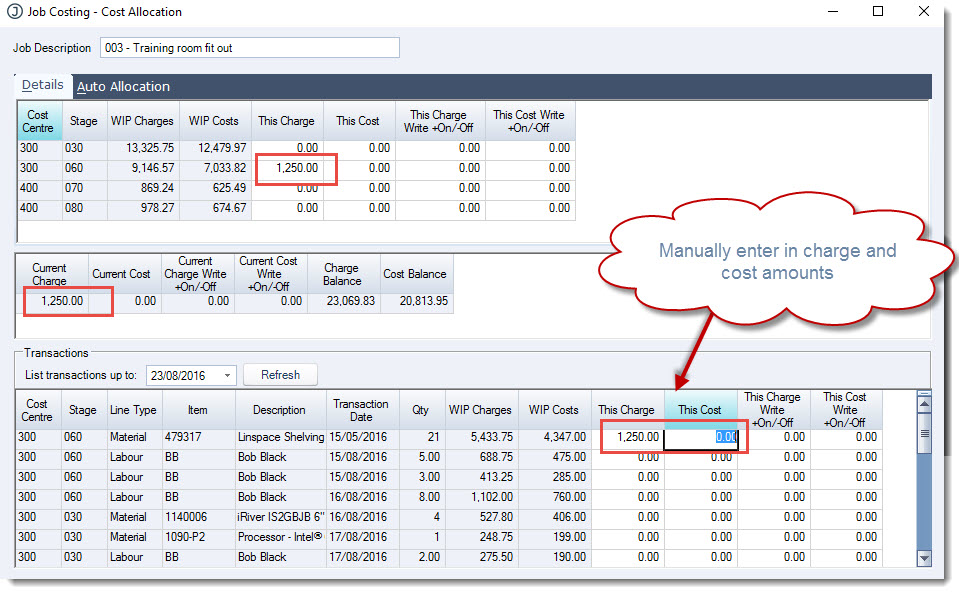
Allocation by Transaction
Costs and charges can be allocated to an invoice by individual transaction using the Transactions grid.
Work through each transaction and set the This Charge and This Cost amount
Notice that the top and middle sections of the form are updated as you work through the transactions
Alternatively, you can set the charge and cost amounts to match the WIP values by right mouse clicking on either of the WIP values on the transaction
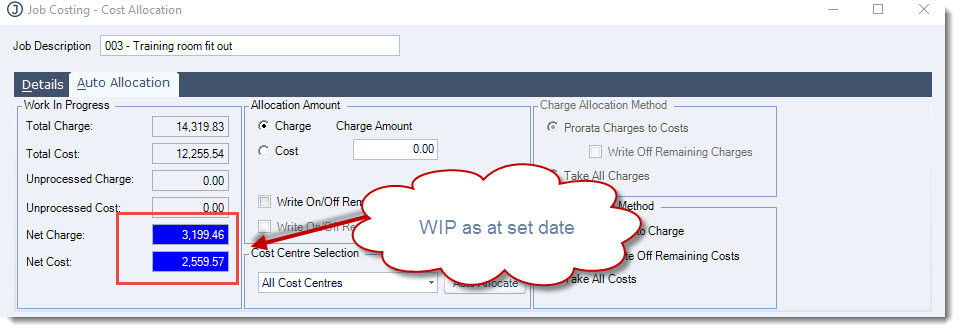
Auto Allocation
Move the the Auto Allocation tab and then select your Allocation Amount method
NOTE: All values entered in the Cost Allocation form are GST exclusive, GST if applicable to the job will be applied to the sales order. Check the Settings tab on the job to confirm if GST is to be applied to or not.

|
Section |
Description |
|
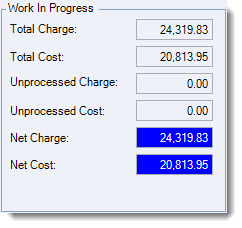
Work in Progress |
This section provides an overview of;
|
|
Allocation Amount |
This section is used to set the basis of the automatic allocation, options are Charge or Cost. Fields are enabled or disabled depending on the method selected. Users can also select if the allocation is applicable to all cost centres or a single cost centre 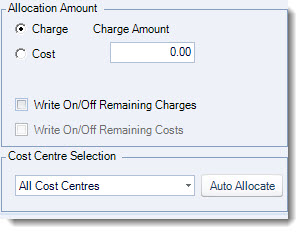
|
|
Allocation Method |
This section is used to control how costs and charges are taken up in the allocation process and if any balances are to be written off. Fields are enabled or disabled based on the method of allocation selected. 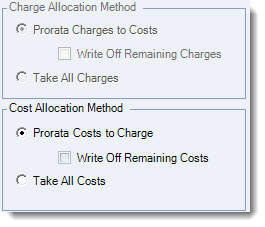
|
Enter either the charge or cost amount excluding GST in the Charge / Cost Amount field
Confirm if the allocation is applicable to a specific cost centre or all cost centres, the default is All Cost Centres
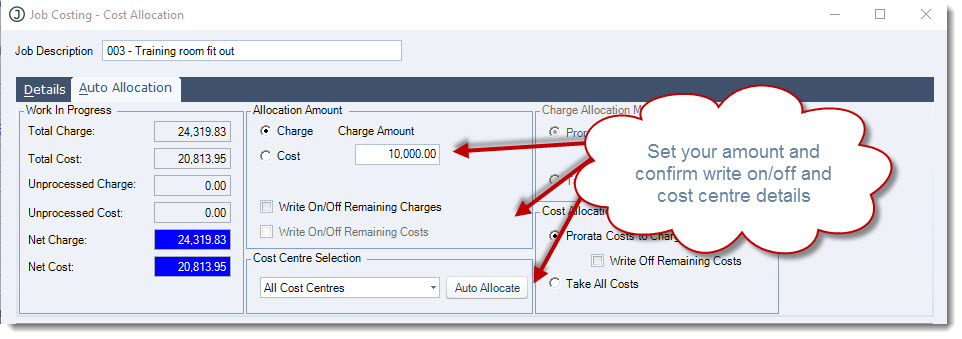
Confirm how your costs/charges are to be taken up

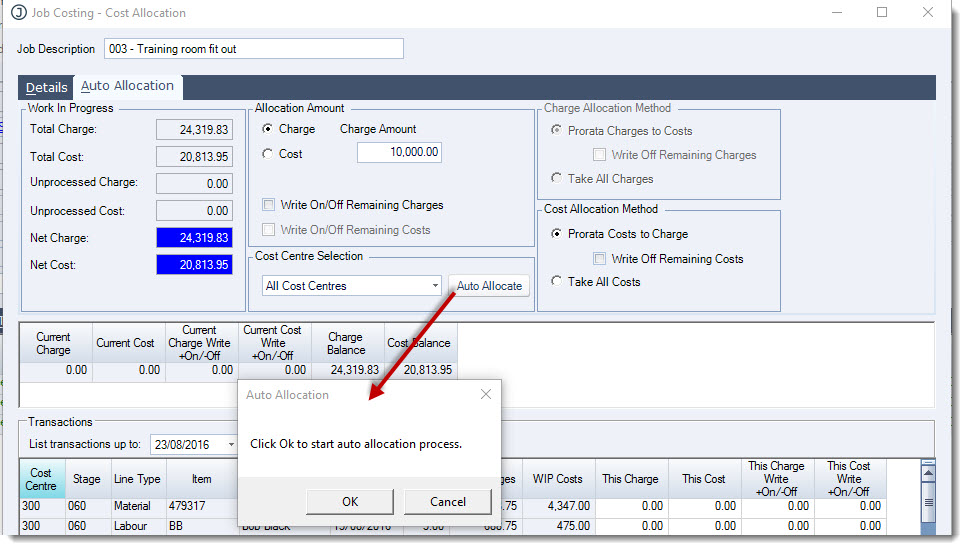
Select the Auto Allocate button
Then select OK to start the process
Select OK at the completion prompt
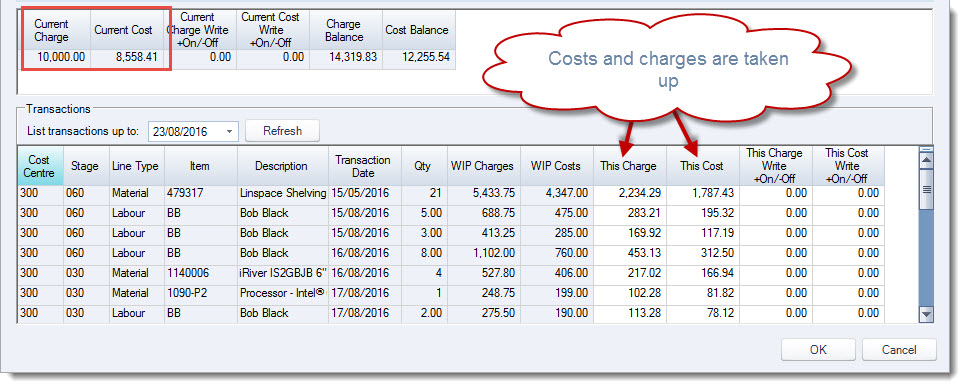
Each transaction is updated with a charge and cost value
Processing Invoice
When you have confirmed the costs and charges to be allocated to the invoice click on the OK button at the bottom of the form.
Add comments to your order as required and then Save and Process your sales order as usual.
This video is best seen on the full screen. Just click on the icon at the bottom right of the video (see image below).
To exit full screen just press escape