In this article we look at how to create finished goods through the Job Costing module in Jiwa 7.
Before proceeding with this article we recommend that you have a basic understanding of the Job Costing module and you have reviewed the following articles.
Creating Finished Goods
When finished goods are created from the Job Costing module the finished product is put into stock on hand.
Finished goods can be created from the menu by selecting Job Costing | Transactions | Produce Finished Goods
The Product Finished Goods form can also be opened from the Transaction tab on a job by using the transaction type of Finished Goods and then clicking on Create Transaction
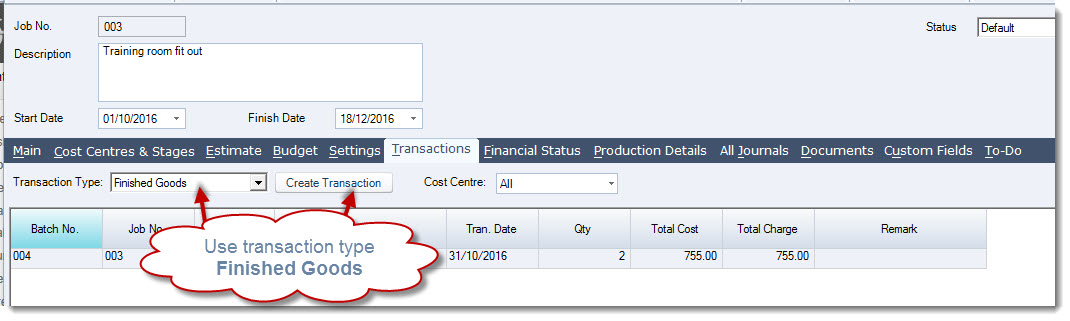
When opening the form from the job you will notice that the Job Number field is automatically populated.
Add a reference to your batch in the Reference field

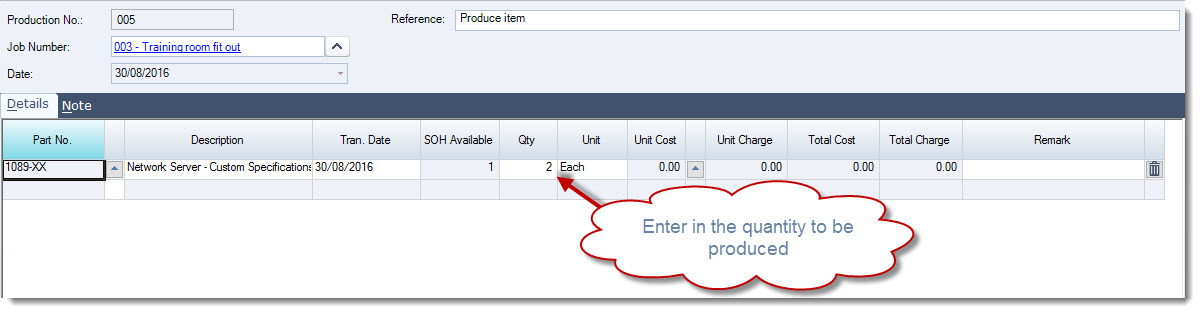
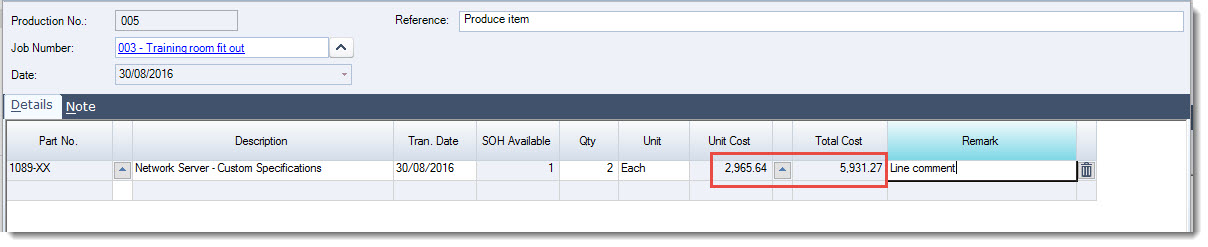
In the Details tab select the item that you are going to produce
In the Qty field enter in the number of units to be produced
To allocate costs to the item click on the lookup icon next to the Unit Cost field
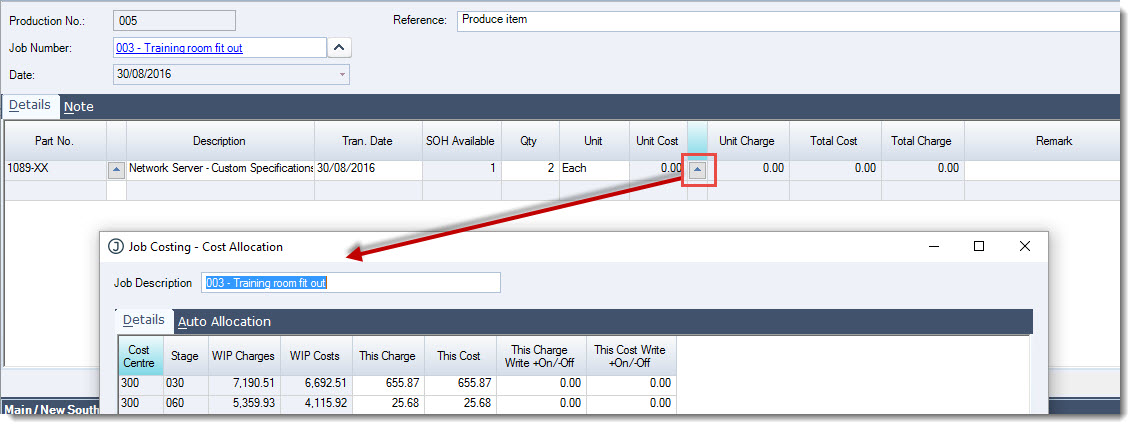
The Job Costing - Cost Allocation form is opened which is the same form that is used to allocate costs and charges to an invoice.
Allocate your costs to the finished item by;
-
Cost Centre,
-
Individual transaction, or
-
Using Auto Allocation
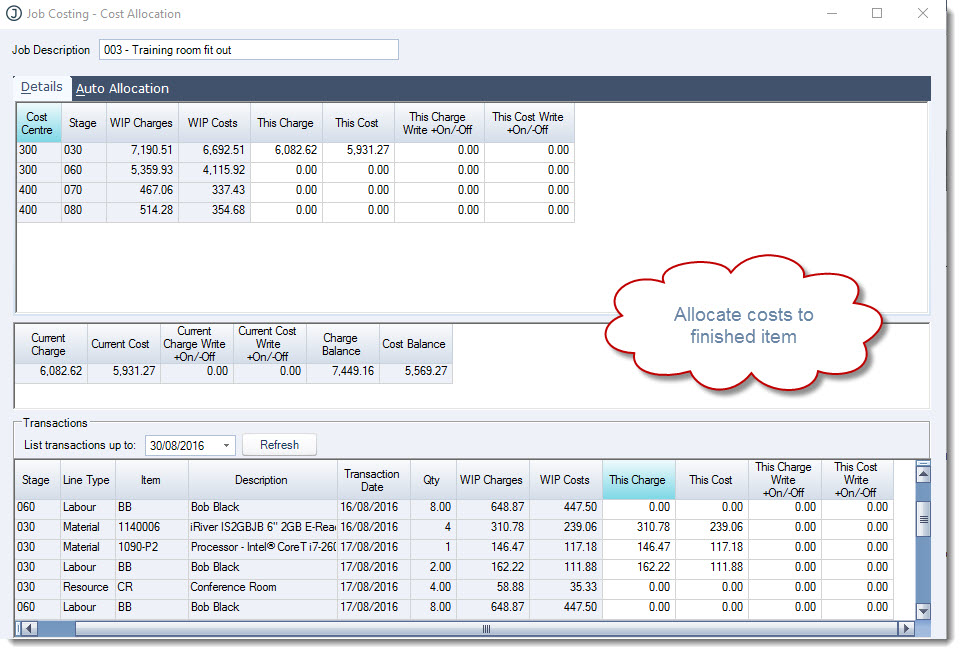
When you have completed allocating your costs select OK
The Unit Cost and Total Cost fields are updated with the allocated costs
Save your updates
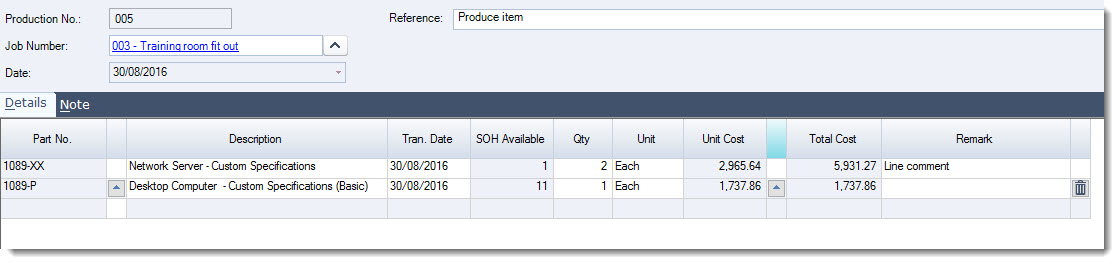
Repeat this process for each item produced
When you have finalised your batch from the menu ribbon select Activate to update your job and the stock ledger
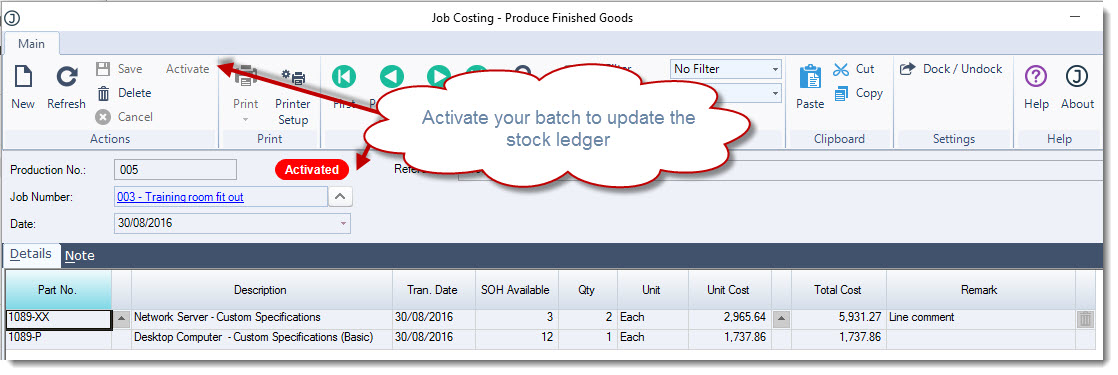
Your job is now updated with the goods produced

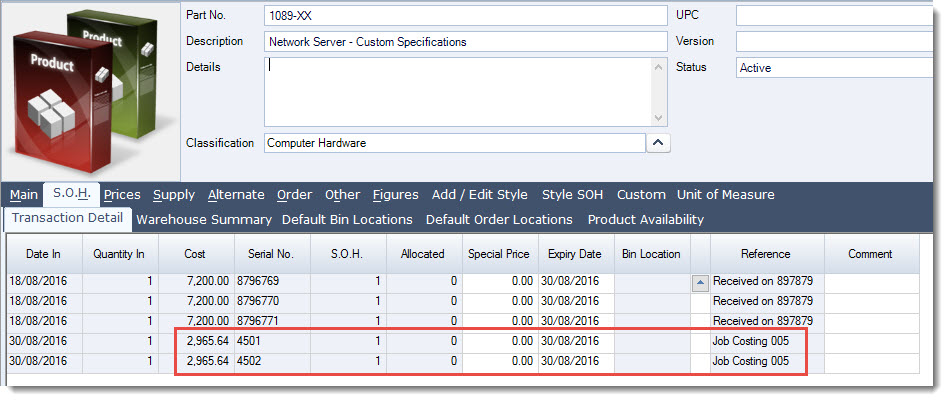
And the Stock ledger is updated with the finished products
This video is best seen on the full screen. Just click on the icon at the bottom right of the video (see image below). To exit full screen just press escape