In this article we look at adding costs to jobs in the Jiwa 7 Job Costing module.
Costs can be added to jobs via a number for different forms, each of these forms can also be initiated from the Transactions tab on a job.
In this article we look at the following forms and how job transactions are entered;
-
Cost Entry,
-
Timesheets,
-
Cashbook Payments,
-
Creditor Purchases,
-
Purchase Orders & GRN, and
-
Converting Estimates
Cost Entry
The Cost Entry form is used to record the following transaction types;
-
Inventory items,
-
Labour,
-
Resource time, and
-
Journals
Transactions for multiple jobs can be entered on this form.
The Cost Entry form can be accessed through the menu by selecting Job Costing | Transactions | Cost Entry or via the Transactions tab on a job.
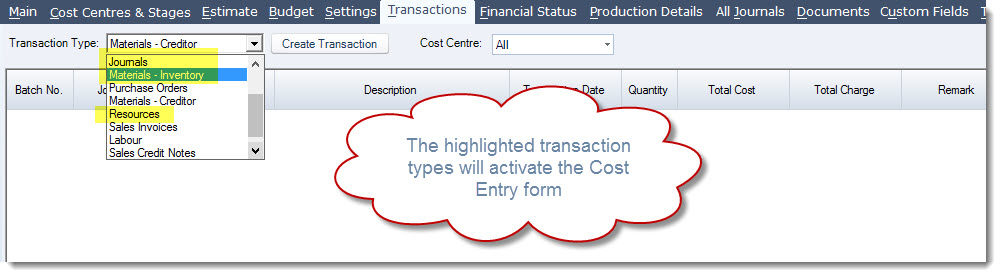
To open the Cost Entry form from the Transactions tab select one of the following transaction types from the Transaction Type field.
-
Journal,
-
Materials - Inventory, or
-
Resource
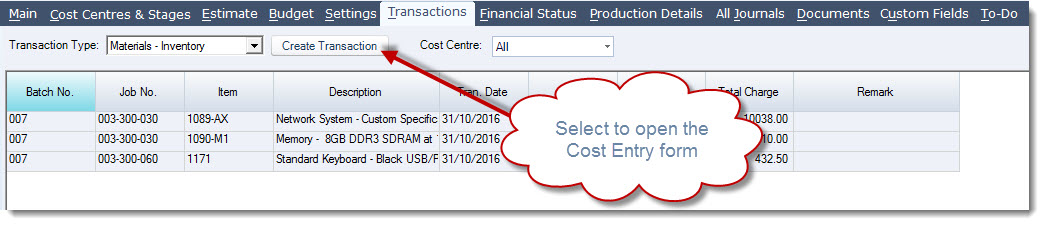
Then press the Create Transaction icon
Add a reference to your batch if required
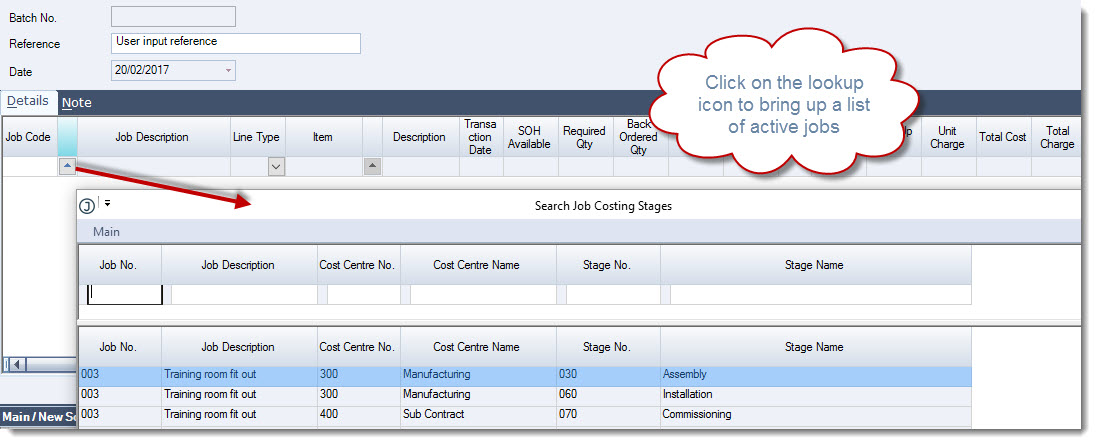
Start adding your costs on the Details tab by first selecting the job that costs are to be assigned to.
You can click on the lookup icon to bring up a list of active jobs, or you can manually key in the job number
Select the type of transaction to be created
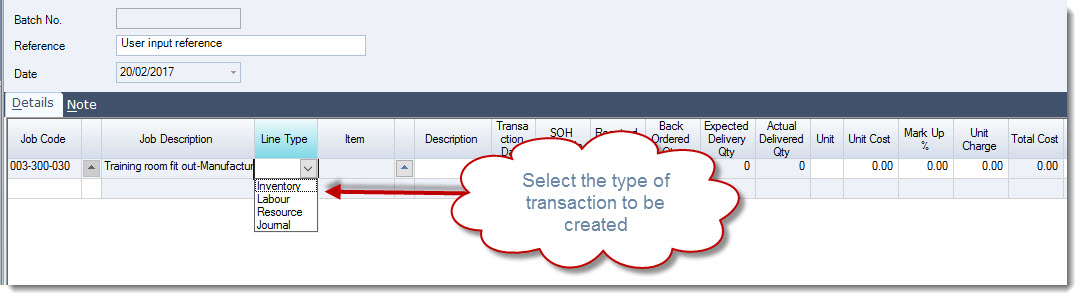
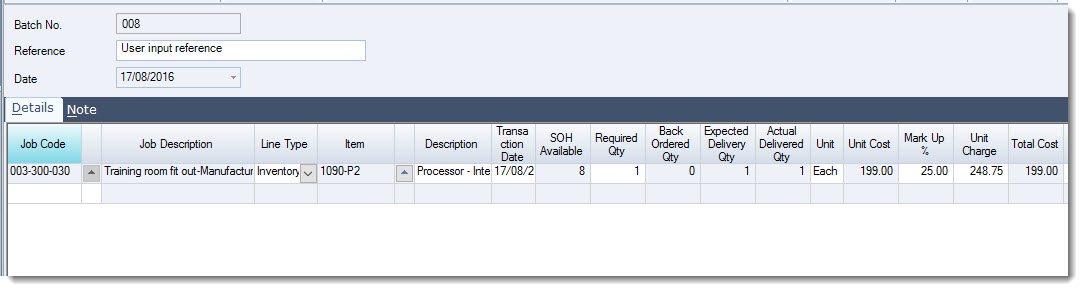
Complete the remaining fields on the line.
Save as you are entering costs. The job will not be updated with the costs until the batch has been activated.
|
Field |
Description |
|
Job Code |
Job, Cost Centre and Stage that the cost is to be allocated to |
|
Job Description |
Job description |
|
Line Type |
Transaction type, options available;
|
|
Item |
The item selected will be dependant upon the line type selected
|
|
Description |
Selected item description. The description can be overridden if required |
|
Transaction Date |
The transaction date defaults to the current login date and can be changed if required Note: Transaction dates in the batch must all fall within the same General Ledger period. In other words you cannot have transactions for both June and July contained within the same batch. |
|
SOH Available |
This field is only applicable when the line type is Inventory |
|
Required Qty |
Units required |
|
Back Ordered Qty |
This field is only applicable when the line type is Inventory |
|
Expected Delivery Qty |
Expected delivery quantity |
|
Actual Delivered Qty |
Difference between expected |
|
Unit |
Unit of measure |
|
Unit Cost |
Unit cost field is automatically updated based on line type
|
|
Mark Up % |
For all line types except Journal lines the markup percentage is taken from the jobs Setting tab and can be changed if required. |
|
Unit Charge |
This field is automatically calculated based on the unit cost and mark up %. The unit charge field can be changed if required. |
|
Total Cost |
Total line cost, this field cannot be edited |
|
Total Charge |
Total line charge amount, this change be changed if required. When changed the unit charge amount will be recalculated. |
|
Remark |
Additional remark field that is also displayed on the Transactions tab of the job. |
When you have completed your batch from the menu ribbon select Activate to finalise your batch.
Once activated the batch is locked from further editing.
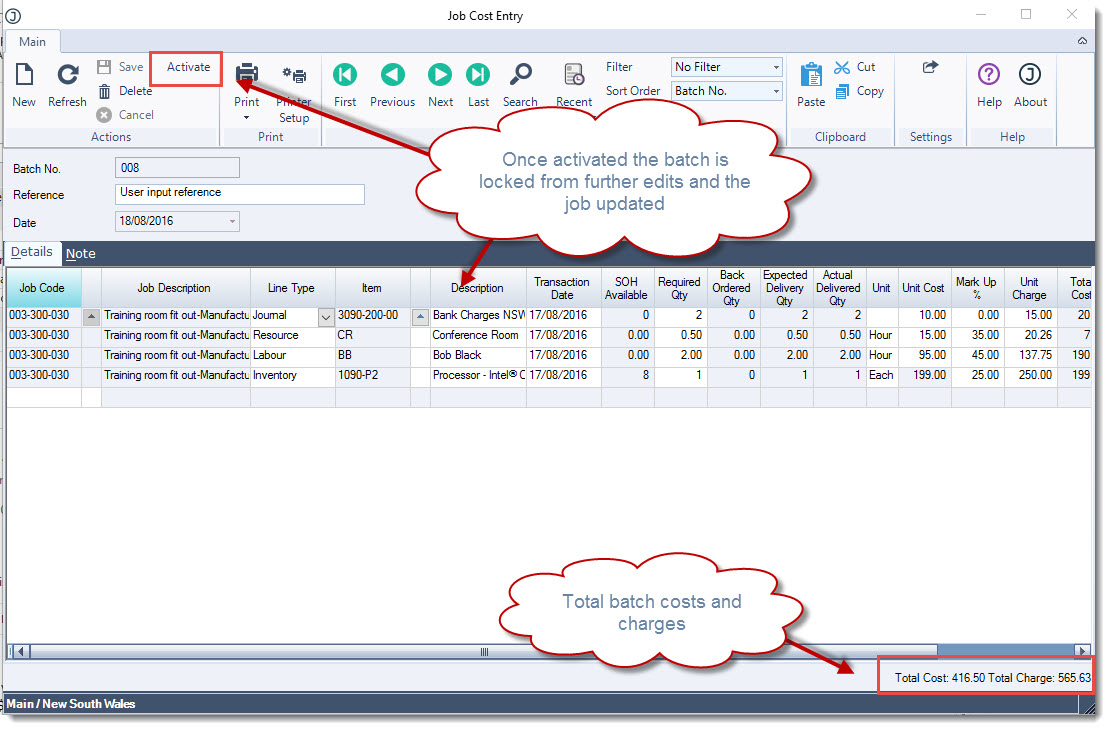
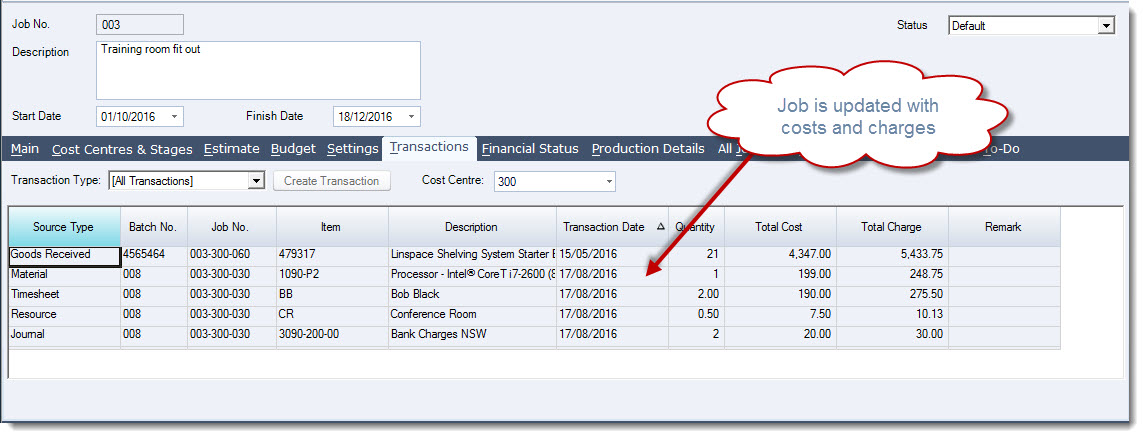
The job is updated with the costs and charges
Timesheets
The Timesheets form is used to enter labour hours by staff across multiple jobs.
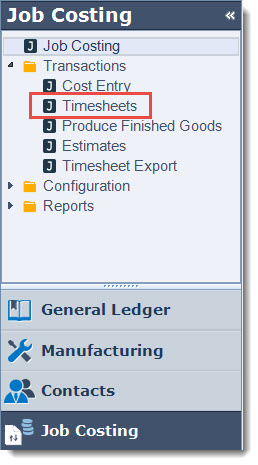
The form can be accessed through the menu by selecting Job Costing | Transactions | Timesheets or via the Transactions tab on a job when you select the transaction type of Labour.
From the menu ribbon select New to create a new batch.
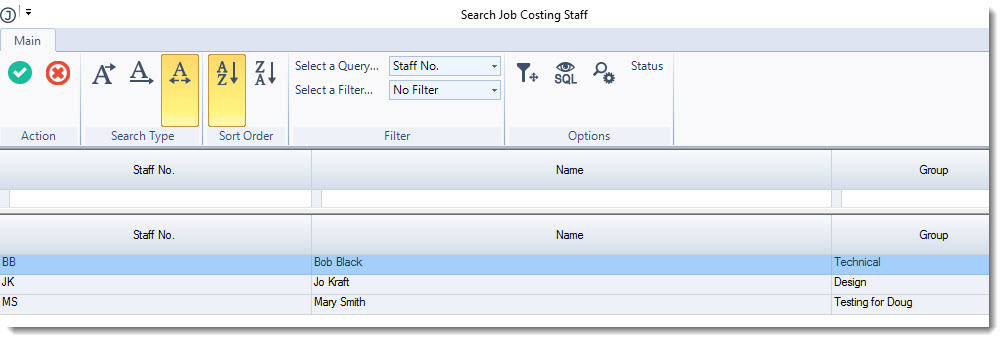
From the Search Job Costing Staff popup select the staff member that you want to enter a time sheet for.
If required enter a note about the batch in the Description field

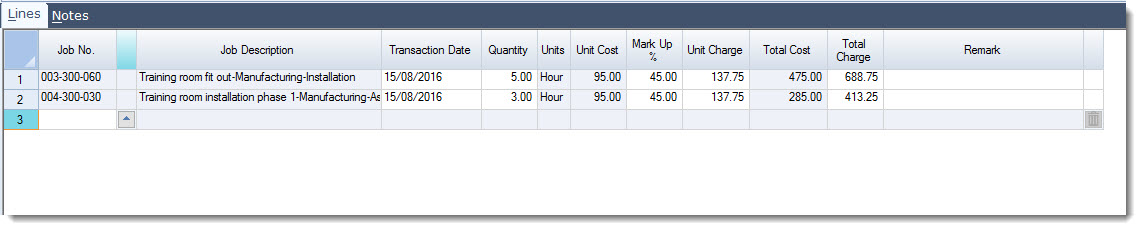
On the Lines tab start entering the time sheet details first by selecting the applicable job number
Update the Transaction Date as required
Enter in the hours to be added to the job and update the remaining fields as required.
Repeat this process until all times for the staff member have been entered, remembering to Save as you are updating your batch.
|
Field |
Description |
|
Job No. |
Job, cost centre and stage that the time is to be allocated to |
|
Job Description |
Job description |
|
Transaction Date |
The date that the time entry is applicable to Note: Transaction dates in the batch must all fall within the same General Ledger period. In other words you cannot have transactions for both June and July contained within the same batch. |
|
Quantity |
Number of hours / days |
|
Units |
Unit of measure as setup against the staff record in Job Costing |
|
Unit Cost |
Unit cost as setup against the staff record in Job Costing, this is a read only field. |
|
Mark Up % |
The labour markup as setup against the job on the Settings tab. This can be manually overridden if required |
|
Unit Charge |
Unit charge amount based on the % markup that can be manually overridden if required. When overridden the markup % is recalculated. |
|
Total Cost |
Read only field displaying the total line cost. |
|
Total Charge |
Total line charge amount that can be manually overridden if required. When manually changed the markup % and unit charge amounts are recalculated. |
|
Remark |
Line comment field that will also display on the job in the Transaction tab |
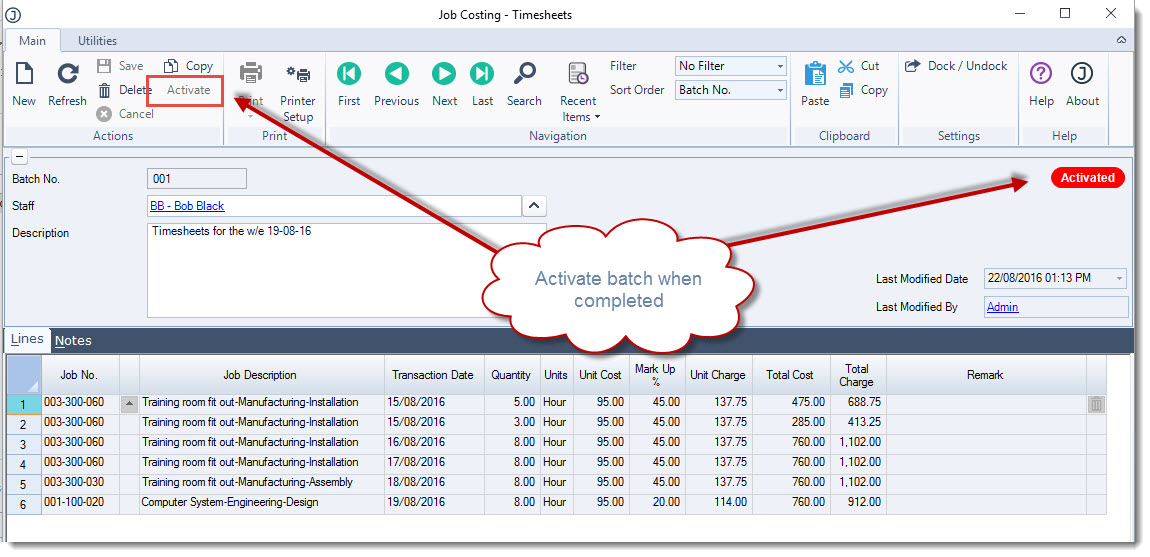
When you have completed your batch select Activate from the menu ribbon.

Cashbook Payments
Miscellaneous job related payments not linked to a Creditor or Debtor can be entered through the Cash Book Payments form.
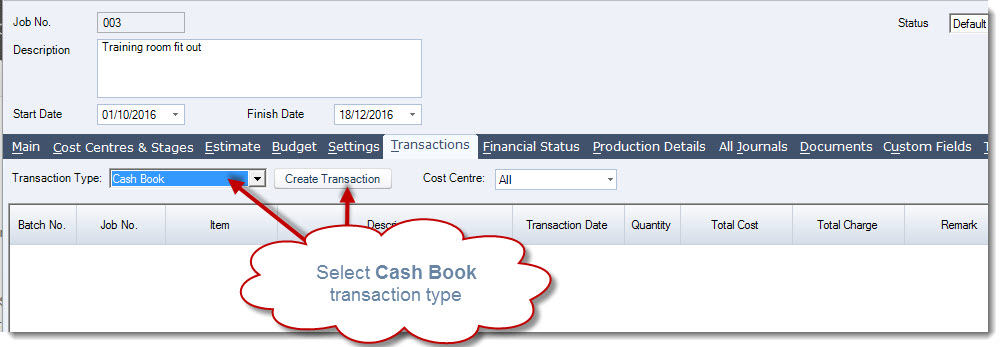
The form can be accessed through the menu by selecting Cash Book | Payments or via the Transactions tab on a job when you select the transaction type of Cashbook.
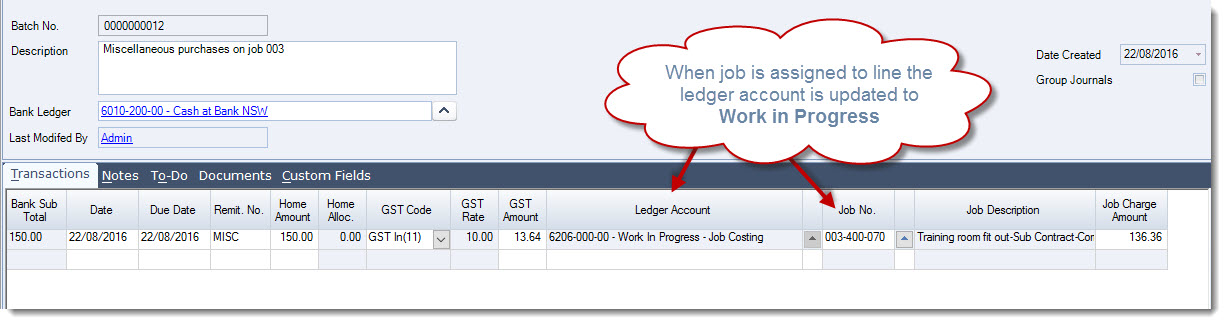
When entering transactions and a line is linked to a job the Ledger Account field is automatically updated to the Work in Progress account linked to the job stage and cannot be changed.
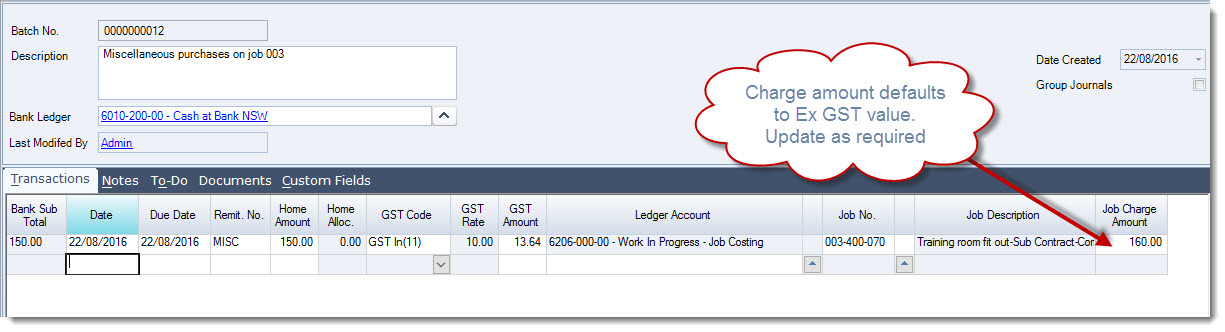
The Job Charge Amount defaults to the Ex GST value, this is because there is no markup setting for cashbook entries.
The field can be manually updated as required.
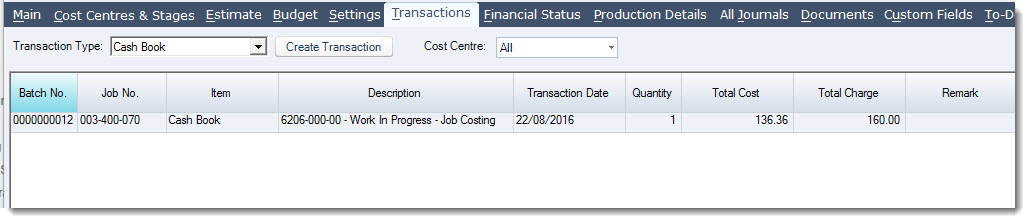
Once the Cash Book Payments batch is activated the costs and charges are added to the job.
Creditor Purchases
Non inventory related creditor purchases can be allocated to jobs through the Creditor Purchases form.
The form can be accessed through the menu by selecting Creditors | Transactions | Purchases | Purchases or via the Transactions tab on a job when you select the transaction type of Creditor Purchase.
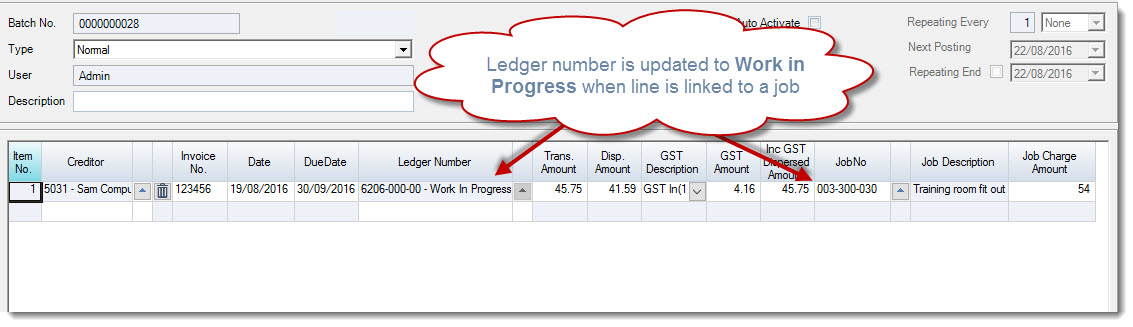
When entering transactions and a line is linked to a job the Ledger Number field is automatically updated to the Work in Progress account linked to the job stage and cannot be changed.
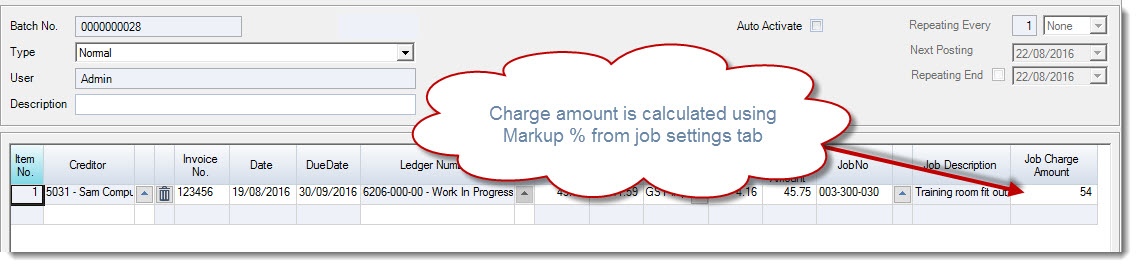
The Job Charge Amount is automatically update based on the Creditors Purchases markup percentage set against the job on the Settings tab.
This field can be manually updated if required.
Once the creditor purchase batch is activated the costs and charges are added to the job.

Purchase Orders
Purchase orders can be raised and linked to one or more jobs.
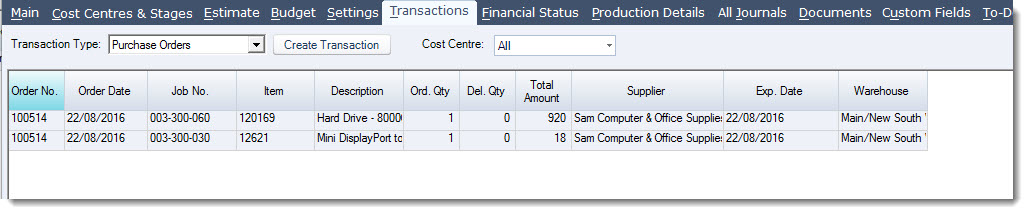
The form can be accessed through the menu by selecting Purchasing | Purchase Orders or via the Transactions tab on a job when you select the transaction type of Purchase Orders.
Note: When selecting the transaction type of Materials - Creditor the Goods Received Note form will be opened.
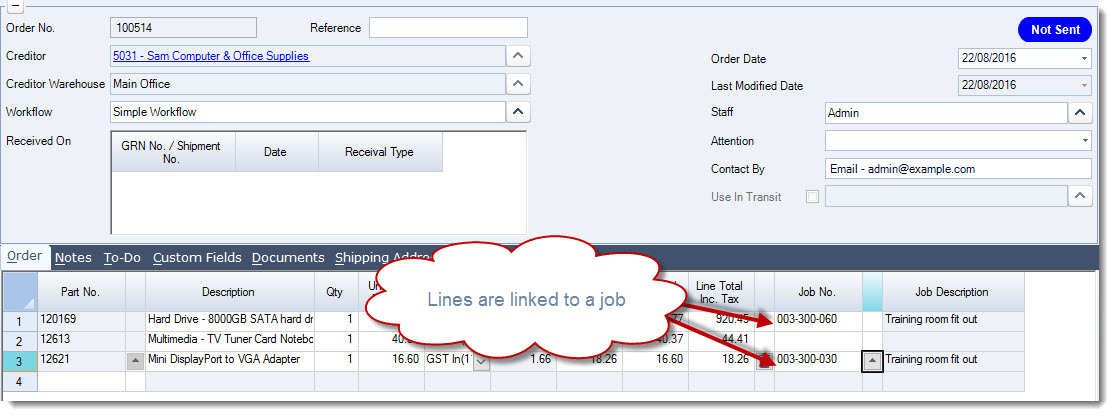
When creating a purchase order for a job, the purchase order lines are linked to a job, this then allows you to create a single purchase order for multiple jobs.
The purchase order is then received through either the GRN form or shipments. It is when stock is received into Jiwa that the job is then updated with the actual cost.
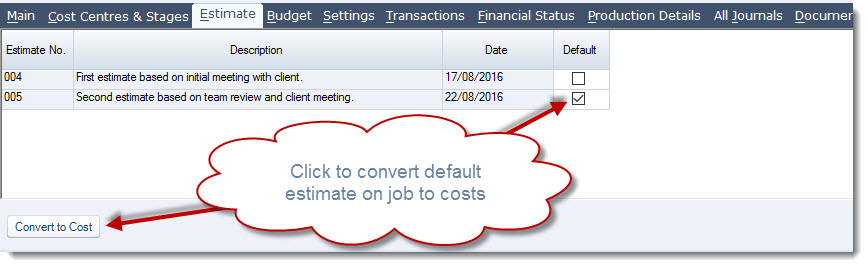
Converting Estimates to Costs
Estimates can be converted to costs on a job however with the following exceptions;
-
Only the default estimate can be converted to costs,
-
Only the following estimate transaction types are converted this is because these transaction types can all be entered against a job through the Cost Entry form. All other cost types will need to be manually created.
-
Inventory,
-
Labour,
-
Resource, and
-
Journal
-
On the Estimate tab click on the Convert to Costs button at the bottom of the Estimate tab
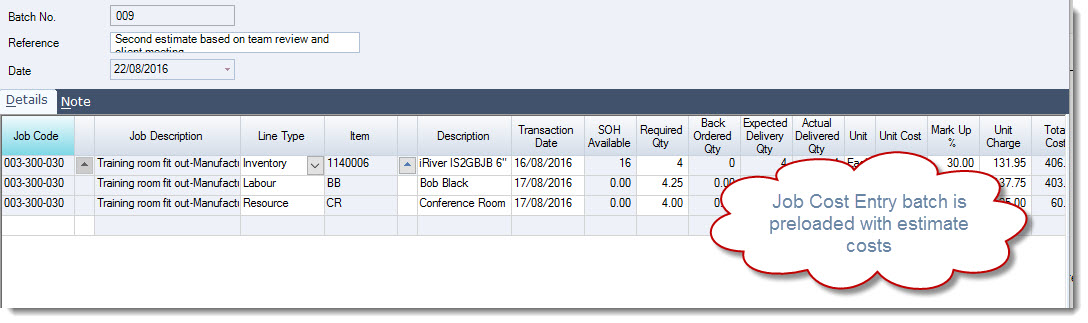
This will open a new Job Cost Entry form with the estimated costs already added to the Lines tab
Make your necessary adjustments and then Save and Activate the batch
This video is best seen on the full screen. Just click on the icon at the bottom right of the video (see image below).
To exit full screen just press escape