In this article we look at how Budget information can be added to your job.
Before proceeding it is recommended that the Jiwa Job Costing - Creating Jobs article is reviewed.
Adding Budget Details
To add Budget information to your job move to the Budget tab.
The tab is divided into two(2) sections;
-
The left panel displays all the cost centres and stages that are attached to the job,
-
The right panel is where budget details are maintained by Cost Centre / Stage / Budget Item type
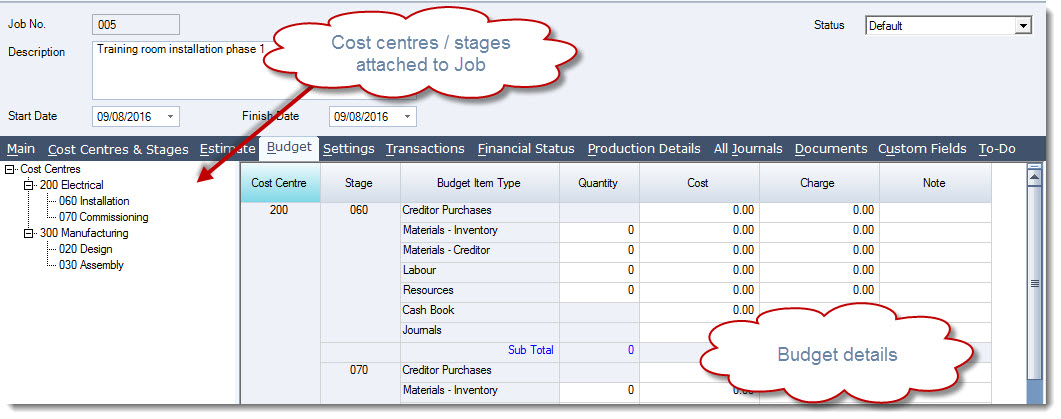
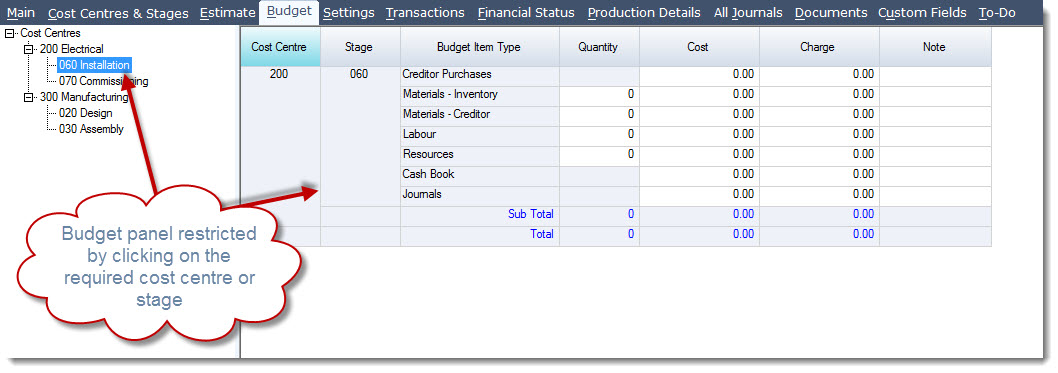
The Budget panel can be expanded or restricted by clicking on the required Cost Centre or Stage on the left hand panel
Start entering your budgeted costs in the right panel.
The Quantity field does not need to be populated but may be useful if you want to be able to compare actual quantities against budgeted quantities for example if you want to compare actual labour hours to budgeted hours.
The Charge field is automatically populated based on your markup percentages on the Settings tab. If the markup settings are changed the charge amounts are recalculated.
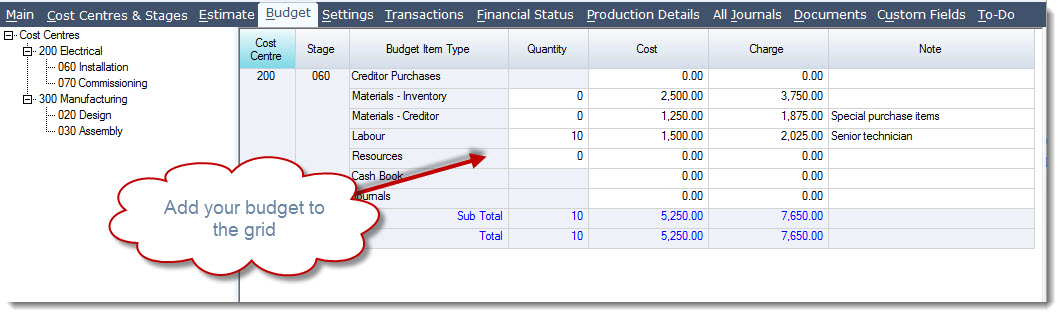
Repeat the process for each Cost Centre and don't forget to Save as you work through your budget.
|
Field |
Description |
|
Cost Centre |
Cost centre code that the budget is applicable to |
|
Stage |
Stage code that the budget is applicable to |
|
Budget Item Type |
There are seven(7) different budget types that values can be added against. Each type representing different transaction types that are added to jobs.
|
|
Quantity |
This is an optional field |
|
Cost |
Budgeted costs |
|
Charge |
This field is manually calculated based on the markup percentages on the Settings tab |
|
Note |
Note field for user comments |
Financials Tab
On the Financials Tab actual costs and charges can then be compared to the budget by selecting the Budget radio button

This video is best seen on the full screen. Just click on the icon at the bottom right of the video (see image below). To exit full screen just press escape