In this article we will look at allocating and unallocating transactions in Jiwa.
Home Allocations
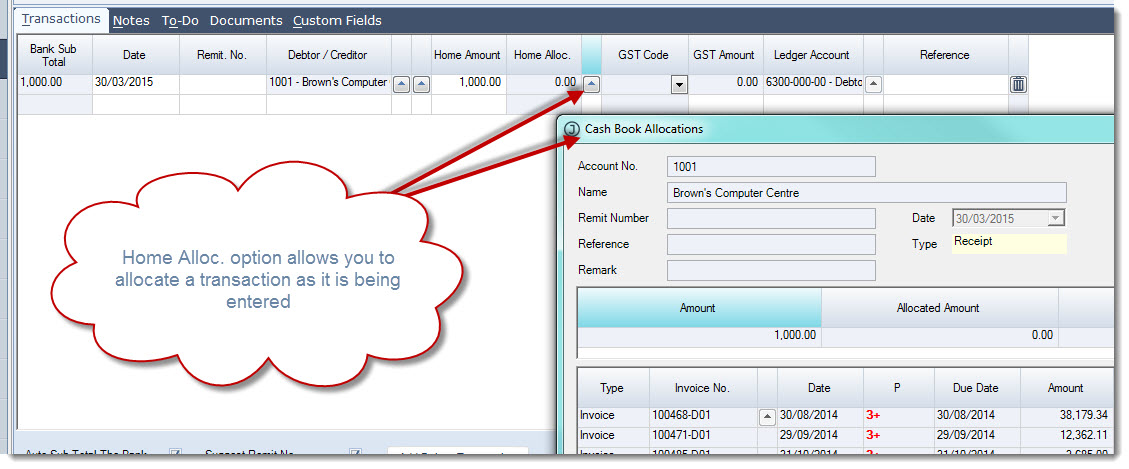
Some transactions can be allocated as they are being entered into Jiwa by using the Home Alloc. option as in Cash Book Receipts.
Click on the lookup icon next to the Home Alloc. field to bring up the Cash Book Allocations popup.
Allocate your transaction.
Debtor Payments & Allocations
Some transactions are not allocated at the time that they are recorded such as deposits or Debtor Adjustments. In these cases transactions can be allocated from the Debtor Maintenance form.
Transactions can be allocated in one of two (2) ways;
-
Automatically, or
-
Manually
Automatic Allocations
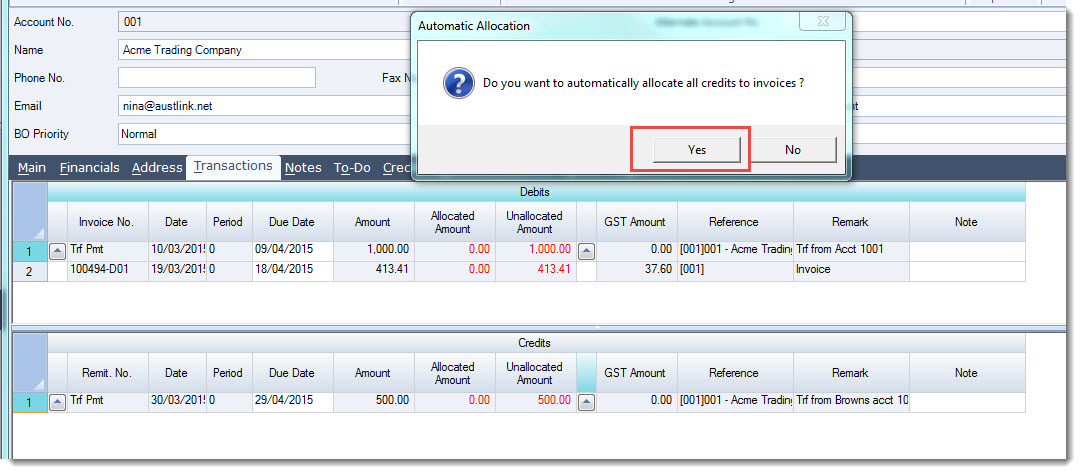
To automatically allocate your Debtor transactions load your required Debtor into the Debtor Maintenance form.
From the menu ribbon select Automatic Allocation

At the Automatic Allocation prompt select Yes
You will notice that the credits are automatically allocated to the oldest transaction/(s)
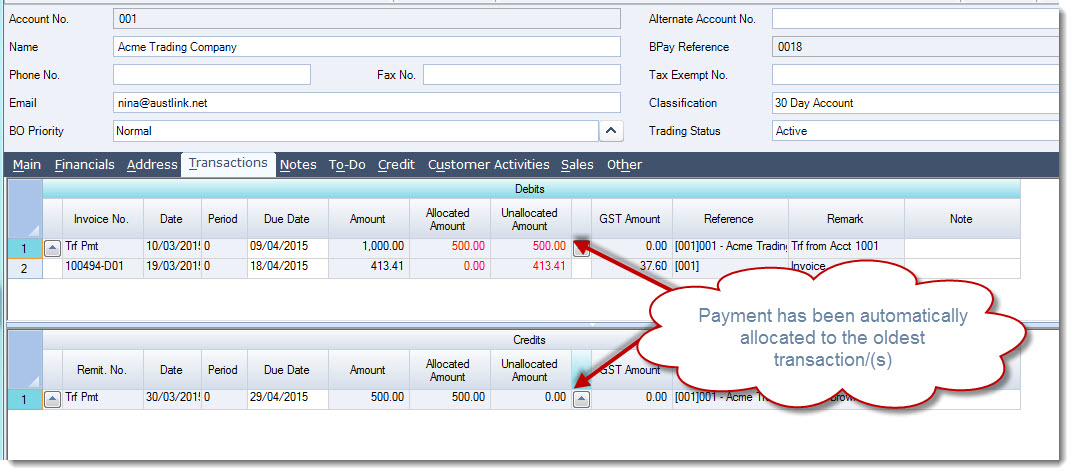
To record the allocation select Save from the menu ribbon.
Manual Allocations
To manually allocate your Debtor transactions load your required Debtor into the Debtor Maintenance form.
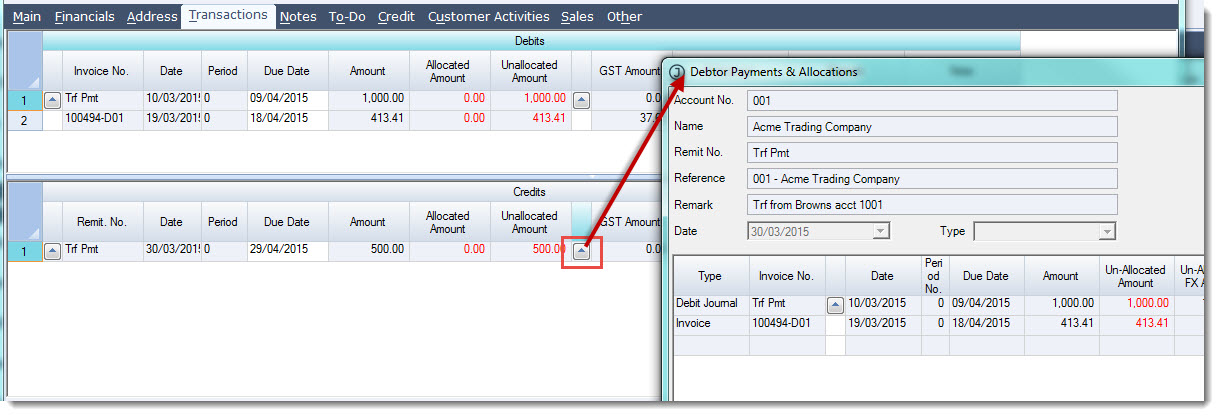
Move to the Transactions tab
Locate the credit or adjustment to be allocated
Click on the lookup icon next to the Unallocated Amount field on the required transaction to activate the Debtor Payments & Allocations form.
Allocate your payment by entering in the allocation amount against each transaction in the This Allocation Amount field
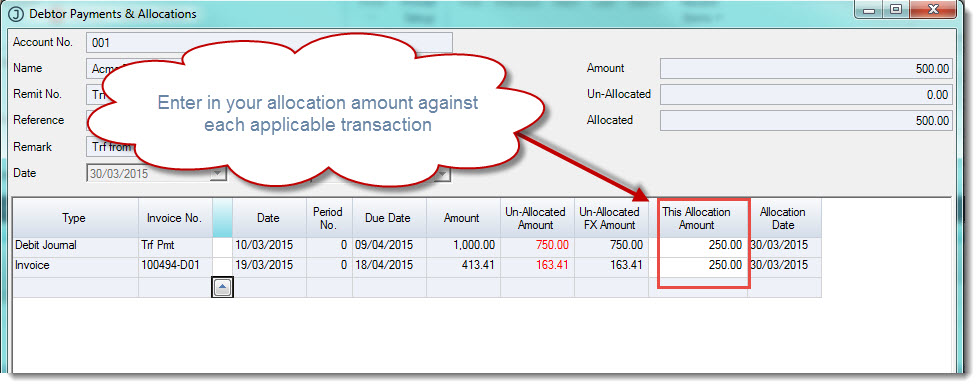
When you have completed your allocation select OK
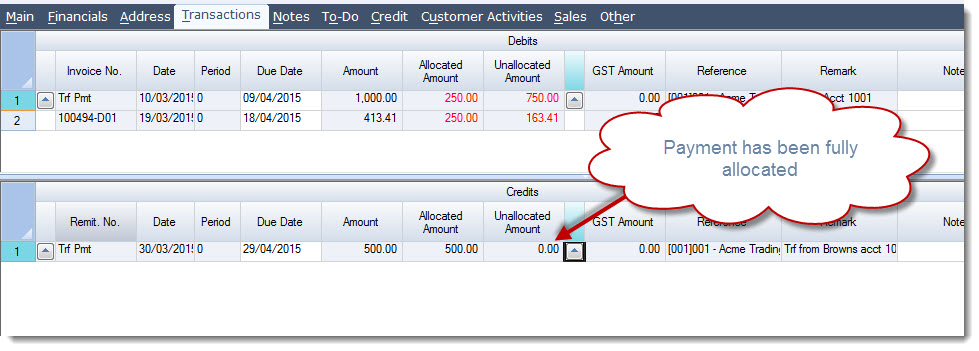
To save your allocation select Save from the menu ribbon.
Unallocating Transactions
A transaction can only be unallocated if it has not been aged out.
Load your required Debtor into the Debtor Maintenance form.
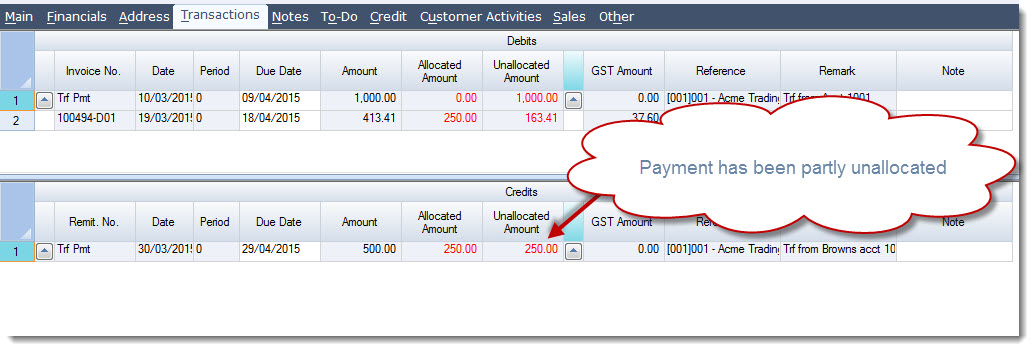
Move to the Transactions tab Locate the transaction to be unallocated
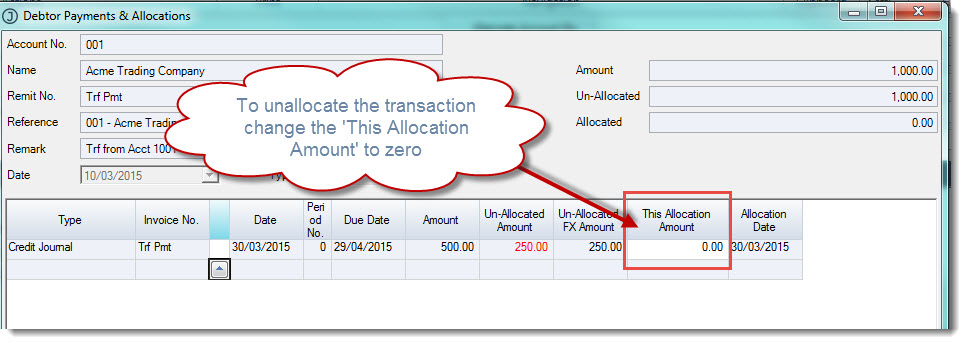
Click on the lookup icon next to the Unallocated Amount field on the required transaction to activate the Debtor Payments & Allocations form.
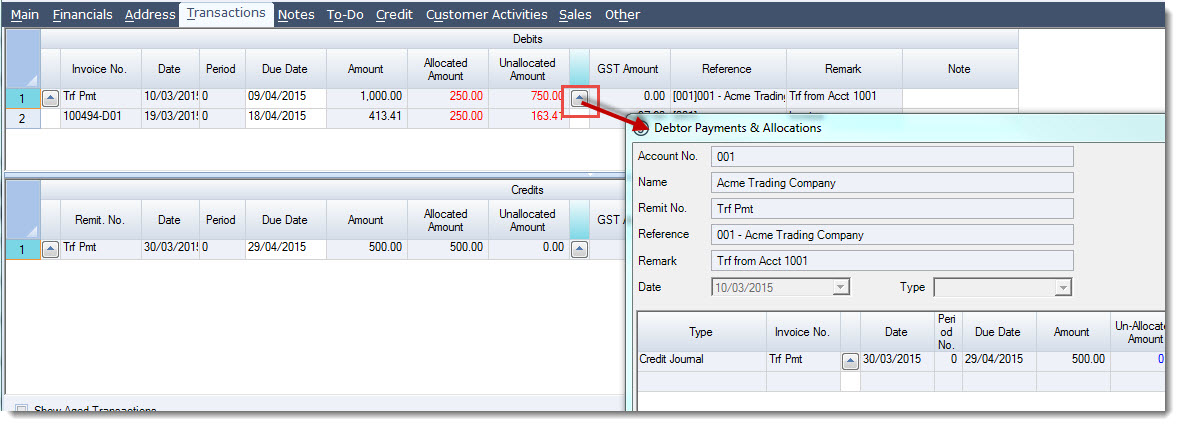
To change the allocation amount or to unallocate the transaction change the value in the This Allocation Amount field.
When you have completed your unallocation select OK
To save your unallocation select Save from the menu ribbon.
This video is best seen on the full screen. Just click on the icon at the bottom right of the video (see image below). To exit full screen just press escape