In this article we will look at how to receive Purchase Orders using ASPluris.
Purchase orders can be part received multiple times ASPluris will create the required GRN's or if the purchase order is linked to a shipment then the required Bookin's are created.
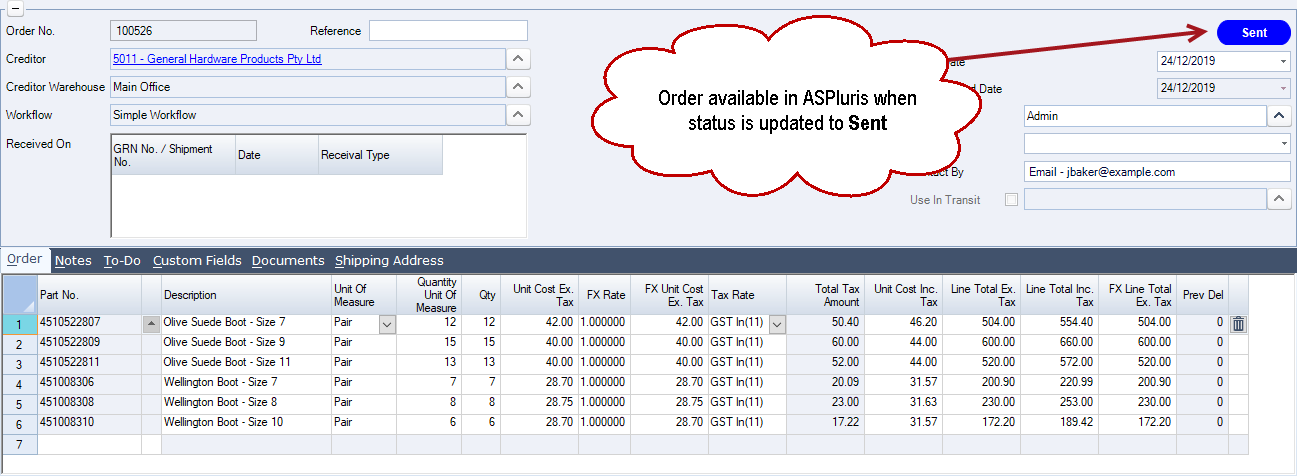
Create your Purchase Order in Jiwa, the order is not sent to ASPluris until the status of the order has been updated to sent.
Log into ASPluris on the scanner by double clicking on the ASPluris icon.
Select your user name and enter your password if prompted.
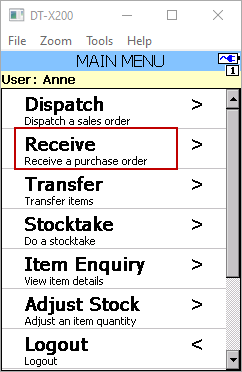
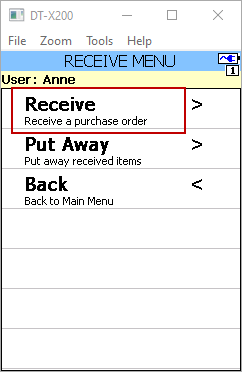
From the Main Menu select Receive
From the Receive Menu select Receive
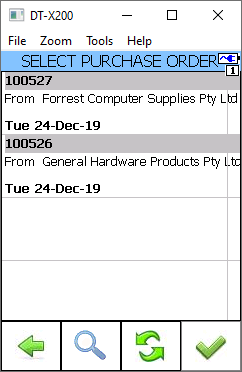
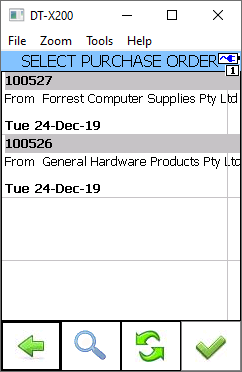
Select the order to be received from available list
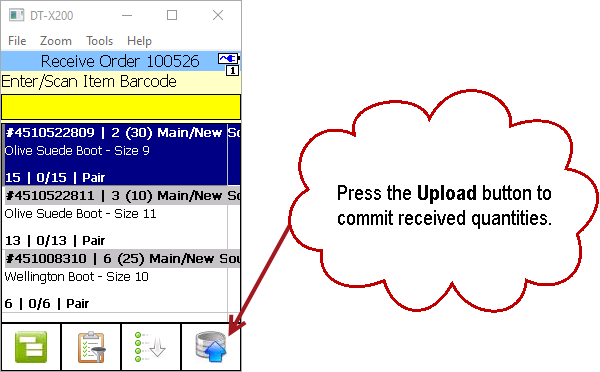
If bin tracking is used then the user will scan the bin location barcode first and then each product barcode that is going into the scanned bin.
Once the order is fully received the received quantities are automatically sent back to Jiwa.
If the order is only part received then the received quantities can be manually committed by pressing the upload button.
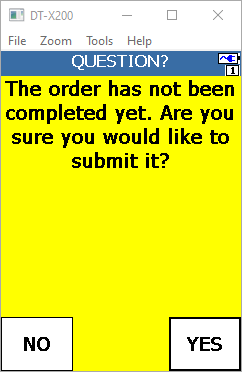
The following message is displayed letting the user know that the order is not complete.
Select OK
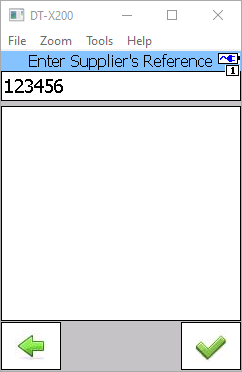
If ASPluris has been configured to prompt users to enter in a supplier reference then the following prompt is displayed before the order is committed.
Press the tick icon.
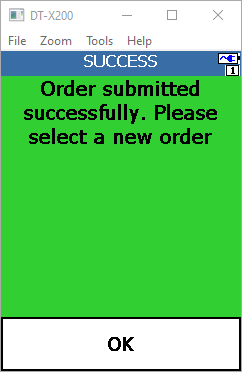
When the order has been submitted the following prompt is displayed.
Select OK and continue to the next order.
In Jiwa a GRN is automatically created and the purchase order details updated.

The GRN is automatically activate so that stock can be dispatched.
Note: ASPluris can be setup to create but not activate the GRN, requiring a Jiwa user to review and then active the GRN. This setting is controlled through the ASPluris configuration module.

Purchase orders continue to display in ASPluris until they are fully received or the purchase order status has been changed to Closed.