A stock take is used to compare the physical stock counted in the warehouse against the stock quantities recorded in Jiwa. This helps identify any differences and allows the required stock adjustments to be processed so that inventory records remain accurate.
Before starting a stock take, it is important to make sure the warehouse and Jiwa are both ready. We recommend completing the following preparation steps:
-
Ensure all stock received into the warehouse has been receipted into Jiwa, either through a Goods Received Note (GRN) or Shipment Book-In, and that the related transactions have been activated.
-
Process any outstanding sales orders that need to be completed before the stock take begins. Stock committed to a sales order that has not been processed may be excluded from the stock take, which is covered in more detail below.
-
Stop all transaction processing and physical stock movement in the warehouse until the physical stock count has been completed.
Print a list of Items on Unprocessed Sales Orders
When a stock take is created in Jiwa the the stock on hand displayed is the quantity on hand at the time the stock take is created and EXCLUDES stock allocated to unprocessed sales orders.
For this reason it is recommended that as many sales orders as possible are processed and dispatched before the stock take is started.
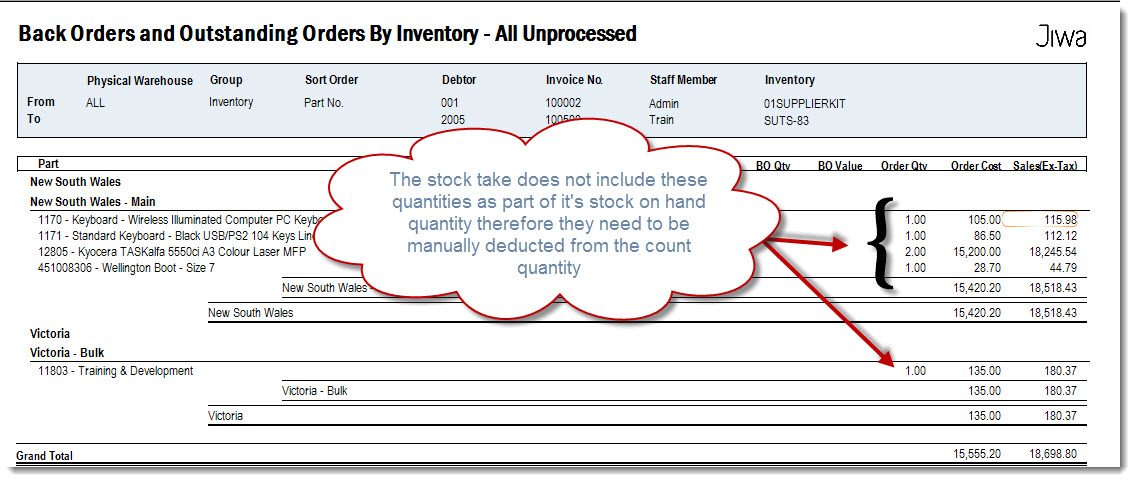
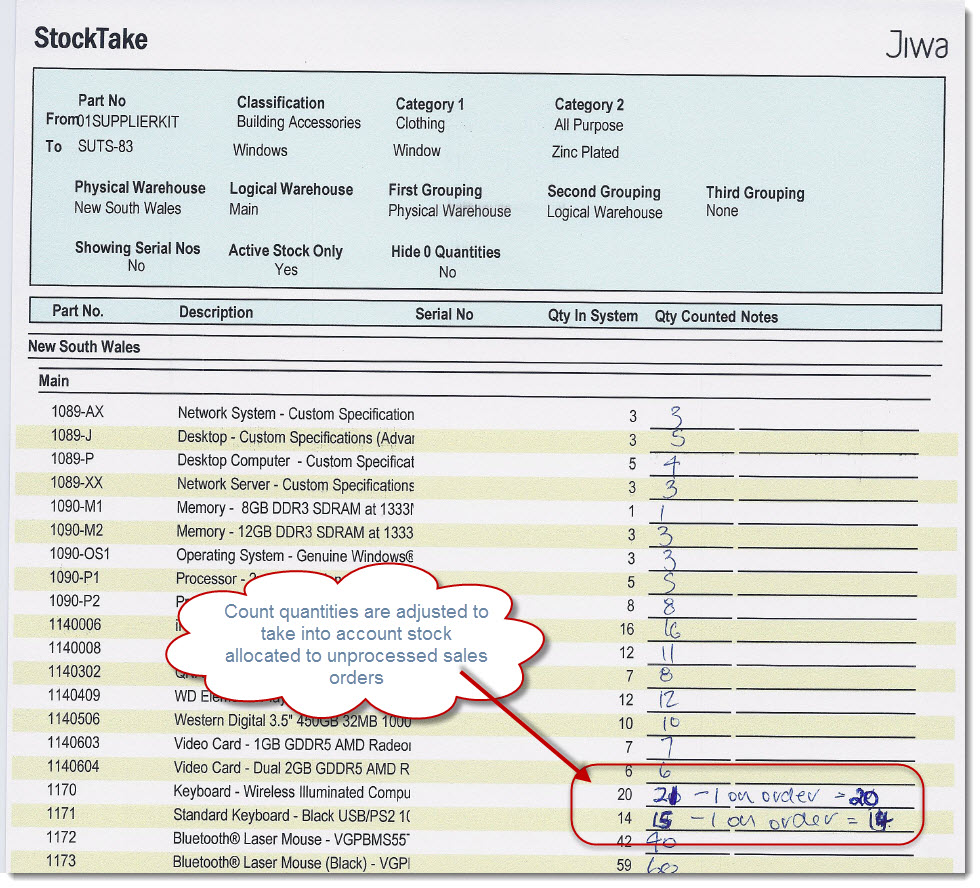
Before starting your stock take run the BackOrders and Outstanding Orders report this will give you a listing of stock allocated to unprocessed sales orders that needs to be taken into account when entering your count into the system.
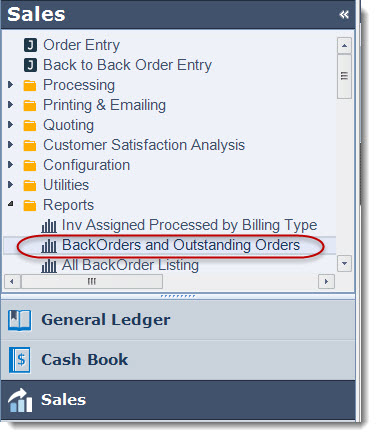
Select Sales > Reports > BackOrders and Outstanding Orders
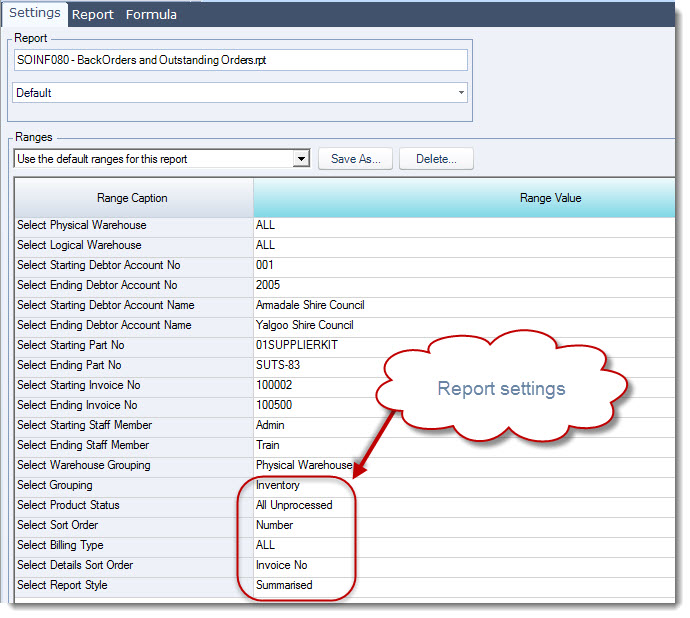
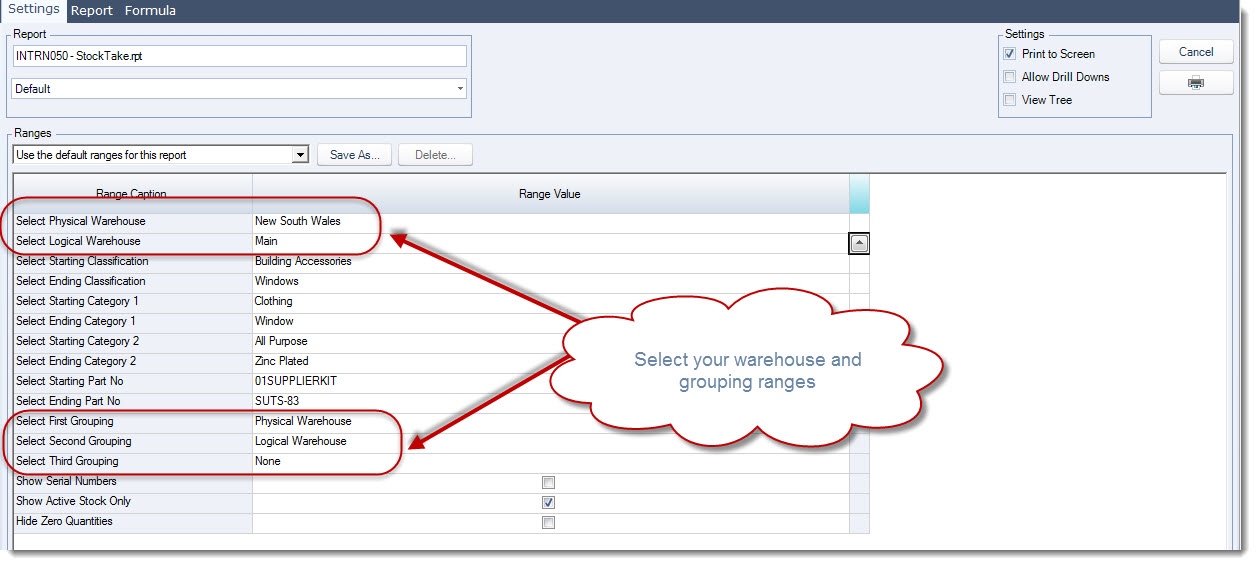
Set your report ranges as follows as per the example below;
Print the report and set aside as this report will be required when keying in your stock take count into Jiwa.
Your count quantity must be manually adjusted by the Order Qty shown on this report.
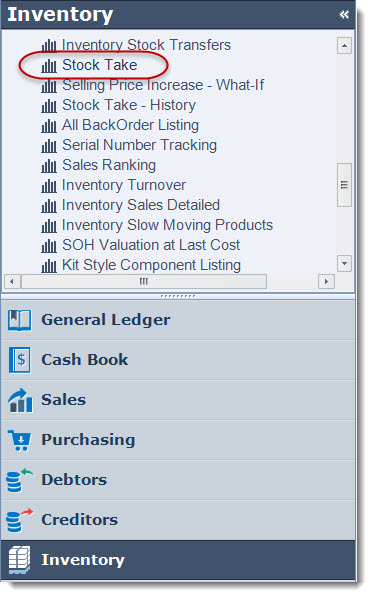
Create New Stock Take
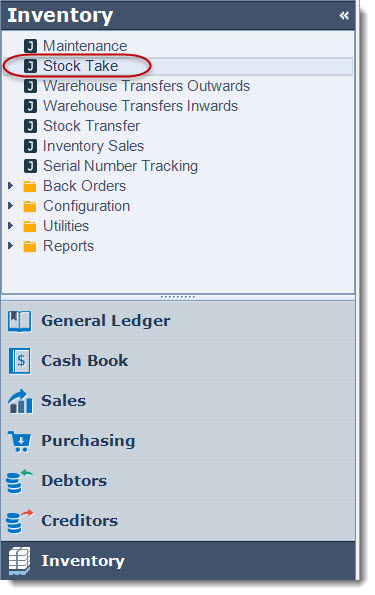
Select Inventory > Stock Take
From the menu ribbon select New

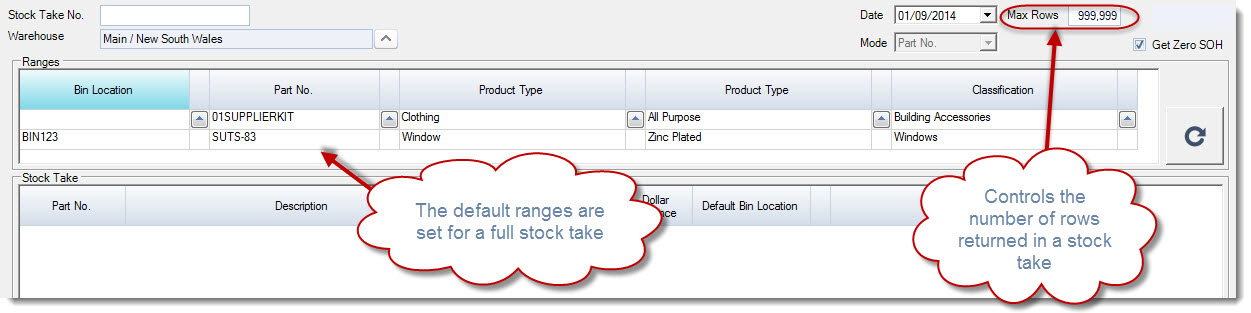
Confirm the warehouse your are completing a stocktake for and set your ranges.
|
Field |
Description |
|
Stock Take No. |
This will be automatically set when you save your stock take for the first time |
|
Warehouse |
Confirm the warehouse the stock take is for |
|
Date |
Stock date date, this is also the date that will be used on any stock transfers that are created once the stock take is activated |
|
Mode |
This field is only activated if bin tracking has been turned on |
|
Max Rows |
This field controls the number of rows that are displayed in the stock take if you are completing a full stock take then it is recommended that this is set to 999,999 to ensure all items are picked up in the stock take. |
|
Get Zero SOH |
This check box controls where items with stock on hand of zero are displayed in the stock take or not. |
Define your stock take ranges, this controls what items are to be included in your stock take and can be used to complete partial stock takes based on the criteria displayed.
The default ranges are set for a full stock take
Once you have confirmed your stock take setting click on the Go icon next to your ranges

Once Go has been clicked you will notice that the stock take grid is populated.
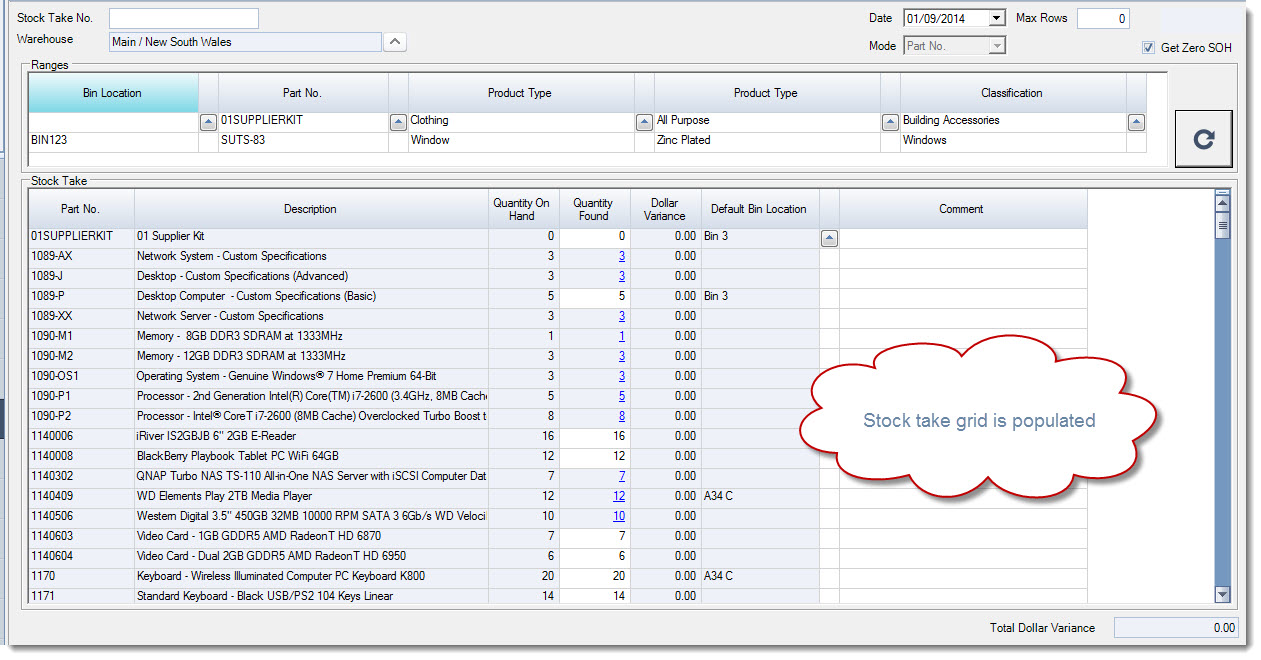
Save your stock take
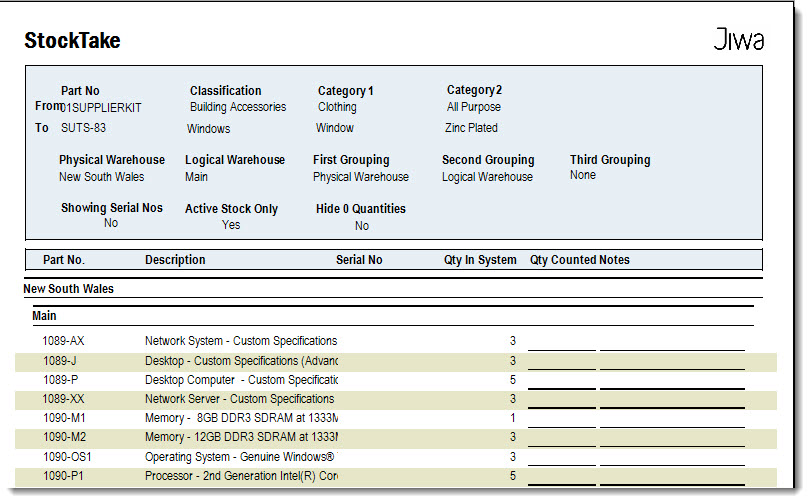
Print the Count Sheets
Select Inventory > Reports > Stock Take
Set your reporting ranges
Print your count sheets
Count Your Stock
Complete your physical stock take. Once the stock take has been completed the count sheets should be verified before they are processed.
Adjust Your Count Sheets
Once the count sheets have been verified the quantities counted should be adjusted.
The quantities reported in the BackOrders and Outstanding Orders report printed at step 1 should be deducted from the counted quantities reported on the stock take count sheets.
Enter in the Count
Enter in your adjusted counted quantities into Quantity Found field on the stock take form
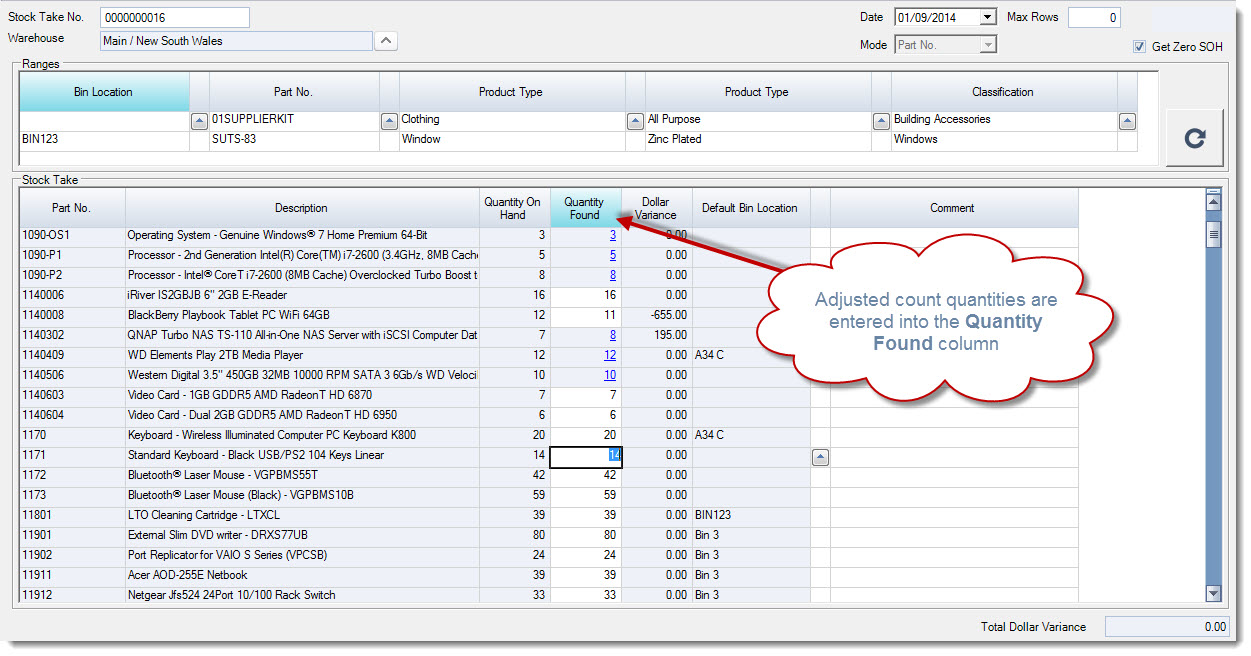
You will notice that the Quantity Found field is sometimes greyed out but the quantity is in blue, this means that the item is either serial or batch tracked.
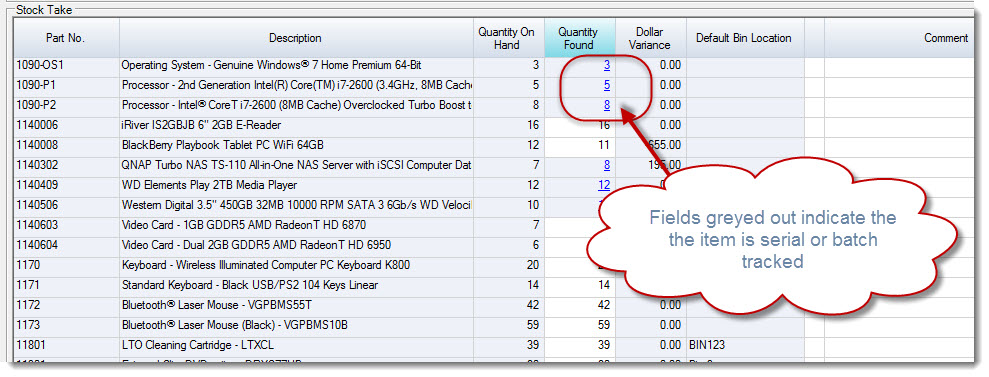
To update a serial or batch tracked item click on the Quantity Found field, this will activate the Line Details form where quantities can be changed.
To INCREASE the quantity found add a new line with a positive amount in the Quantity on Shelf field for serial tracked items.
For batch tracked items update the Quantity on Shelf against the relevant batch or create a new line if the batch is not listed.
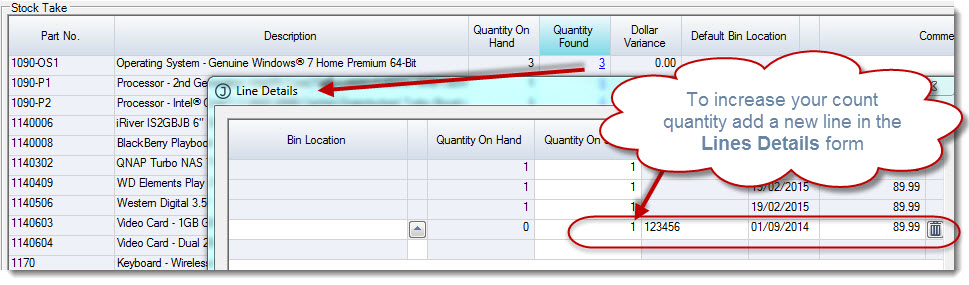
Select Save once you have completed your changes
To DECREASE the quantity found update the Quantity on Shelf field against the respective serial / batch number

Select Save once you have completed your changes
Continue entering in your count quantities until completed.
Save your stock take.
Review your variances to ensure their accuracy, at the bottom of the stock take form the Total Dollar Variance is displayed.
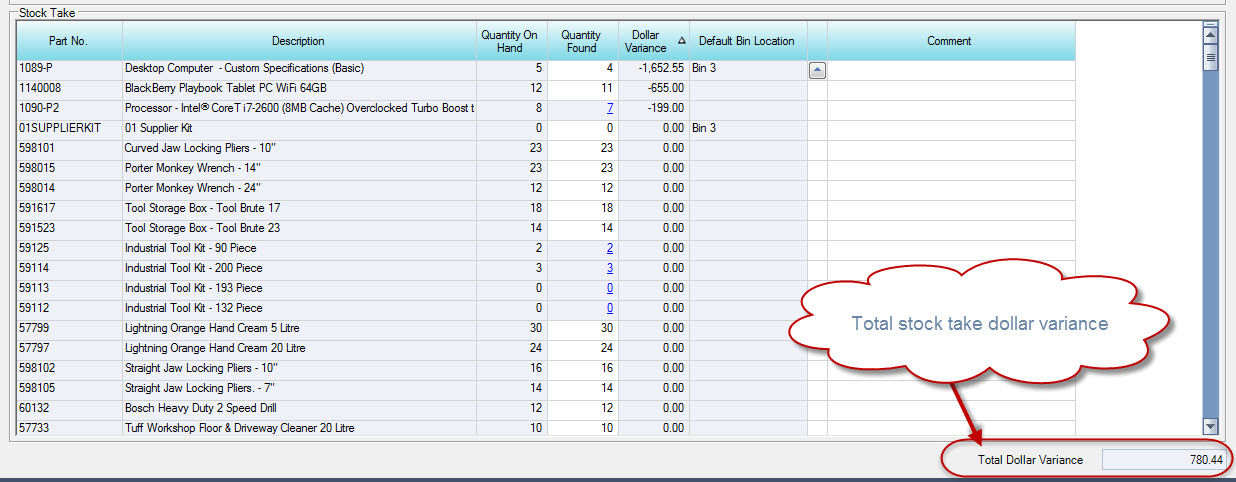
Continue to correct your count quantities until you are happy with the variance.
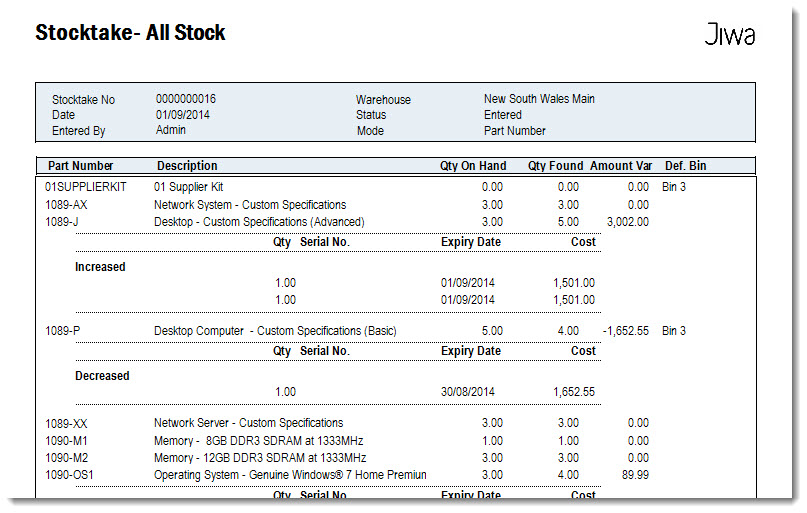
Print the Stock Take Variance Report
Depending on your business process the stock take variance report can be run before or after the actual stock take has been activated.
From the Printer icon on the menu ribbon select Stocktake - All Stock

Activate your Stock Take
Once your stock take variance report has been accepted the stock take can be activated to update the stock ledger.
If there have been stock movements in Jiwa between the stock take being created and activated the following message will be displayed:
Stock reductions have occurred since this stock take was created. Quantity on Hand and Quantity Found have been adjusted to current stock levels
Review the changes that have been completed before saving and activating the stock take.
Note: This does not include the processing of sales orders reported in step 1 above.