In this article we will look at how to add parts and labour to a service job.
Before proceeding please ensure that you have reviewed our article Jiwa Service Manager - Creating Service Jobs
Parts and labour can be added to a service job either from a quote or manually entered against the relevant task.
Before adding parts to a service job task ensure that your current warehouse is the warehouse you want the parts to be taken from.
Importing from a Quote
Before a service job is started or even created you may have issued your customer a quote for the installation or repair work.
Once the quote is accepted by the customer, the quote components can be imported into your newly created service job.
Load your job into the Service Job form.
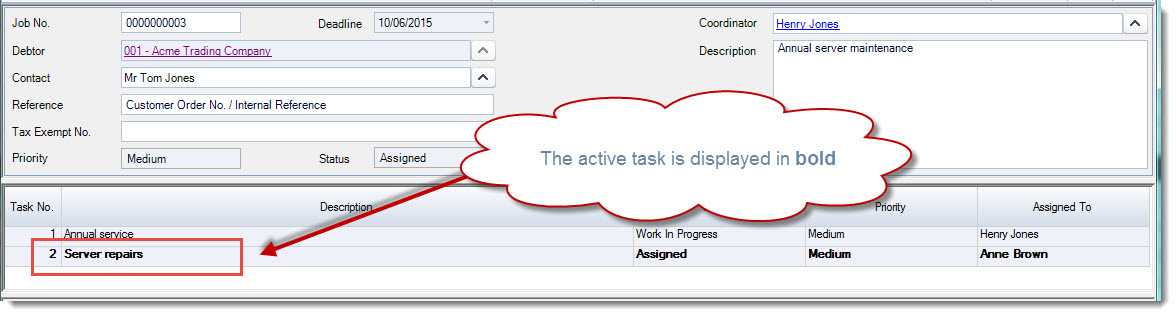
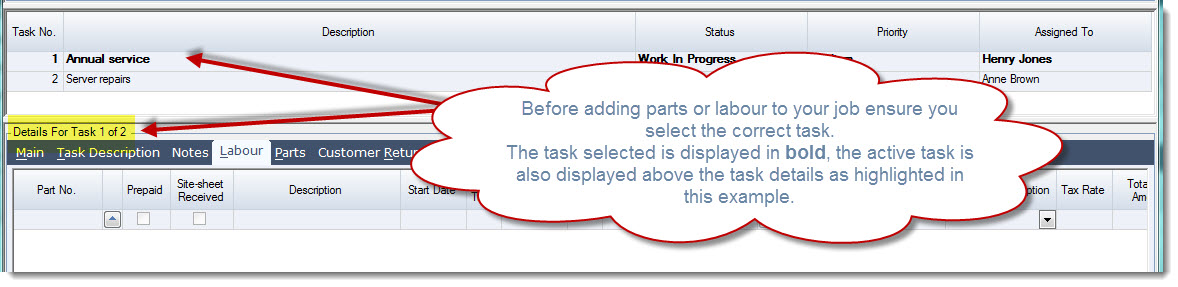
Click on the task that the quoted items will be imported into you task should now be in bold indicating that this is the active task.
Remember parts and labour are task specific so you need to ensure that the quote is imported into the correct task.
From the menu ribbon click on the Utilities tab
Then click on the Import From Quote button this will activate the Search Quotes form.
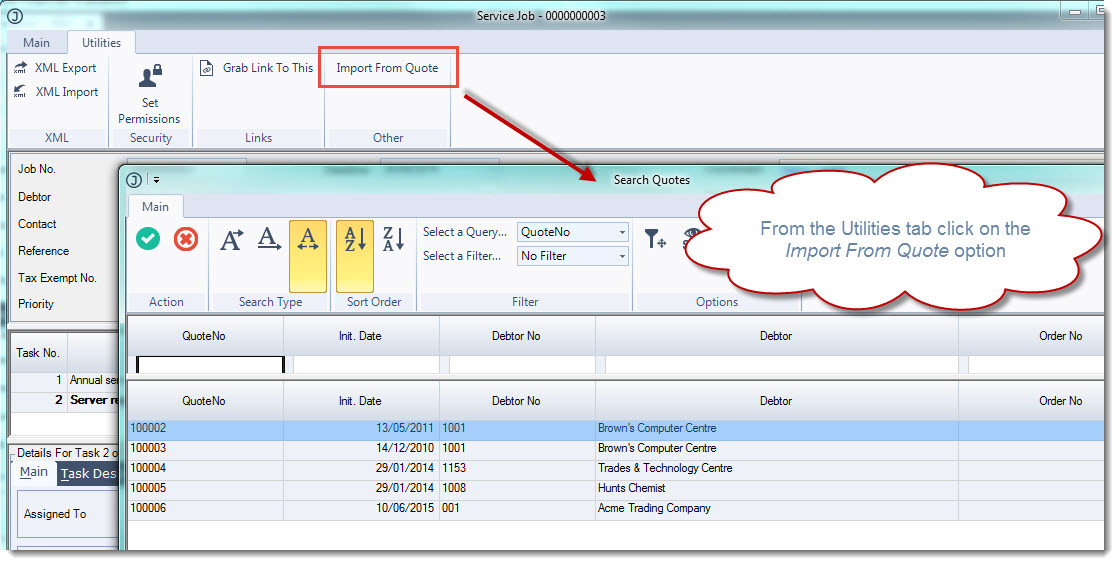
Select the required quote from the search form and press Save
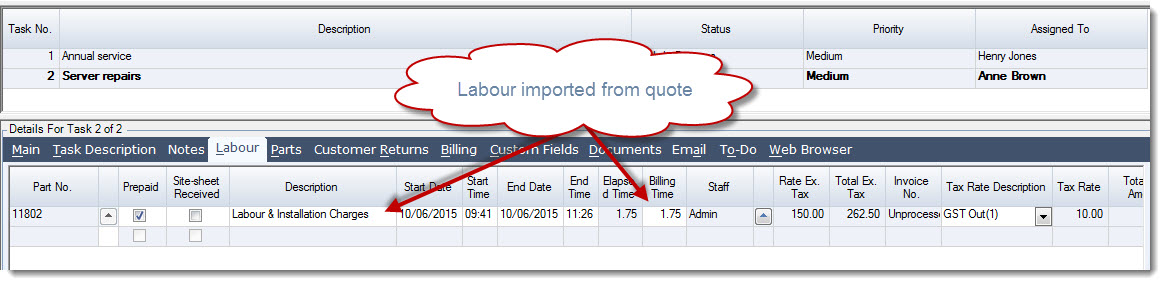
Move to the Labour tab and you will notice that the labour part on the quote has been imported into the service job task.
On the Parts tab you will notice that parts on the quote have now been imported into the service job task.
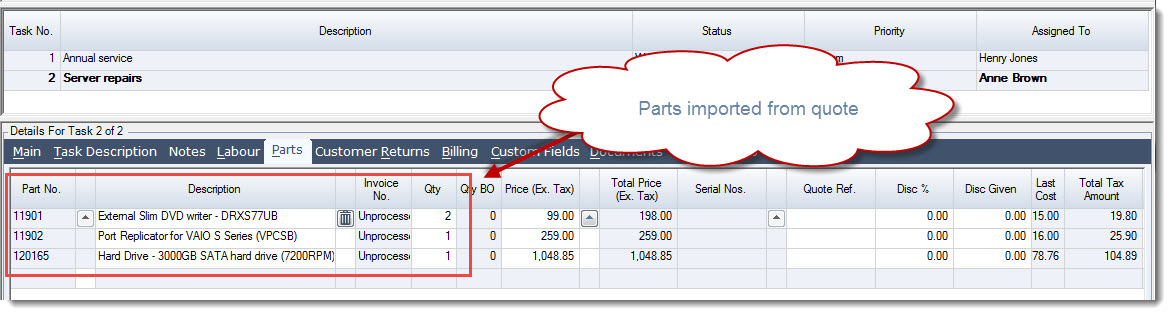
From the menu ribbon select Save to record your changes to the service job.
Entering Labour & Parts Directly
Adding Labour to Tasks
Before you start to add labour to your service job first select the task that the labour hours are to be added to.
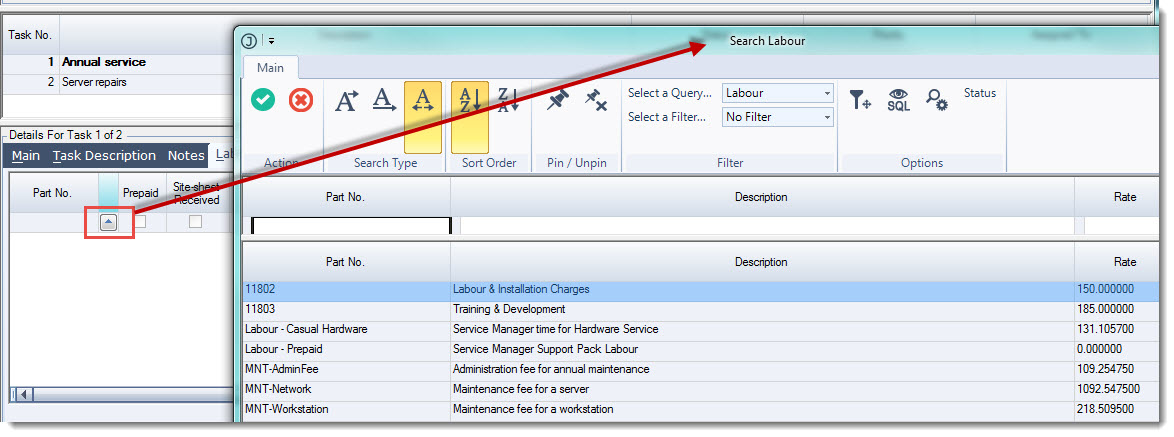
To add labour to the service job click on the Labour tab
Click on the lookup icon next to the part number field to bring up the Search Labour popup.
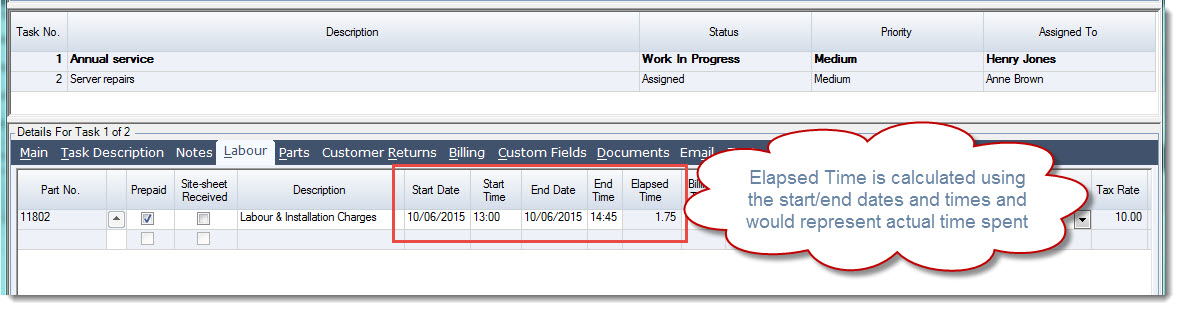
Enter in the start/end dates and times this will calculated the Elapsed Time.
This would typically represent the actual time spent by the technician which can be different to the actual time that will be billed to the customer.
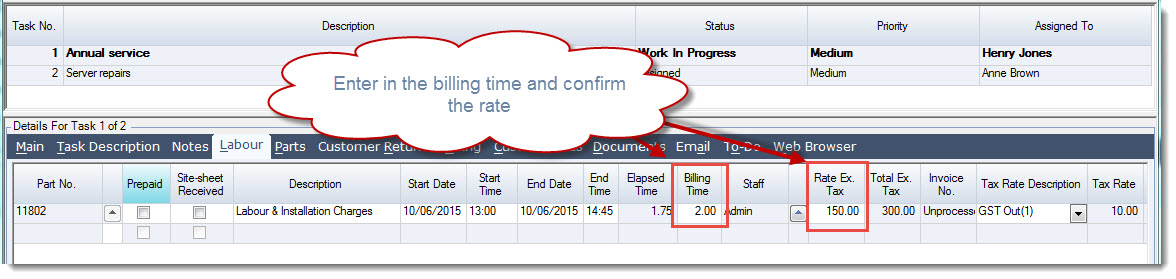
Enter in the time to be billed in the Billing Time field
Confirm the billing rate
From the menu ribbon select Save to record your changes to the service job.
Fields Defined
|
Field |
Description |
|
Part No. |
Labour part number. Non-inventory parts belonging to an inventory classification containing the word Labour are displayed on the part number search form. |
|
Prepaid |
This field is only applicable if you are using Prepaid Labour Packs. The field is ticked automatically if prepaid labour is available, if all prepaid labour has been exhausted then this field will be un-ticked by default. When this field is ticked it indicates that labour hours will be deducted from the available prepaid labour pack/(s) on a first in first out basis. The rate field becomes non-editable and the rate defaults to zero. If a prepaid labour pack is linked to the task on the Task main tab then labour hours will be deducted from from the selected labour pack. |
|
Site-sheet Received |
Check box indicating that the site-sheet or job time entry sheet has been received. |
|
Start Date / Time |
Labour actual start date and time. Times must be entered in a 24 hour format for example 1.00pm should be entered as 13.00 |
|
End Date / Time |
Labour actual end date and time. Times must be entered in a 24 hour format for example 1.00pm should be entered as 13.00 |
|
Elapsed Time |
This is a read only field and displays the difference between the start/end dates and times |
|
Billing Time |
The hours to be billed to the customer or deducted from prepaid labour |
|
Staff |
This field will automatically default to the person logged into Jiwa entering the time This field should be changed to the staff member that actually performed the task |
|
Rate Ex. Tax |
The billing rate per hour excluding GST. The value in this field will default to zero if hours are being deducted from prepaid labour |
|
Invoice No. |
This field is updated with the sales invoice number when the labour hours are processed to a sales order |
|
Prepaid Labour Pack |
Displays the prepaid labour pack/(s) that the labour is deducted from if applicable. |
|
Cost |
The last cost assigned to the labour part number |
Adding Parts to Tasks
Before you start to add parts to your service job first ensure that your current warehouse is the warehouse that the parts are to be drawn from.
Select the task that the parts are to be added to, the current task will be in bold
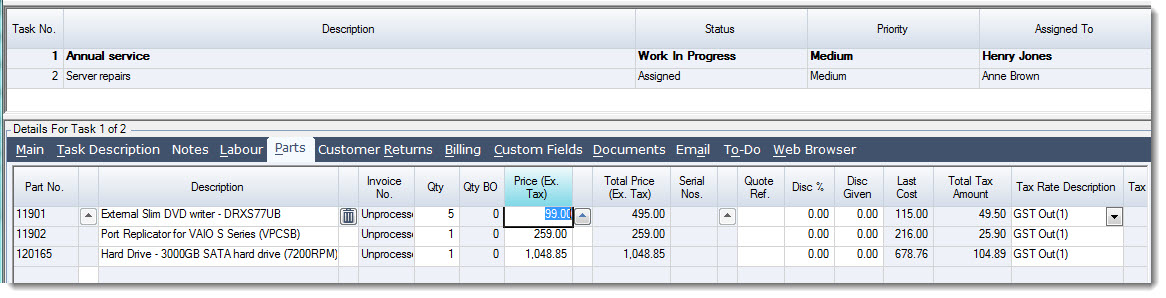
To add parts to the service job click on the Parts tab
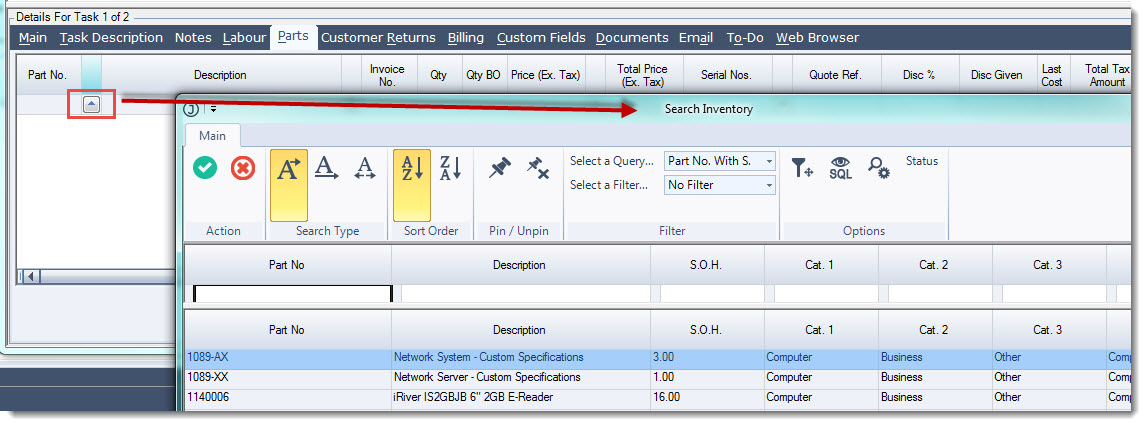
Click on the lookup icon next to the part number field to bring up the Search Inventory popup.
Enter in the quantities used and confirm the price if required.
From the menu ribbon select Save to record your changes to the service job.
Fields Defined
|
Field |
Description |
|
Part No. |
Inventory part number used on the service job task |
|
Description |
Item description that will appear on the sales invoice, this description can be edited if required. |
|
Invoice No. |
This is a read only field and is updated with the sales invoice number when the line has been processed to a sales order |
|
Qty |
Quantity used |
|
Qty BO |
Back order quantity if stock is not available to fill the required quantity |
|
Price (Ex. Tax) |
Unit price applicable to the Debtor (Customer) |
|
Serial No.s |
Serial numbers selected if the part is a serialised item |
|
Quote Ref. |
Free form text field |
|
Last Cost |
The last cost against the master file at the time the part was added to the task |