In this article we will be looking at how to raise a manual purchase order in Jiwa.
Creating Purchase Orders
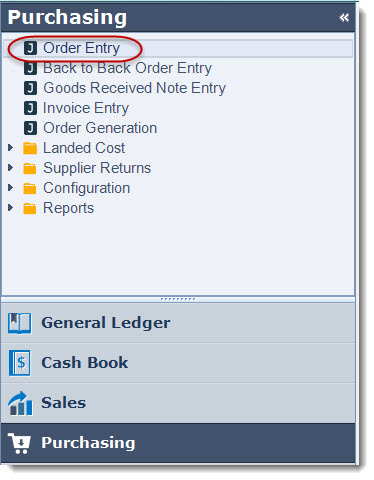
From the menu select Purchasing | Order Entry
Before creating your new purchase order make sure you are working with the correct warehouse as you will not be able to change the warehouse on the purchase order itself.

From the menu ribbon select New > Supplier Purchase Order

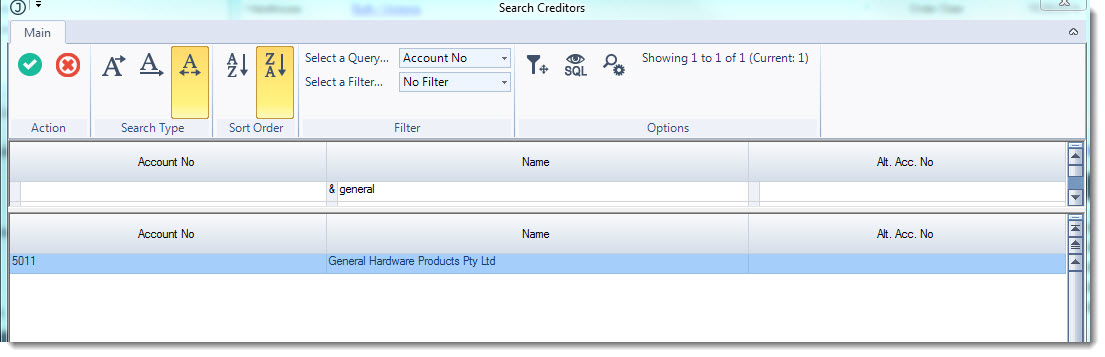
The Creditors search screen will appear
Select your creditor
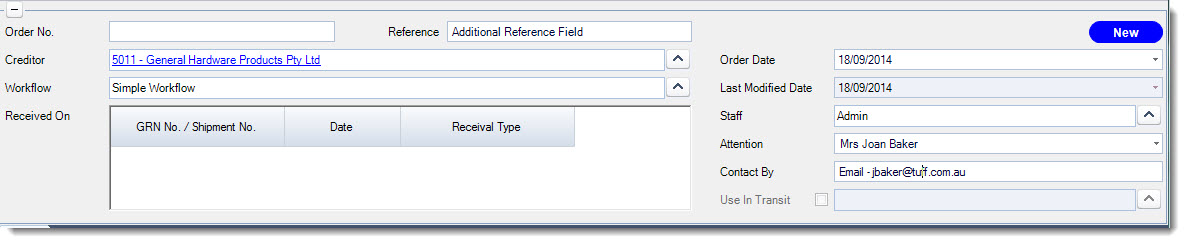
Purchase Order Header
The purchase order header information provides you with key information about the order.
|
Field |
Description |
|
Order No. |
The order number is automatically applied to the order when the purchase order is first saved |
|
Reference |
Additional reference field if required |
|
Workflow |
Automatically populated from the Creditor master file however can be manually overridden if required. For further details on the available options please discuss your requirements with your Jiwa Consultant. |
|
Received On |
This section is automatically populated with the GRN or Book-In references when stock is received into Jiwa |
|
Order Date |
Automatically populated however can be changed if required |
|
Last Modified |
Date the purchase order was last changed, this field is automatically populated and cannot be edited |
|
Attention |
This field can be manually populated or you can select from the available contacts against the creditor |
|
Contact By |
The creditors email address is automatically populated into this field but can be overridden if required |
Purchase Order Tabs
|
Tab |
Description |
|
Order |
Inventory and non-inventory items are added to the purchase order on the Order Tab |
|
Notes |
Notes specific to the purchase order are added on this tab |
|
ToDo's |
Action items specific to the purchase order are added on this tab |
|
Custom Fields |
Additional information captured in custom fields are maintained on this tab |
|
Documents |
Documents and emails specific to the purchase order can be added to this grid by either attaching the document or using the Windows drag and drop function to add documents to this tab. These documents are stored in the Jiwa database. Documents can be extracted, opened or emailed from this tab. |
|
Shipping Address |
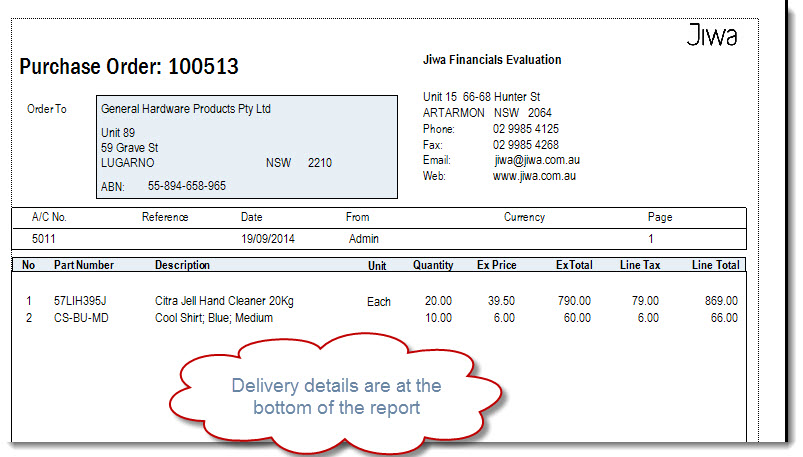
The shipping details are automatically populated into this tab from the warehouse that the purchase order is being raised against but can be manually overridden if required. This is also the Deliver To address that appears on your purchase orders report. |
Order Tab
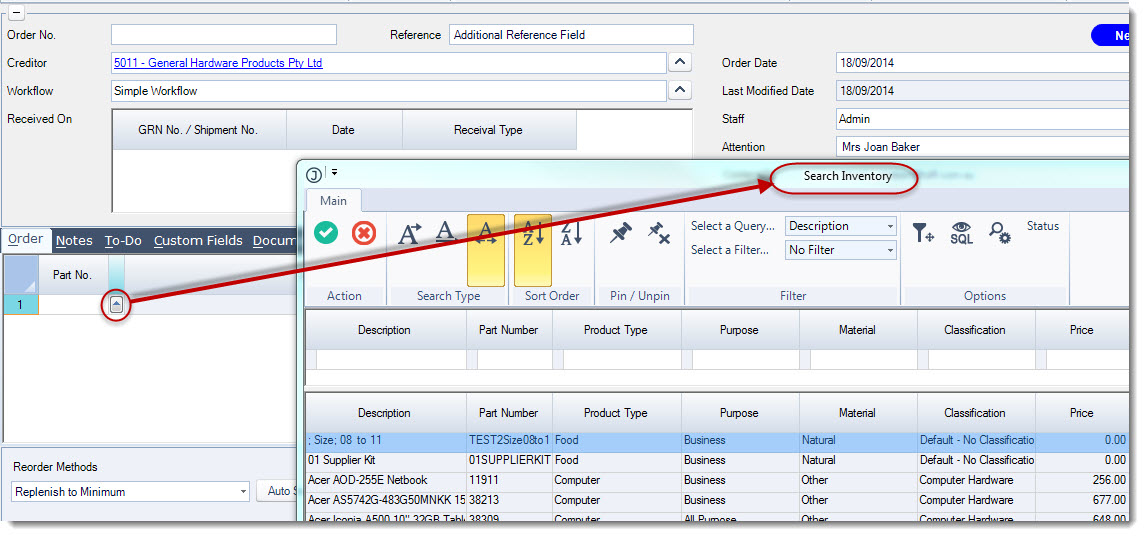
Enter in the parts to be ordered in the Order tab by either keying in the part number in the Part No field or selecting the lookup icon next to the field to bring up your Inventory Search form.
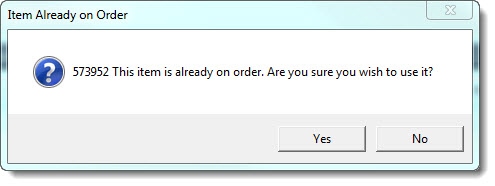
If the item you have selected is already on another purchase order the following pop-up will appear.
If the item has not been ordered from the selected supplier before the following pop-up message will appear.
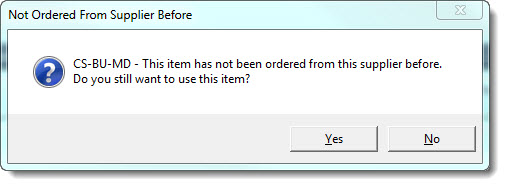
To continue select Yes
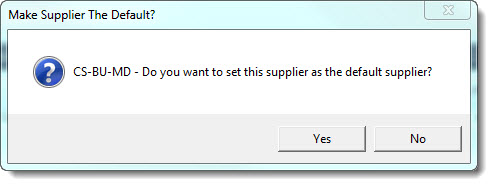
As this is a new supplier the selected part is being ordered from Jiwa will ask if you want to make this new supplier the Default supplier.
Selecting Yes will update the inventory item and set the new supplier as the default supplier when the purchase order is saved
Selecting No leaves the default supplier unchanged on the inventory record
The Replenish to Minimum pop-up will appear for each item selected.
This allows you to let Jiwa determine your order quantities based on the parameters you have selected.
If you do not want Jiwa to calculate a re-order quantity based on these settings simply select Cancel.
If you select OK the order quantities can still be change manually if required.
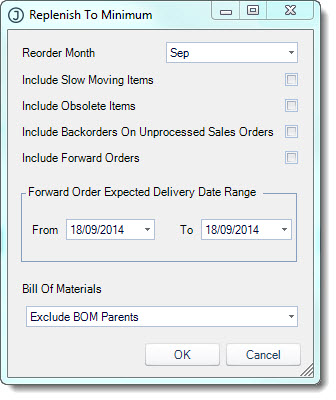
Set your order quantities and confirm the purchase price.

Order Totals
The total order value, cubic and weight measurements if applicable are displayed in the totals grid on the Orders tab.

Finalising your Purchase Order
Once you have completed your order press Save from the menu ribbon, at this point the order number will be applied.
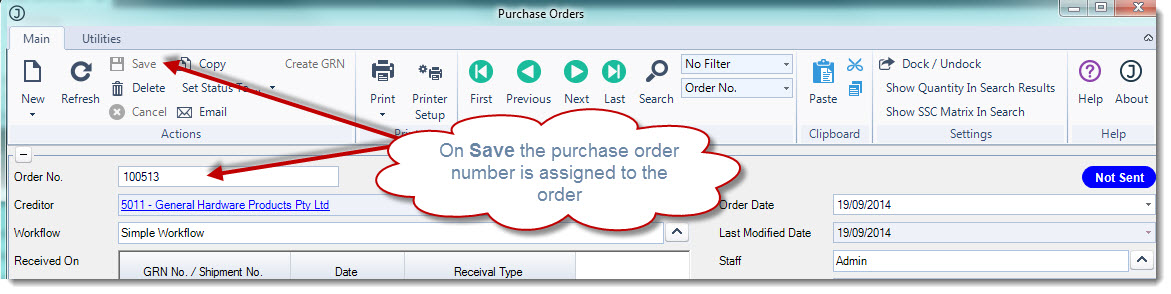
At this stage the status of the purchase order is Not Sent when your order is finalised and ready to be sent to the supplier change the status of the purchase order to Sent
From the menu ribbon select Set Status To > Sent

The status of the purchase order will be changed to Sent

Even though the status of the purchase order is now Sent the order can still be changed/modified until such time as stock is received against the order
To print your order from the menu ribbon select the Printer icon and then the purchase order report you want to use

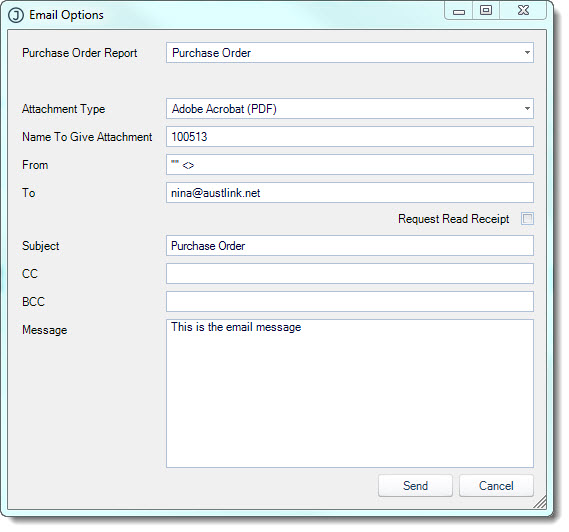
To email your order from the menu ribbon select Email
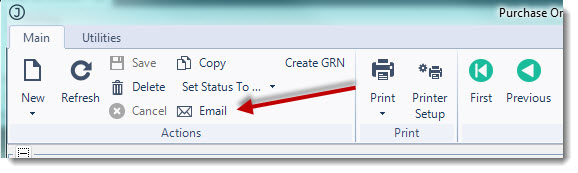
This will activate the Email Options window were email addresses and messages can be changed before the email is sent.