In this article we will be looking at printing Debtor statements.
Debtor statements can be printed either individually or in bulk, this article looks at both methods.
Individual Statements
Individual statements can be printed directly from the Debtor Maintenance form.
Load the required Debtor account into your form.
From the menu ribbon select Print | Debtors Maintenance Statement
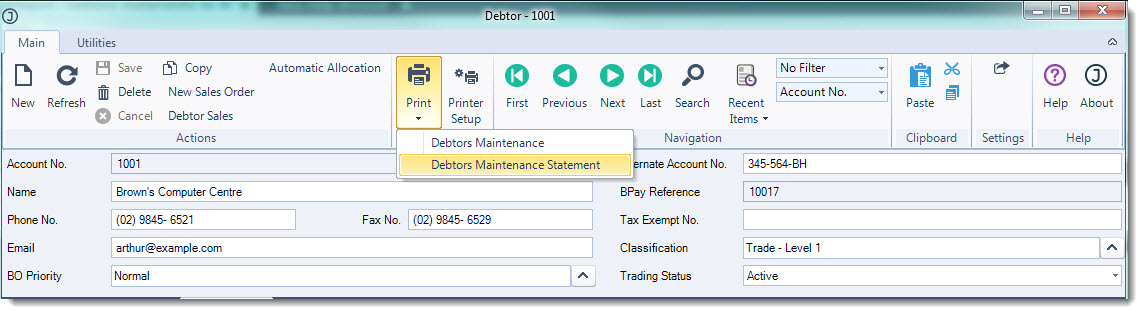
The statement will be printed to screen.

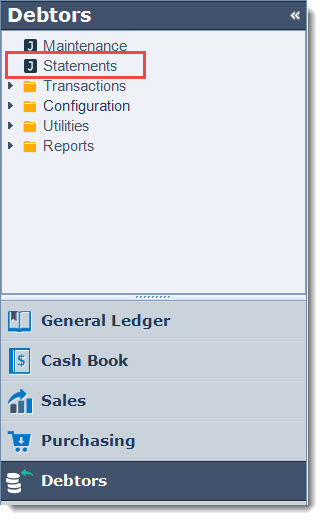
Bulk Statements
From the menu select Debtors | Statements
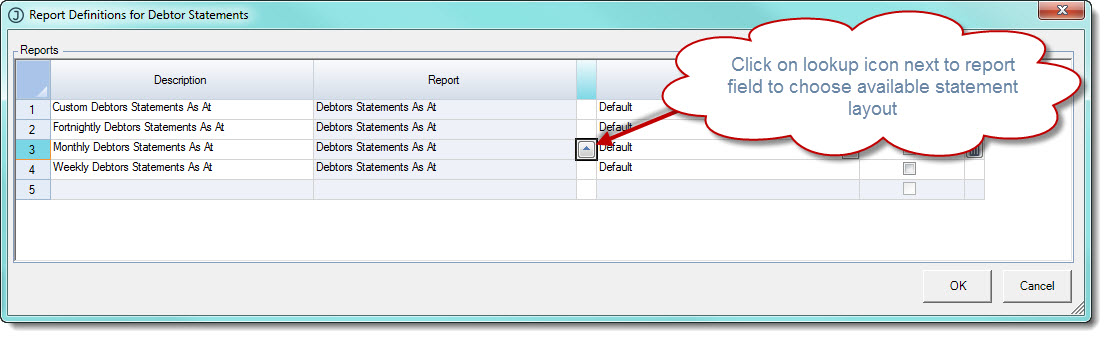
To check or change the statement layout click on the Printer Setup icon from the menu ribbon.

From here we can confirm or change which statement report layout is going to be used for the required statement period.
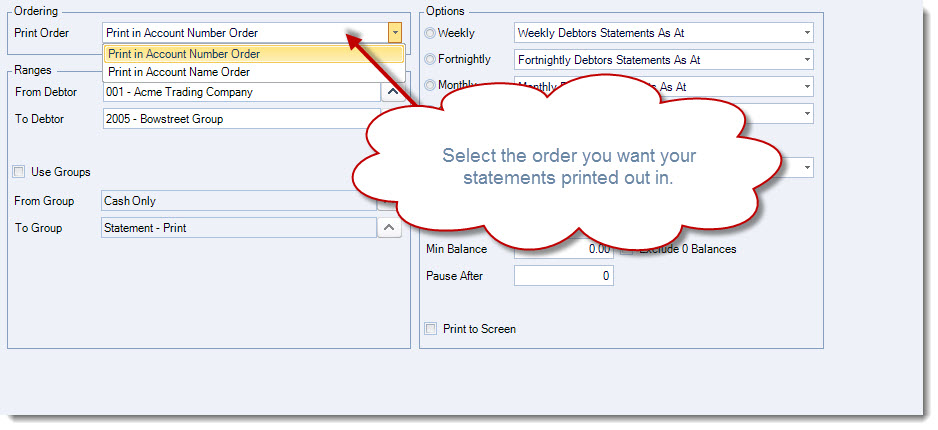
Begin by selecting the required printing order
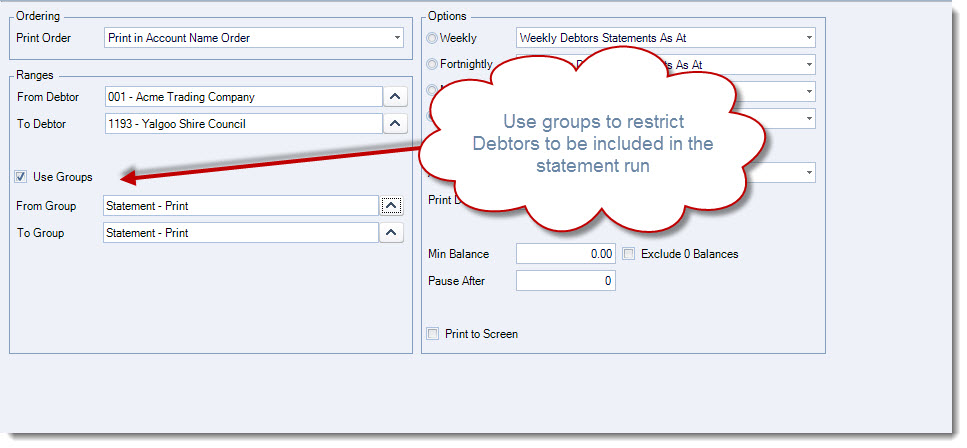
Set Ranges to restrict which Debtor statements are to be printed by either selecting the from/to Debtors or using the groups filter.
Contact Groups are useful as they can be used to restrict the debtors to be included in the statement print run, for example you may have Debtors belonging to the one or both of the following contact groups;
-
Statement - Print
-
Statement - Email
Refer to our article Jiwa Debtors - Emailing Statements for further details in how contact groups can be used in statement runs.
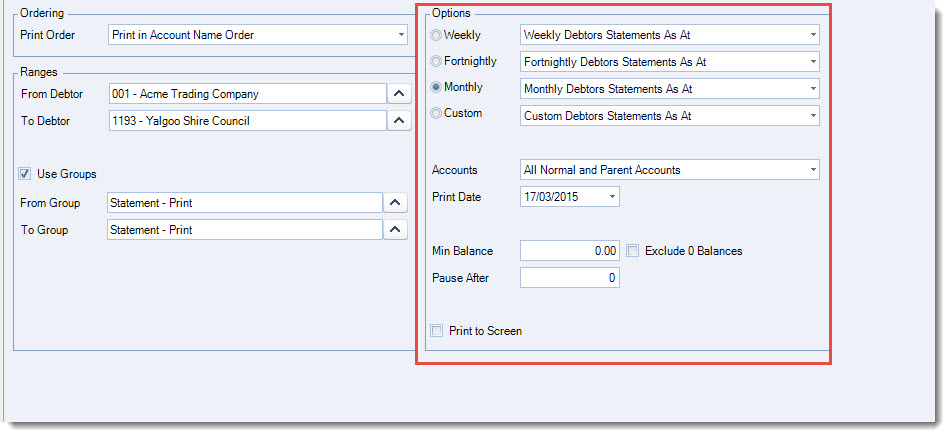
Set the required Options
|
Option |
Description |
|
Statement Period |
Select the statement period to be run available options are Weekly / Fortnightly / Monthly / Custom |
|
Accounts |
If you have parent and child (head office / branch) Debtor accounts set up this option allows you to print Debtor statements for either the parent account or just the children accounts. |
|
Print date |
This is the statement print date and will be the date that appears on your statements. This date also restricts the transactions that will appear on the statement when the Debtors Statement As At report is used. |
|
Min Balance |
Enter in a minimum statement balance. To produce statements with credit balances set the minimum balance to the highest Debtor credit balance, for example if you have a Debtor with a credit balance of $500 then enter in -500 in this field |
|
Exclude 0 Balance |
Check this box to exclude statements with a zero balance from the run |
|
Pause After |
Any value entered into this field will pause the statement run to allow other jobs to print. |
|
Print to Screen |
When ticked statements will be printed to screen first |
When you have completed setting the required options select Print from the menu ribbon to print out your statements.

This video is best seen on the full screen. Just click on the icon at the bottom right of the video (see image below). To exit full screen just press escape