Credit notes for stock are used in Jiwa when inventory items need to be credited back to a customer. This may occur when stock is returned, supplied incorrectly, damaged, or where a stock-related sales credit needs to be issued.
This article explains the two methods for creating stock credit notes in Jiwa: creating a credit note from an existing sales order, or creating a credit note manually.
Using the correct method helps ensure that customer balances, inventory quantities, and related financial postings are updated accurately.
Credit Note Based on an Existing Sales Order
Open your Sales Order Entry form
From the menu ribbon select New | New Credit Note
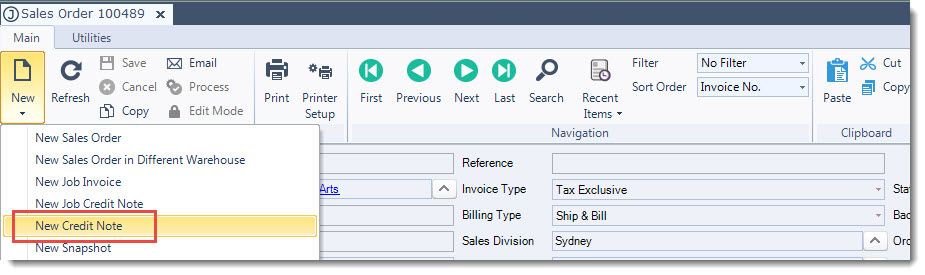
At the New Credit Note pop-up select Yes

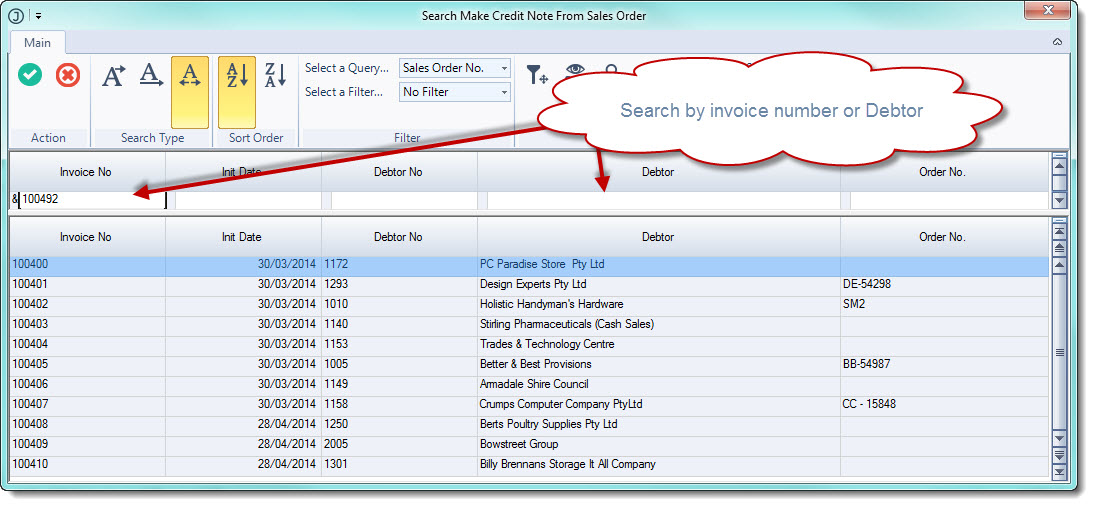
From the Make Credit Note From Sales Order search pop-up select the invoice you want to raise a credit note against, or search by Debtor.
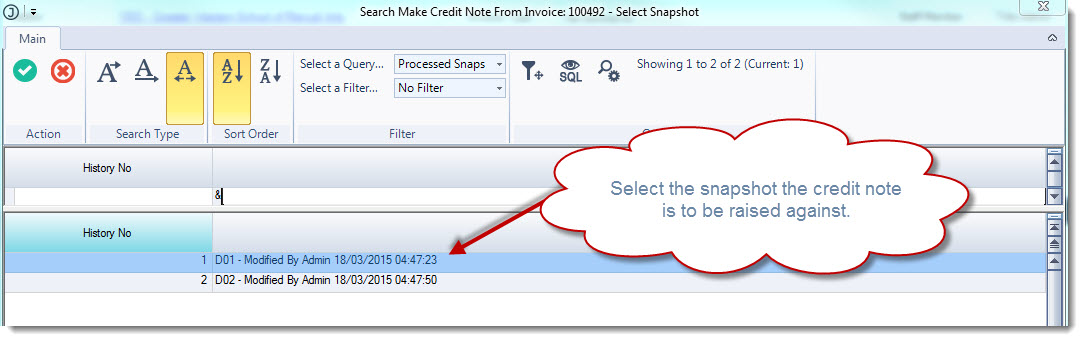
From the Make Credit Note From Invoice xxxxx - Select Snapshot search pop-up select the snapshot to be credited.
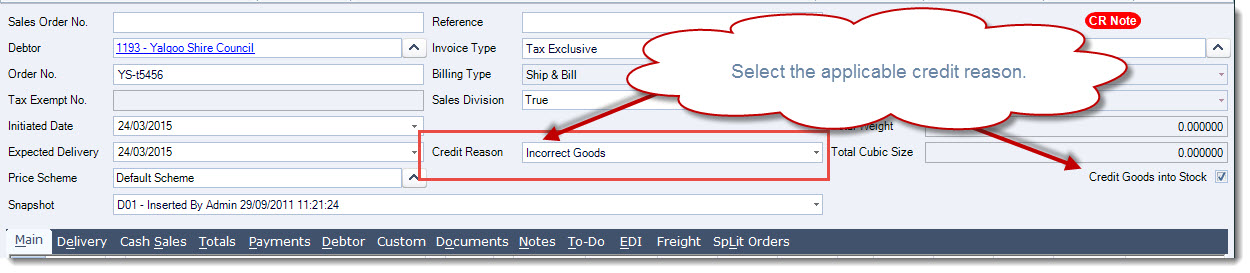
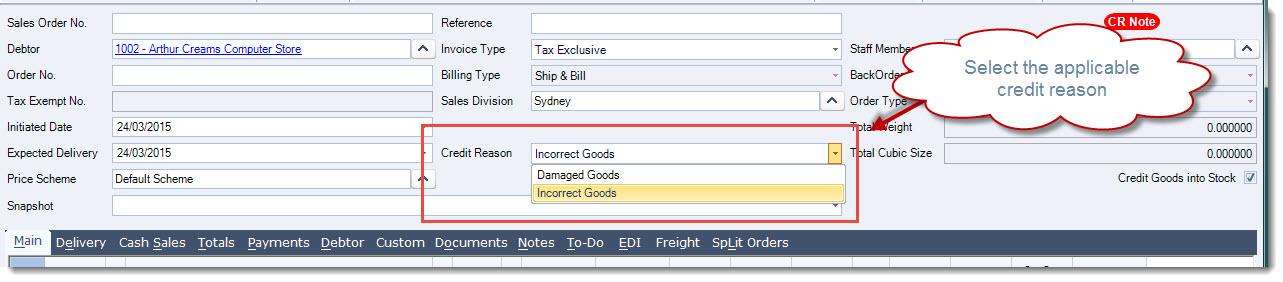
Assign the applicable credit reason to your credit note.
The credit reason will control if goods are returned back into stock or not.
Check your credit note details.
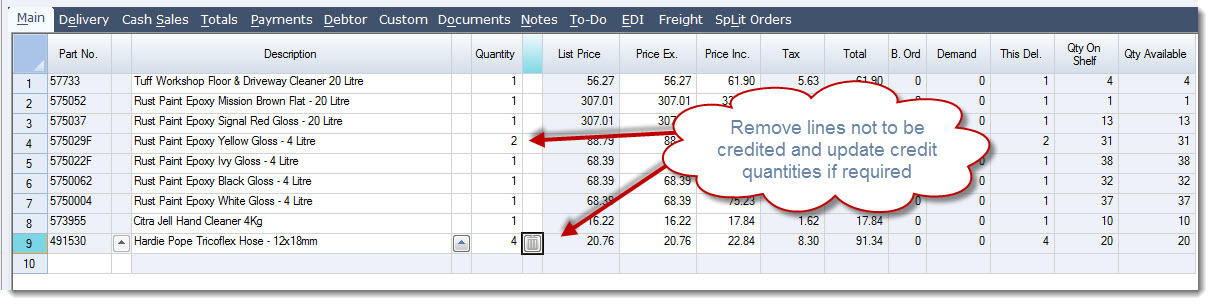
Remove lines not to be credited and update quantities as required.
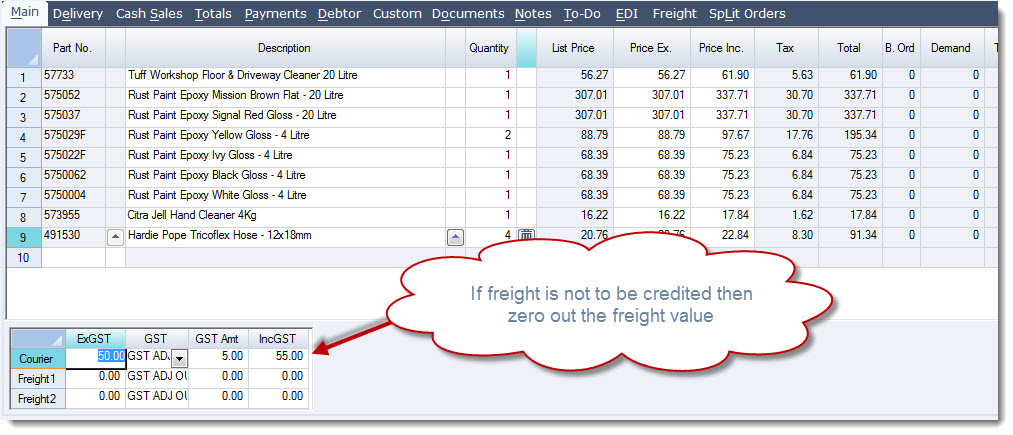
If freight was added to the original invoice it will also be included in the credit note.
Change the freight to zero if you are not going to give a credit for the freight charged on the original invoice.
Add a note in the Notes tab about the reason for the credit note.

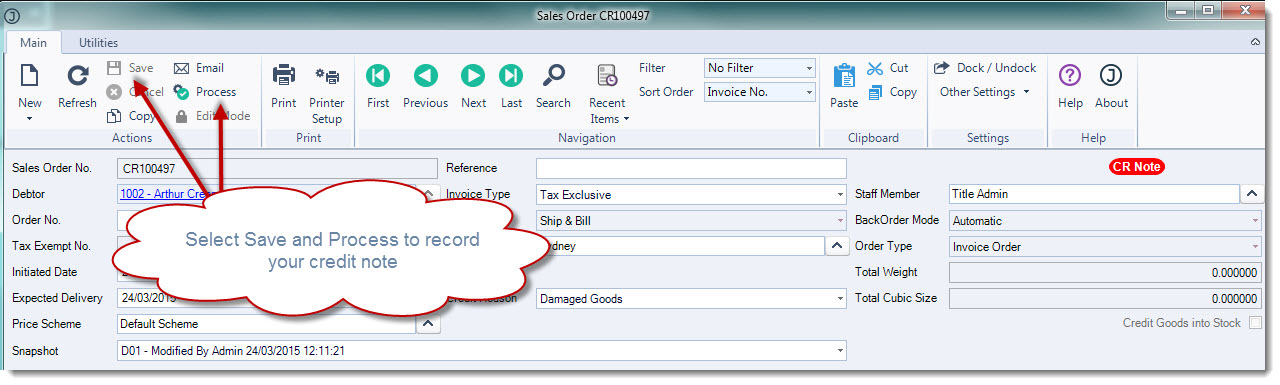
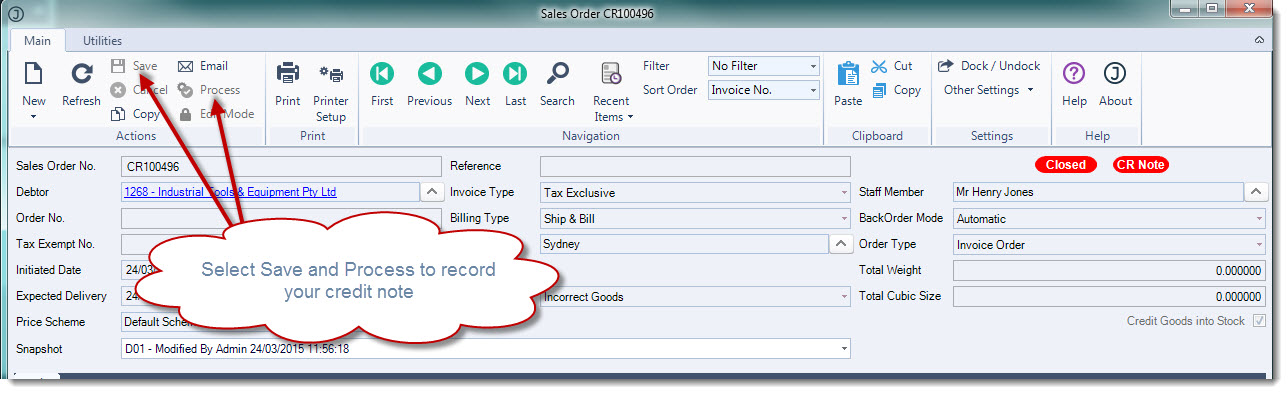
Once you have checked and confirmed the details of the credit note from the menu ribbon select Save and then Process.
Manual Credit Note
Open your Sales Order Entry form From the menu ribbon select New | New Credit Note

At the New Credit Note pop-up select No

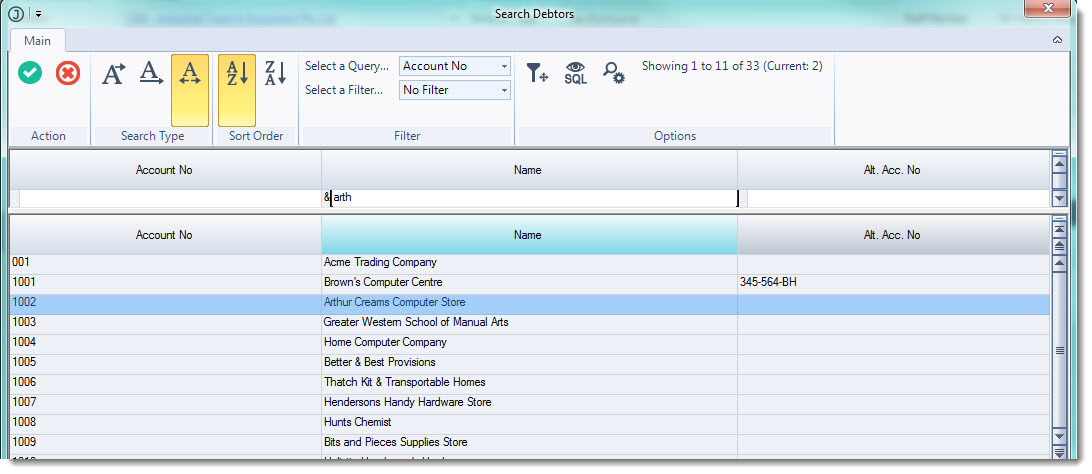
Select the applicable Debtor from the Search Debtors pop-up
Assign the applicable credit reason to your credit note.
The credit reason will control if goods are returned back into stock or not.
Manually add the parts to be credited in the Main tab
Enter in quantity returned and confirm unit price.

Add a note in the Notes tab about the reason for the credit note.

Once you have checked and confirmed the details of the credit note from the menu ribbon select Save and then Process.